
 |
 |
|
|

|
|

|

|
||||||||
|
|
Thread Tools | Display Modes |
 09-16-2011, 02:25 PM
|
#1 |
 Drives: MR2 Spyd/Type R/Yaris/Civic Si Join Date: Feb 2007
Location: Ottawa
Posts: 479
|
2010 White 3dr / A Pillars / kicks / sound deadening / new false floor / etc...
***DUPLICATE FROM ANOTHER FORUM - but I think only 3 other members here are on that forum*****
This is my first install in over 10 years. I'll warn you that if the results are amateur(ish) its because I did the whole thing on the ground outside my garage, or on some days I worked from my front porch. What I'm trying to say, is the whole thing was done in my spare time, (whenever I could steal away 30mins or an hour to myself) If I'd had proper tools and a week off from work, I could have done the whole thing in short time, but as it was I had to spread it over 4 months of odd weeknights and at times maybe a couple hrs on a weekend. The goals were: -create a good sounding system with emphasis on sound quality (I've never had a car louder than 140db and frankly I don't really care for much over 110 these days) -highlight some equipment that I'm fond of (Xtant specifically) -mix of old school design (carpeted false floors etc.) with more contemporary install methods / while also having a tiny bit of flash but not so much that people being in the car for the first time would know that there was a system installed. (I didn't want anything that slapped you in the face) -complement the overall theme of the vehicle (I enter a lot of Import shows on the east coast - having a decent system isn't mandatory in the ImportScene but it certainly helps) -I also wanted to keep it as functional as possible (full access to spare tire / full use of hatch area / zero compromise of passenger comfort upfront) (the new false floor is only 0.75" taller than OEM) Brief Info on the car I bought it new off the lot this April, and within a week I had installed the coilovers and wheels. Since then I've done the rear wing, JDM badging, lightweight pulleys (crank/alternator/waterpump), as well as a cold air intake and some minor cosmetic stuff. This winter I'm going to install a full exhaust including high flow catalytic converter / bracing / anti-roll bars and tons more MicroImage stuff and if I get more adventuresome I'll do a lightweight flywheel and bolt on supercharger. The first step was figuring out the front stage / placement / size / drivers used etc .. After lots of reading at Parts Express, I decided to try their Dayton ND105 4" Midbass and the Vifa Vifa BC25SC06-04 silk dome tweeter. The Mids claim to have 4mm of Xmax / a 53hz resonant frequency and they cost me about $26 each (at the time I bought them) . The Vifa tweeter had some really really good reviews, I read a lot of good stuff about it on various message boards and frankly it only cost $11 each, so how could I go wrong? Then for Sub duties I decided to try two of the TangBand 6.5 Neo subs, and I built a box for one ported that I put in the hatch and one sealed that I had under the dash (behind the glovebox) This first iteration sounded fantastic and I had it tuned really well, I loved what the TB 6.5's could do. BUT!!!!,,,,,,,,,,,,,,,,,, I saw one of the SWR 843's at a carshow in May and I was intriqued, then I came back here to DIYMA and started reading about them so I decided to build a new install in the hatch around a ported SWR 843. After I put everything back in, I never got to re-tune it, somehow I frigged with the crossover settings in the amp and the passive crossovers and I haven't managed to get it right since then - so thats a project for the winter (after I change the kickpanels) Here is the equipment list Clarion NX501 DVD / Nav headunit Xtant 3150 3channel amp Alpine SWR 843 sub (ported) Dayton Audio ND105 4" midbass Vifa BC 25 tweets Alpine Type X passive crossovers First I found a paper-mache jewellery box at Michaels that would perfectly fit the Vifa tweeter. I recessed it into the factory A-pillar and glassed it in (don't need to explain the whole process of wrapping / filling in from behind - smoothing out the front etc ). Then instead of painting the pillar black and using 1 layer of grill cloth, I decided instead to use two layers of grill cloth. The first layer to serve as a black base and also to give more texture and a slightly softer feel. Next I cut the end off an ABS plumbing cap that was almost the exact size of the Midbass / I cut holes in the factory kicks (personally I always integrate the factory kick into my design) / I hotglued the ABS baffle to the factory kick / wrapped / filled etc. For the kickpanels I decided to wrap them in NEFFY carbon fibre vinyl, and also matched the door sill covers in the same stuff and also use the NEFFY as highlights in the hatch area (more on that later) Next came the hatch area (the last part I did) basically I removed the factory floor and storage compartments and re-created them in 1/2 inch mdf (with lots of metal bracing) . The right side features a .53 cu-ft box housing the SWR 843D. The chimney style port for the box is 100% outside the box, and it basically passes underneath the passive crossovers. The centre of the false floor features a door which provides access to the spare tire beneath. In the door is a recessed compartment with the passive crossovers. To the left of the door is another recessed area with power distribution / ground distribution a volt meter and a current meter. The Amp and the active EQ (not running until I can get TRUE RTA set-up) are housed in the back of the rear seat. Each one is in its own rack that was recessed into the seat. For this I cut the backs of the seats out, the amp rack is recessed about 2 inches into the seat and the EQ rack is recessed about 1.25 inches into its side of the rear seat. The whole floor of the car (unibody) was covered in deadening material (from the firewall to the back of the hatch) and in some areas I'm trying out a thin convoluted foam mattress pad, underneath the OEM carpet. I ran KnuKoncepts 4 AWG through a grommet I put in the firewall. Basically every inch of wire was techflex'd and all the wires were tied to each other where appropriate and taped to the floor under the carpeted areas. On to the pics The day I picked up the car  Coilovers installed shortly after 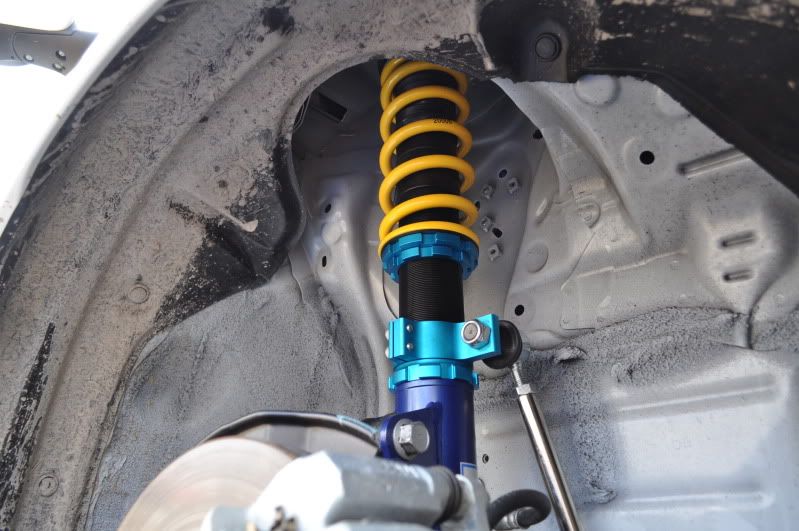 Wheels installed after that  Install pics: Factory A Pillars 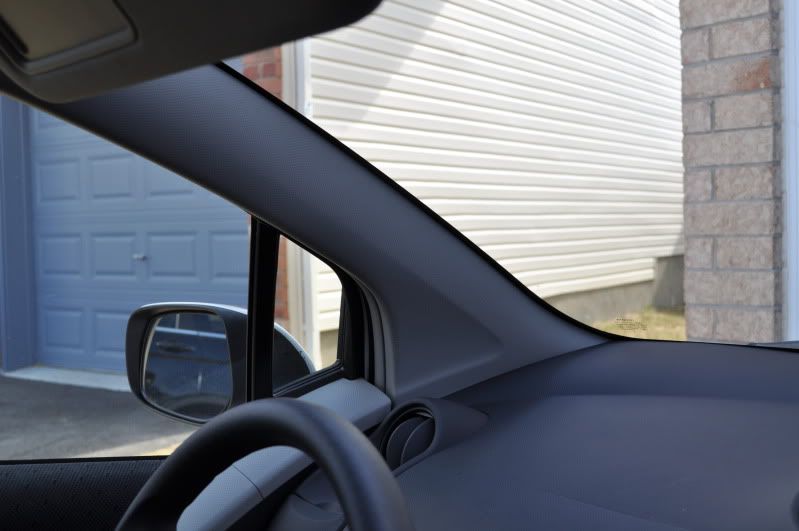 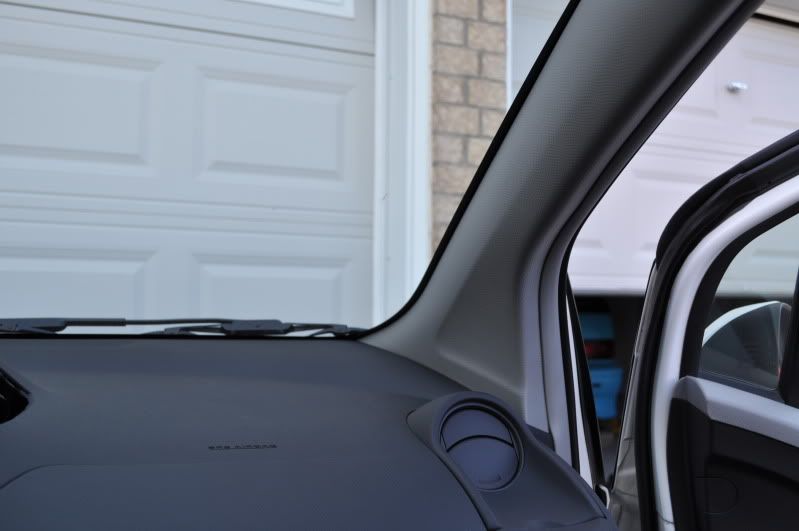 The Factory A Pillars are held in with a safety clip to prevent them from hitting you in the face when the side airbags deploy 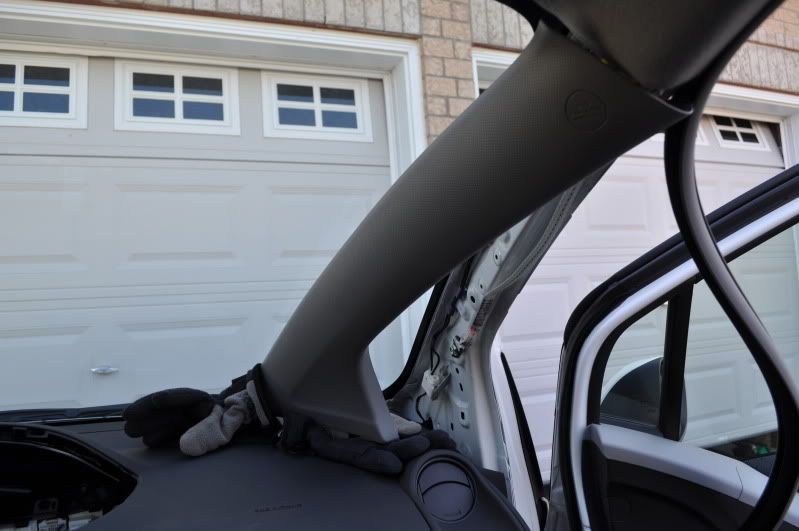 Here is the clip  A pillar removed 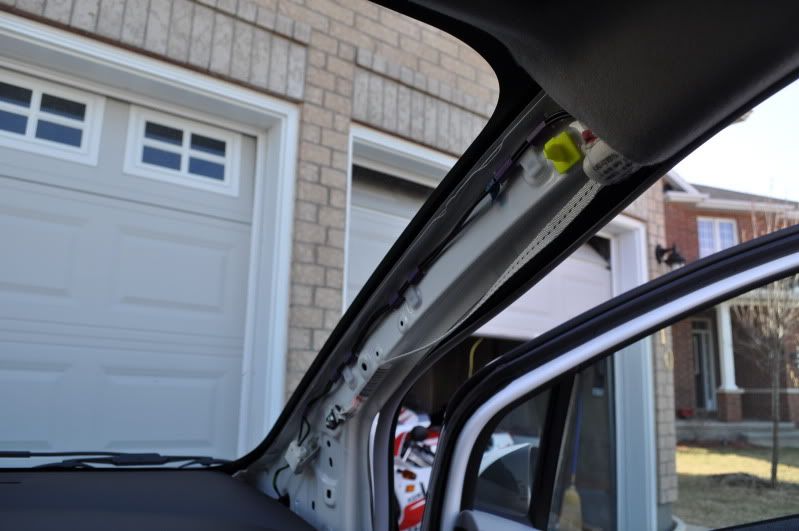 Behind each kickpanel was a big distribution block that got moved Here is the drivers side 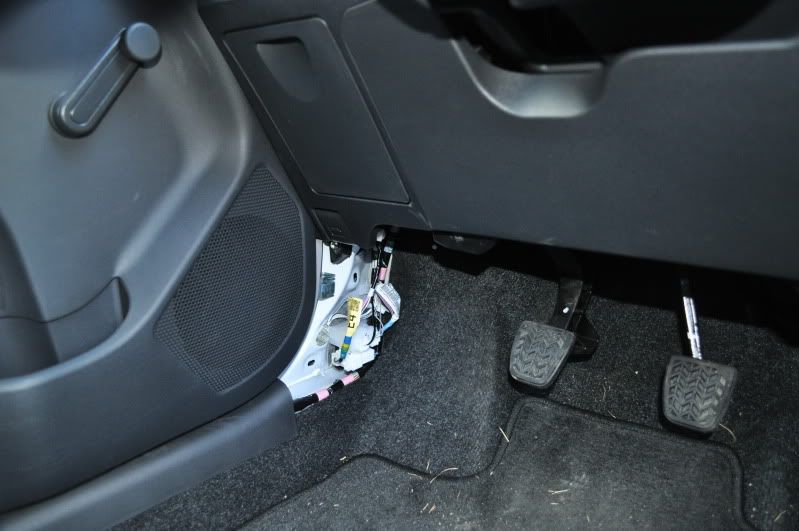 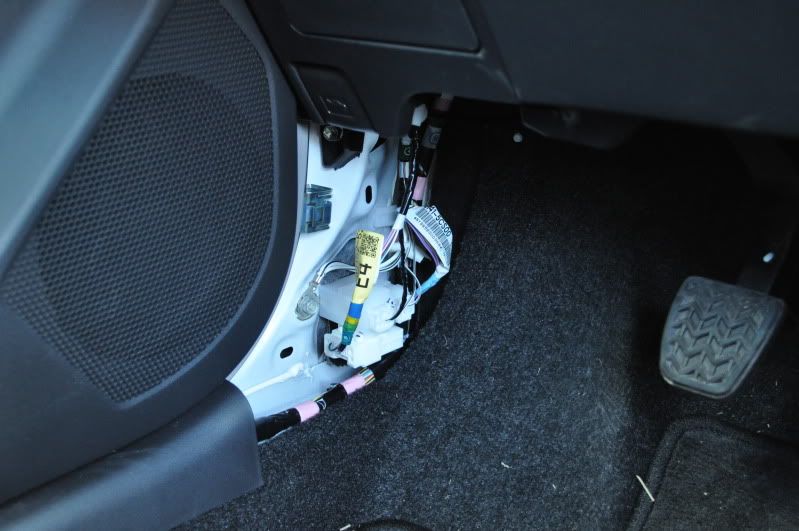 Here is the passengers side 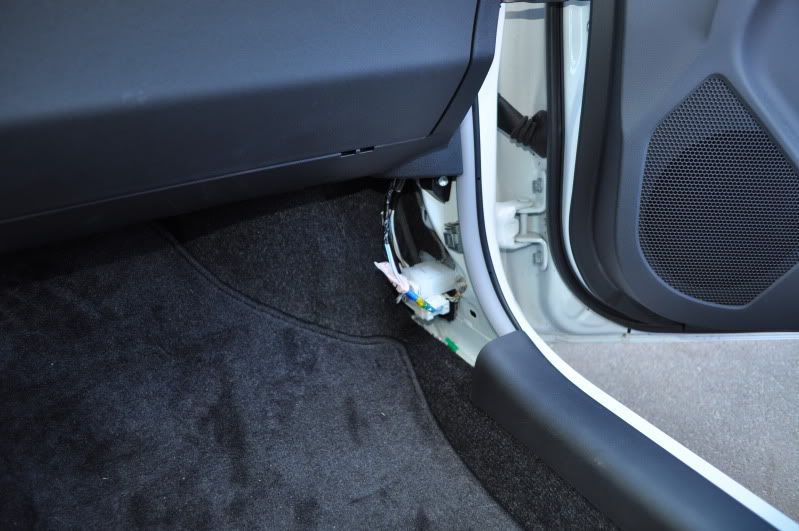 Here is the passengers side with the hole for the baffle and the wiring block out of the way 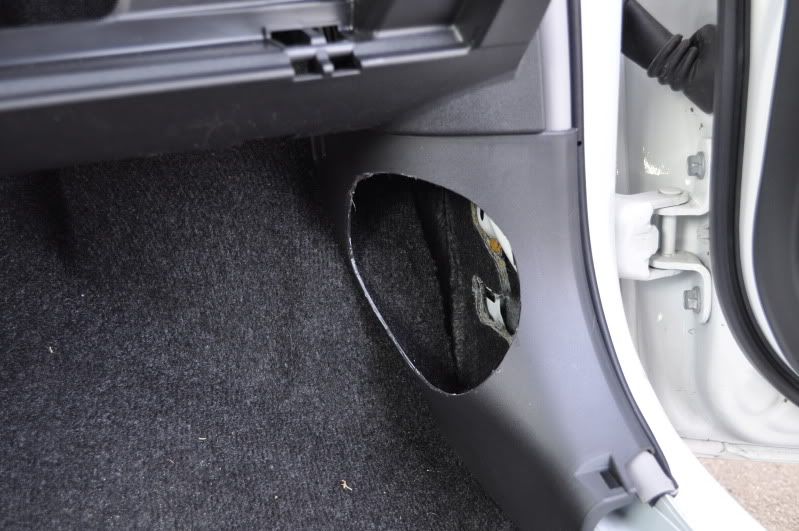 PaperMache jewellery boxes perfect for tweets 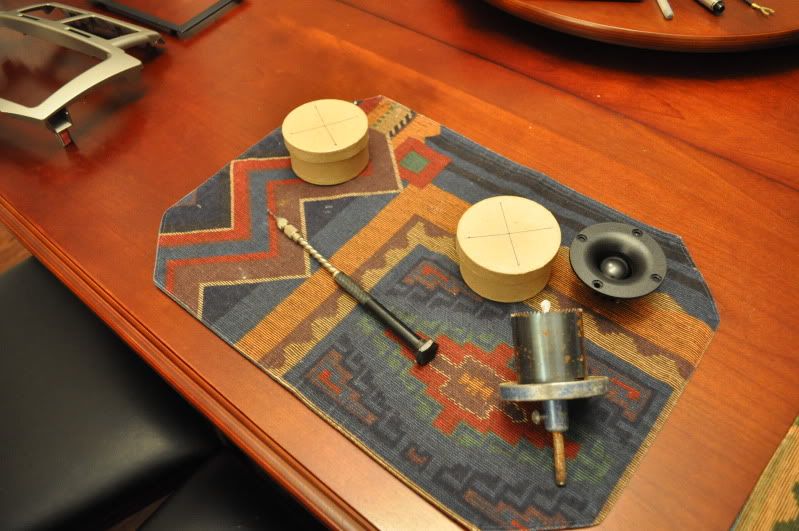 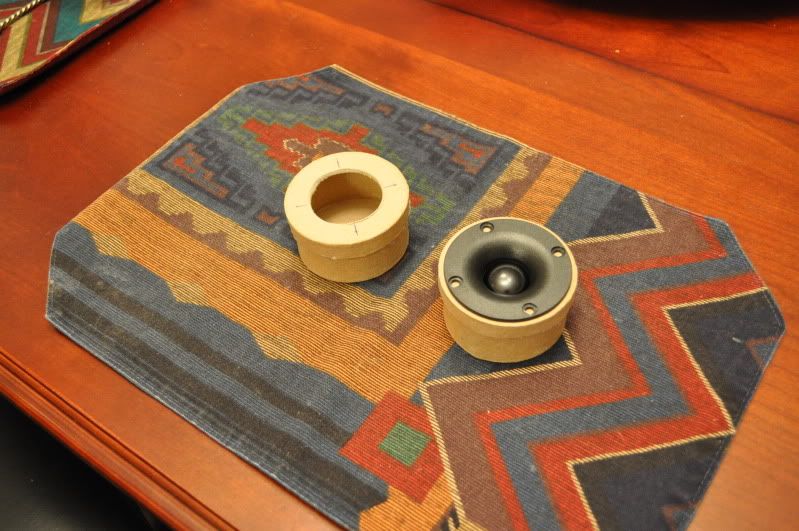 Midbass Baffles out of ABS endcaps 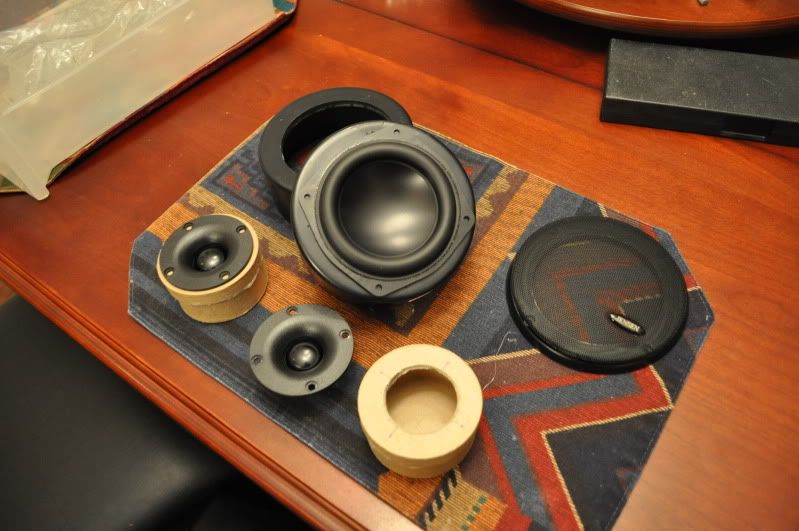 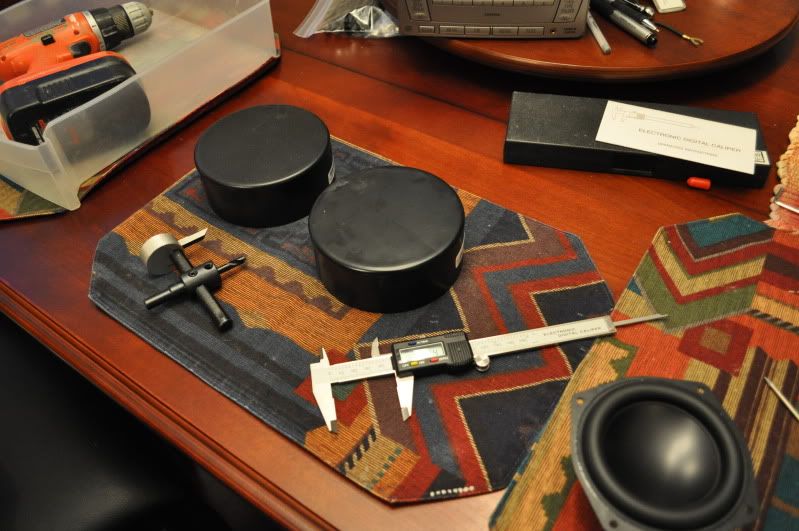 A-Pillars prepped for tweeter pod 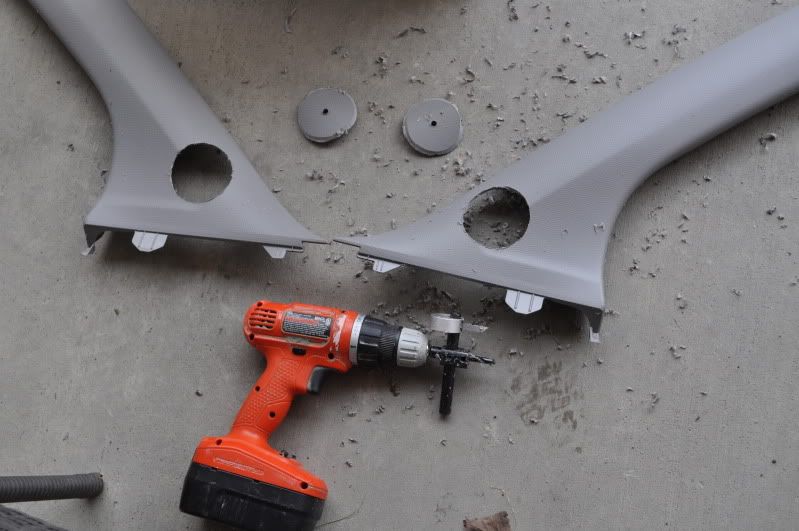 Tweeter Pod inserted into A-Pillar 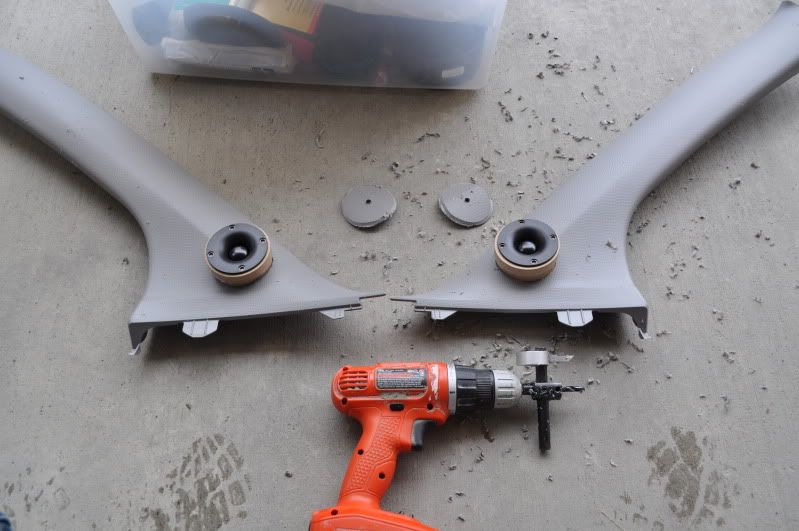 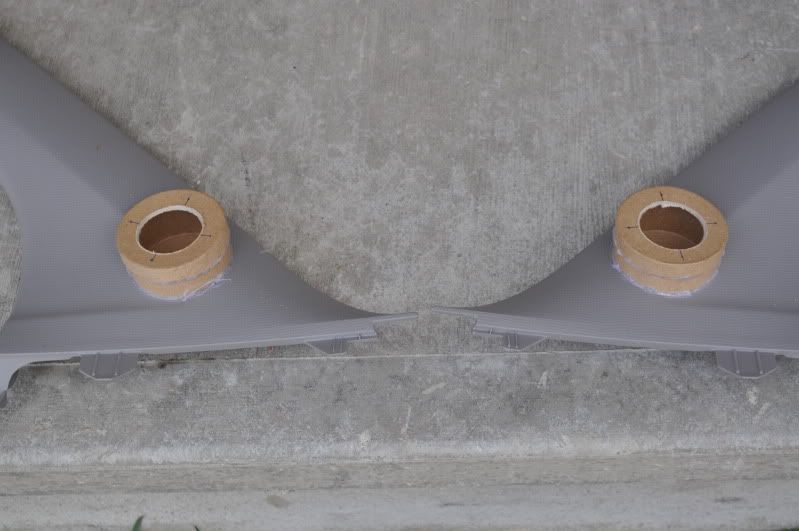 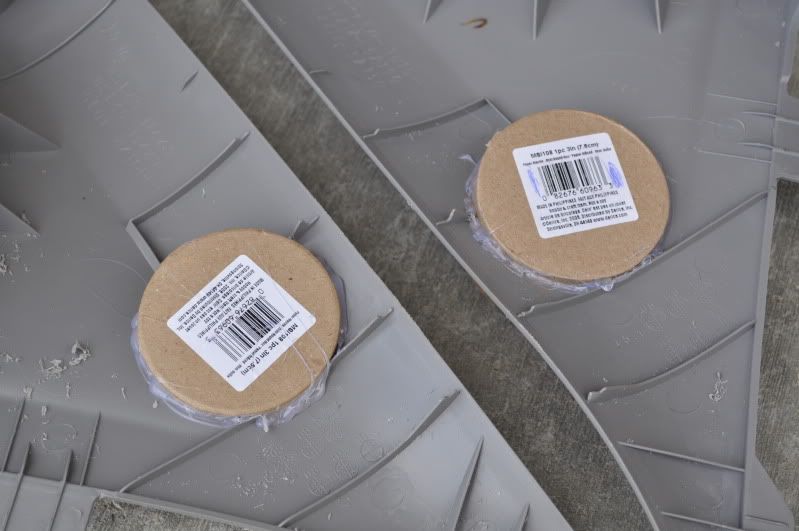 Tested in the Car 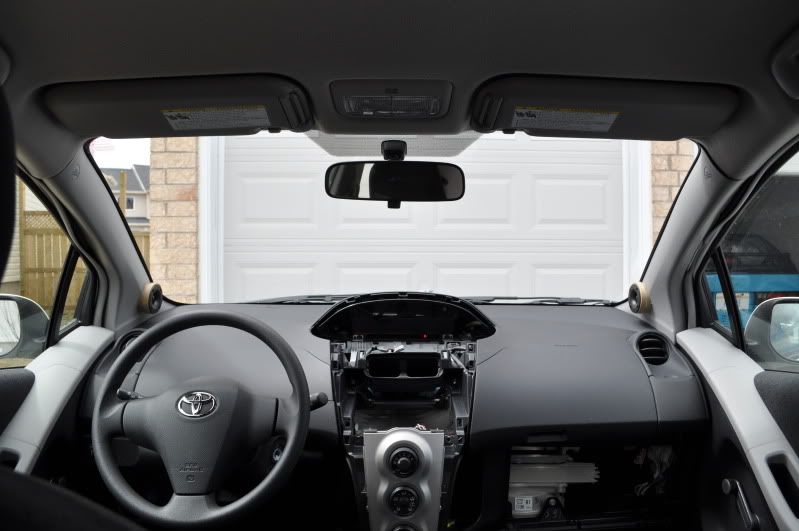 A Pillar wrapped 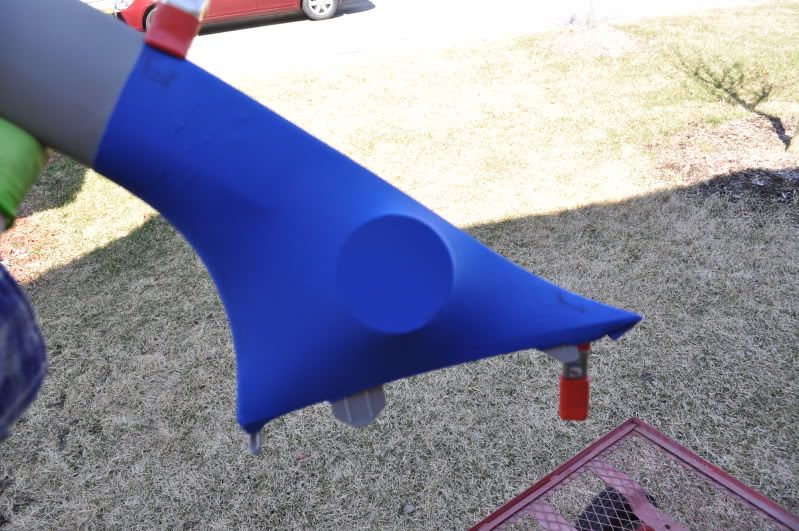 Glassed and test fitted in car 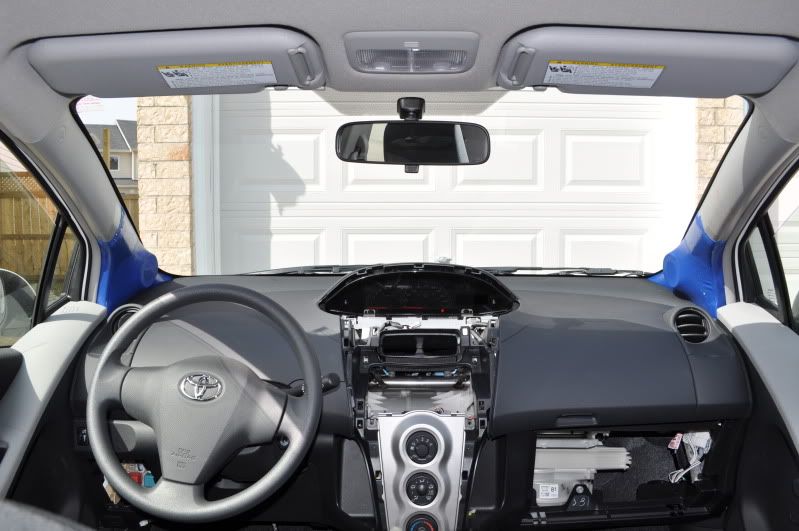 Tested in car with kickpanels as well  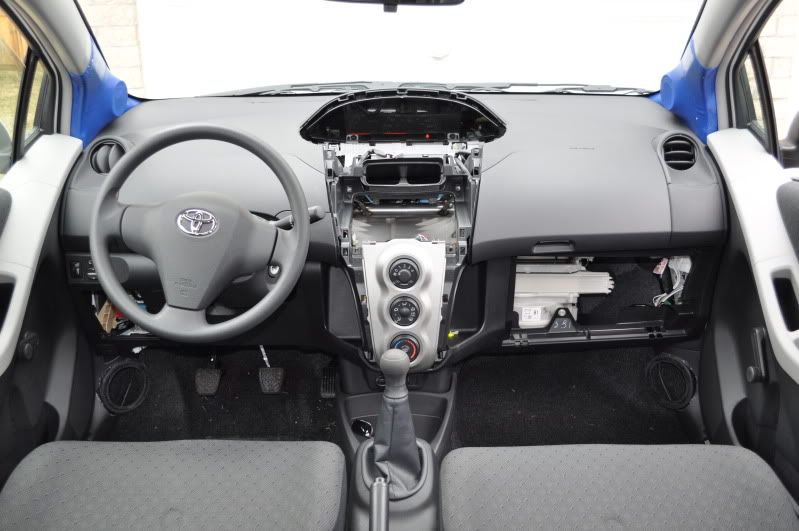 Test fitting Midbass into kickpanel 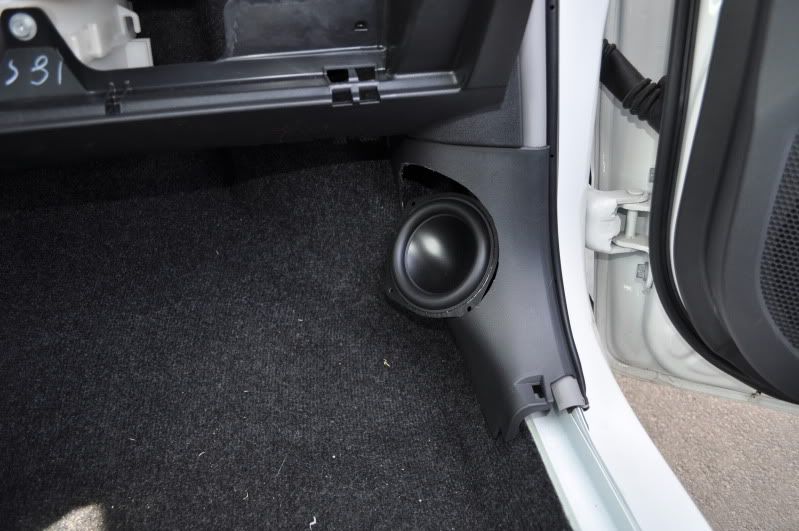 Baffle attached to kickpanel 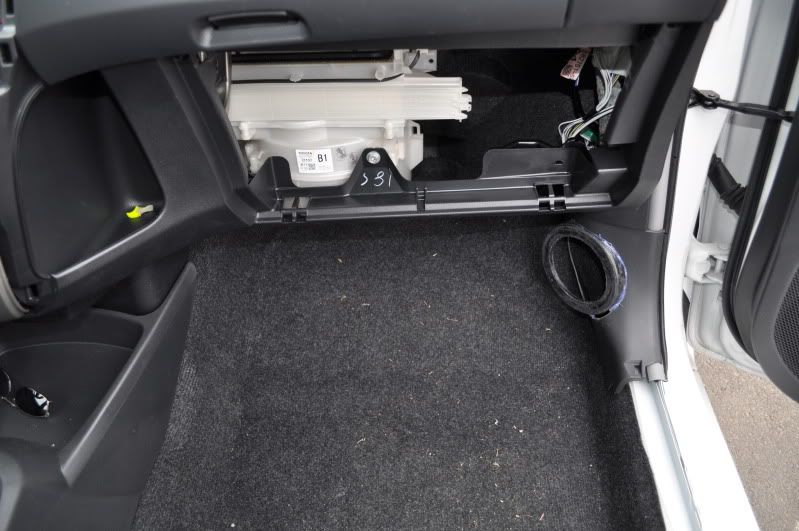 Kickpanel glassed 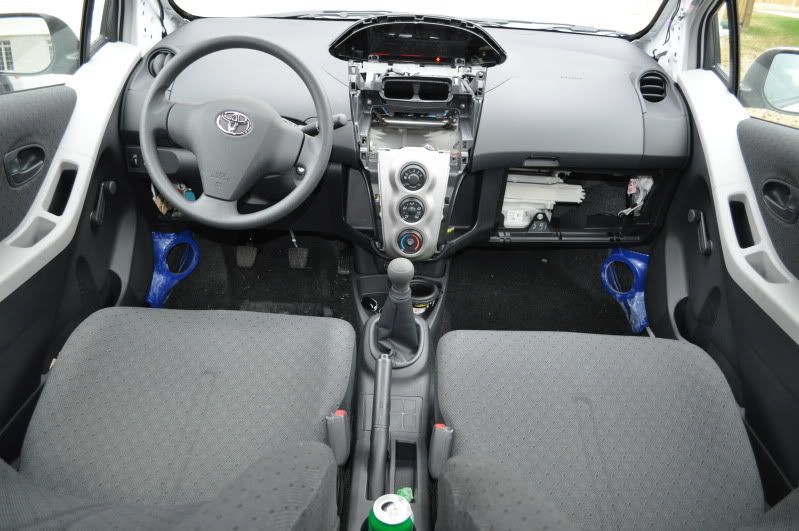 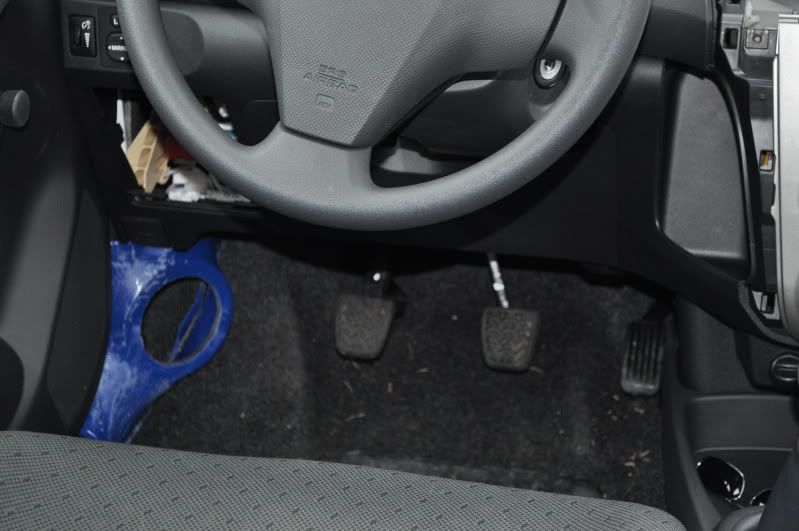 Testing for space behind the glovebox. Two cardboard boxes fit behind glovebox (stacked on top of each other) in this picture just one cardboard box is shown  Refining the Kickpanels 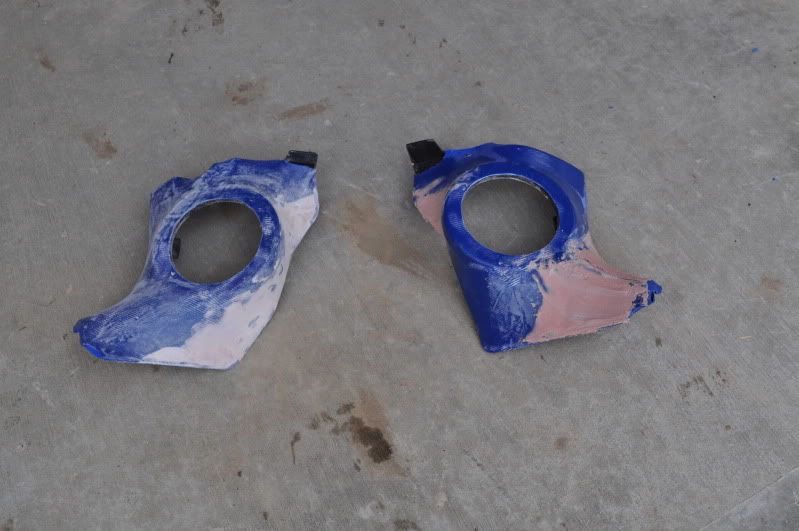 Refining the A Pillars 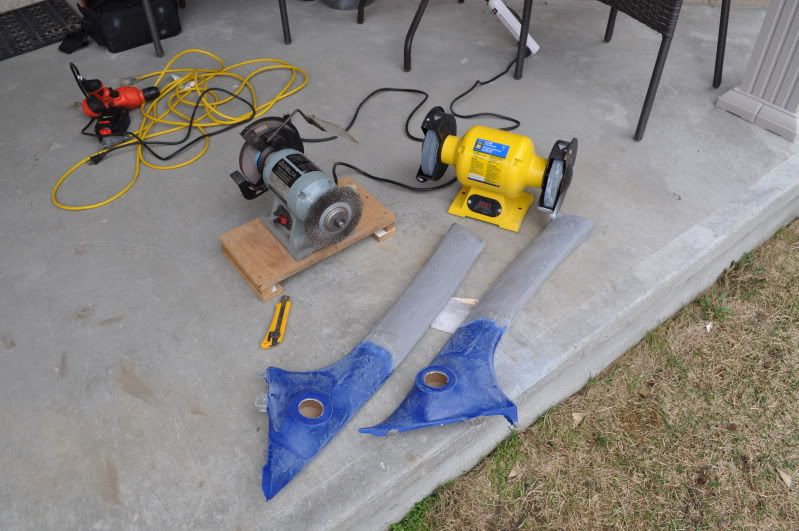 A bunch of steps weren't photographed but the end result was a-pillars wrapped in two layers of black grill cloth and kickpanels wrapped in one layer of Neffy carbon fibre vinyl (the door sills were wrapped to match the kicks) 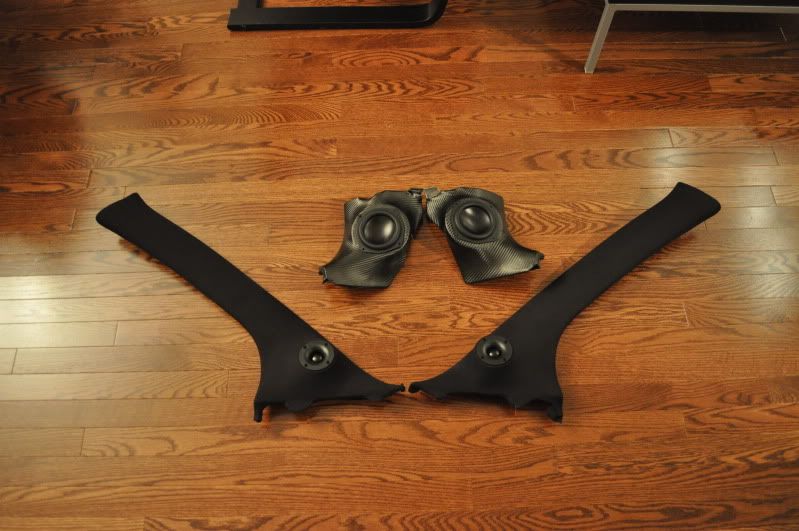 Drivers side A Pillar 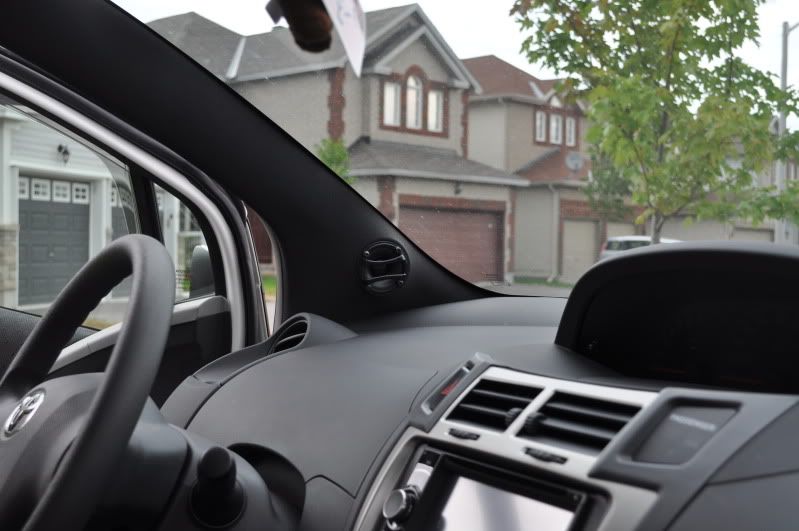 Passenger side A Pillar 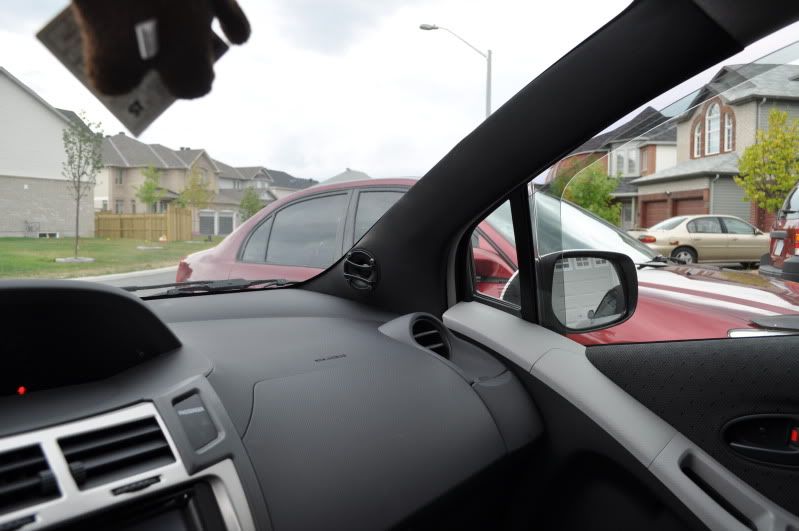 From the outside   One part that I was particularily proud of was working with a company that does Rapid ProtoTyping and 3D printing to create grills for the tweeter and midbass that match each other. I look at a bunch of designs from both home audio and car audio and sent my ideas to the company who turned around with these really cool grills. Final Design of the Tweeter Grill 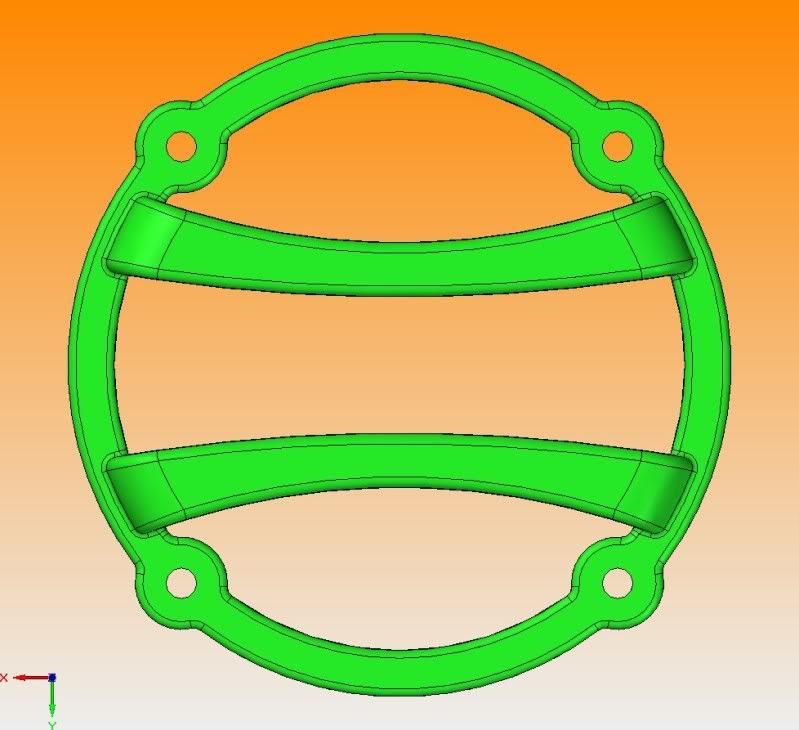 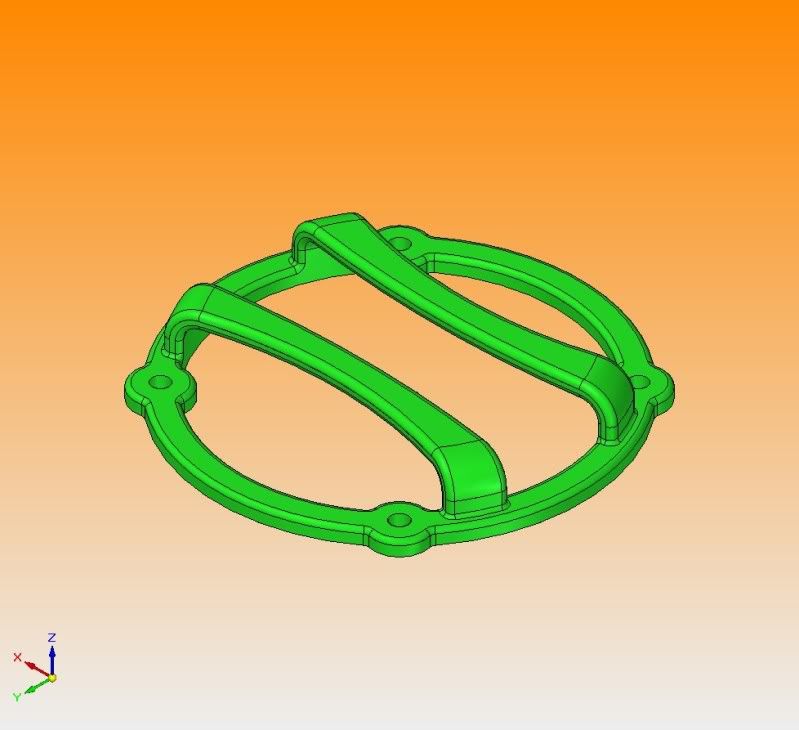 Here is the grill for the tweeter 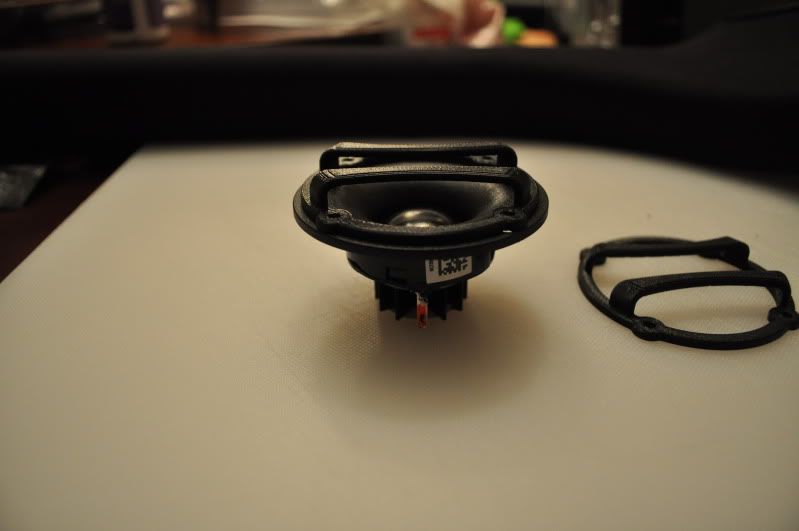 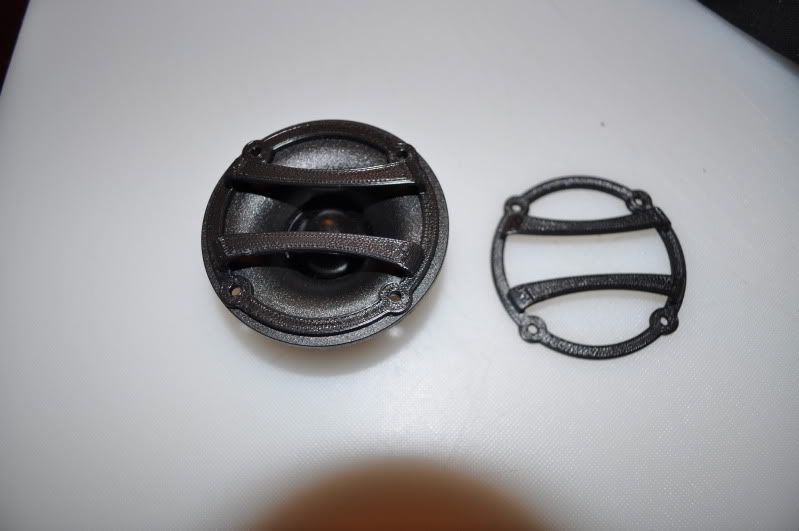 Final Design for the Midbass Grill 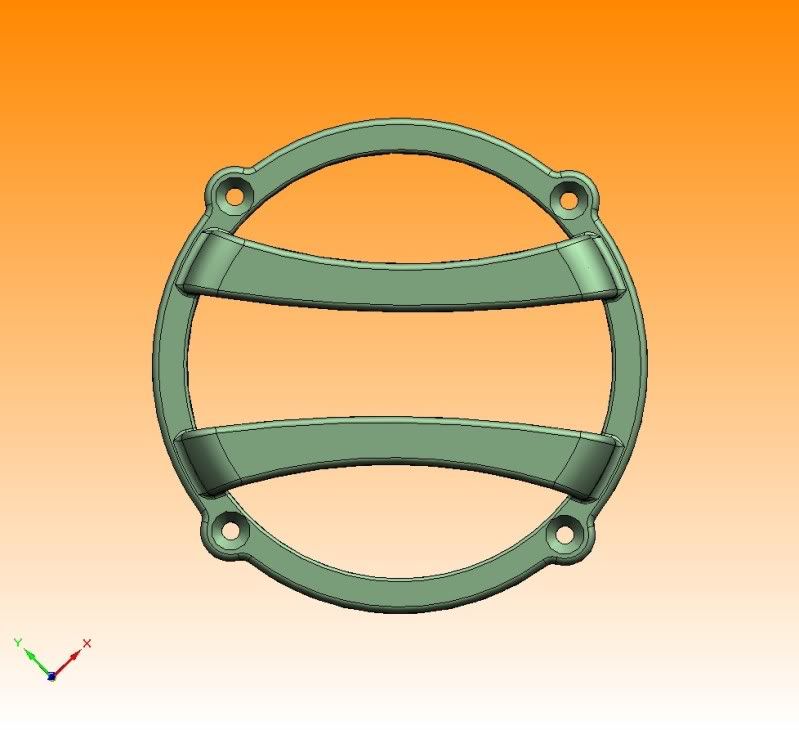 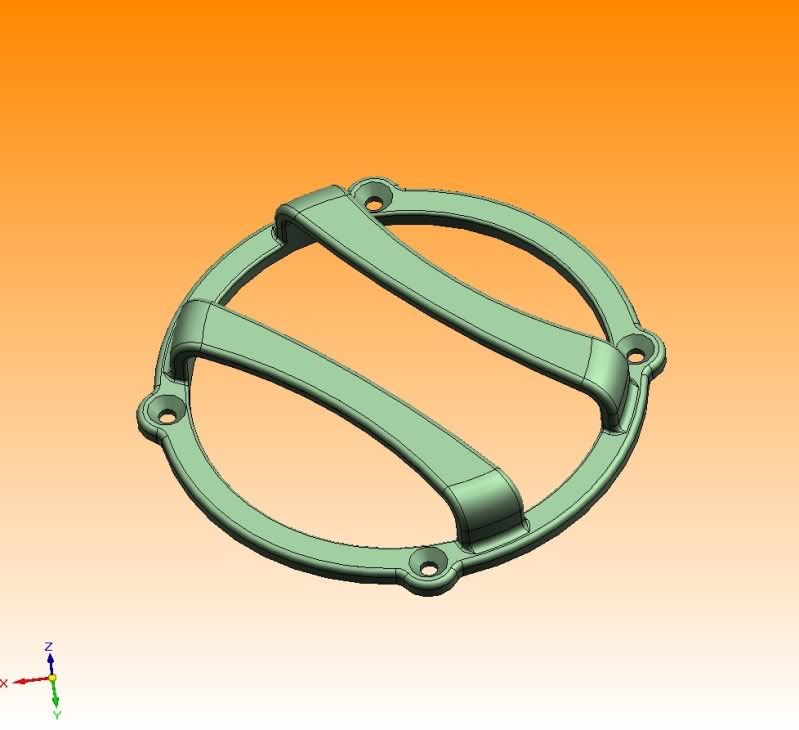 The grill for the midbass (exact copy of the tweeter grill - however sized to the midbass) 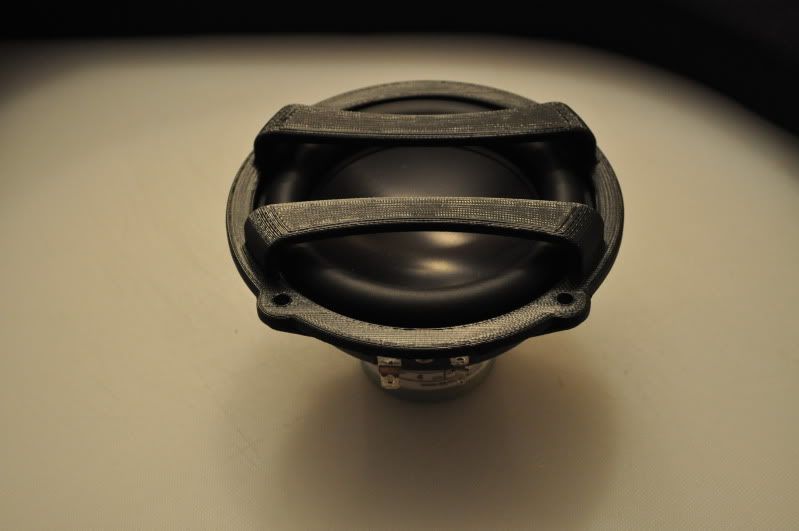 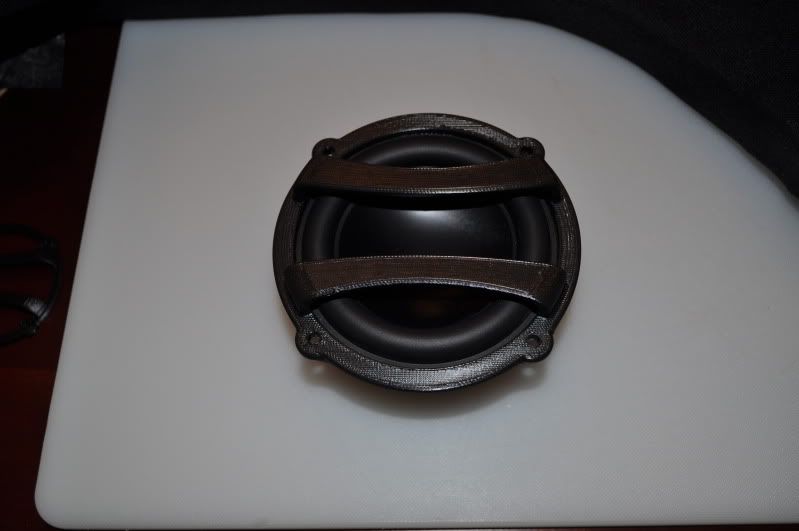 The two grills together 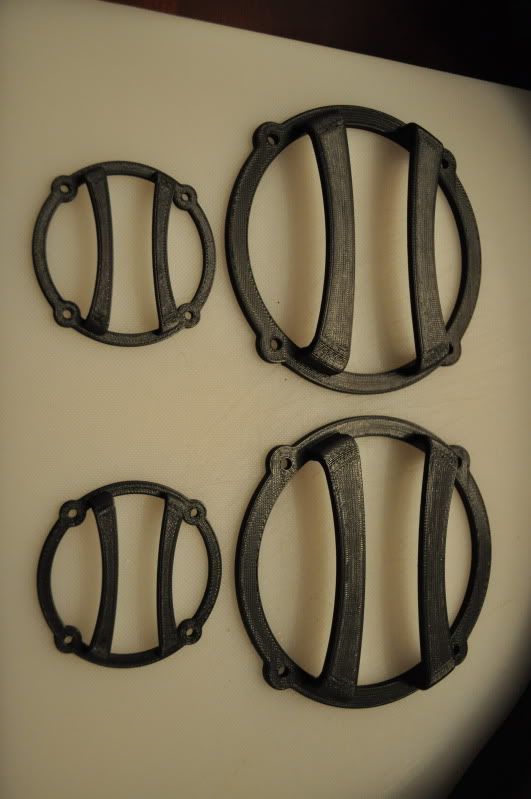 Next I sprayed them with 4 layers of fillable primer before painting 5 coats of gloss black and 5 coats of clearcoat (don't have all the pics) 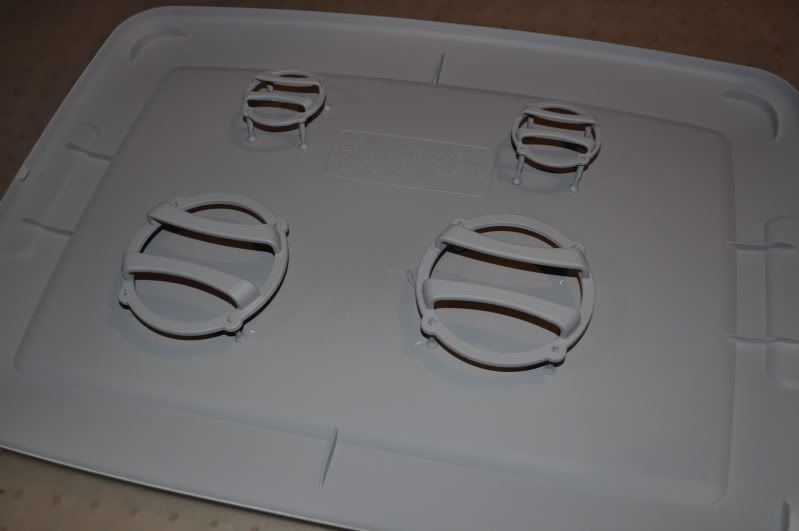 Completed Front end including Pillars / custom grills / kicks / headunit 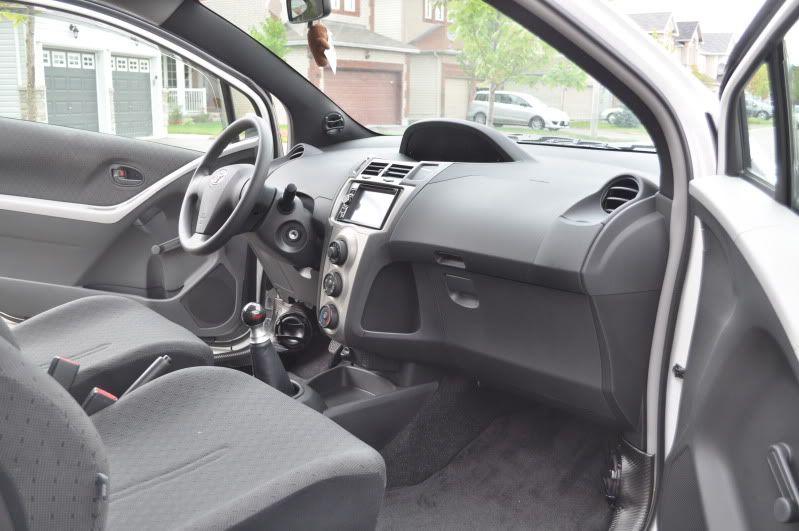 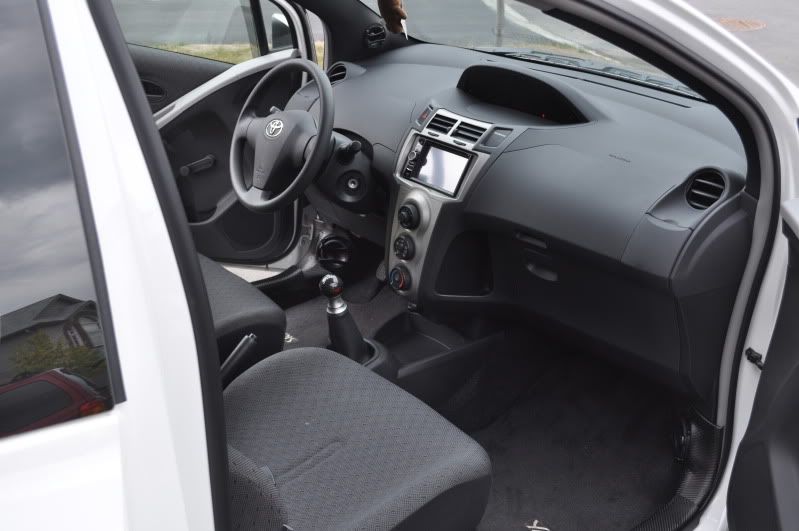 Next came the bulk of the wiring / the deadening and the rear install and recessed amp and EQ racks (in the back seats) Some of my Xtant Collection waiting to go - I used a brand new 3150 for this install, and a used P500 EQ 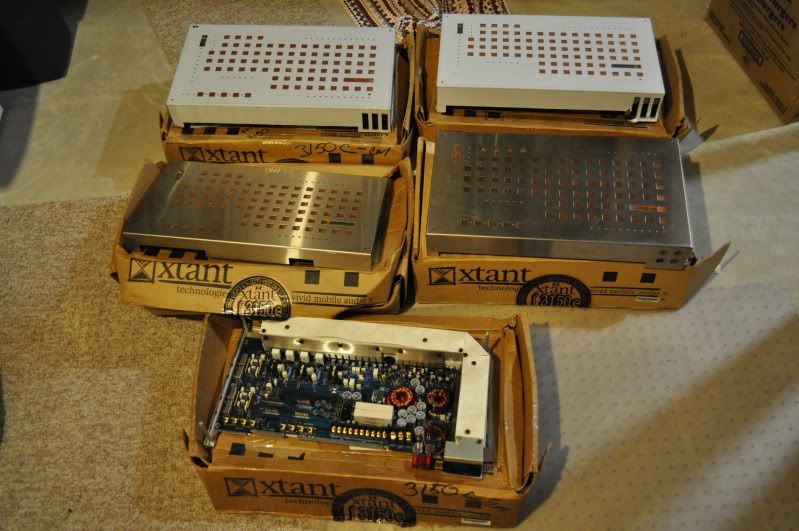 Basically everything came out of the car in stages / first the rear seats / then fronts / then carpet etc . 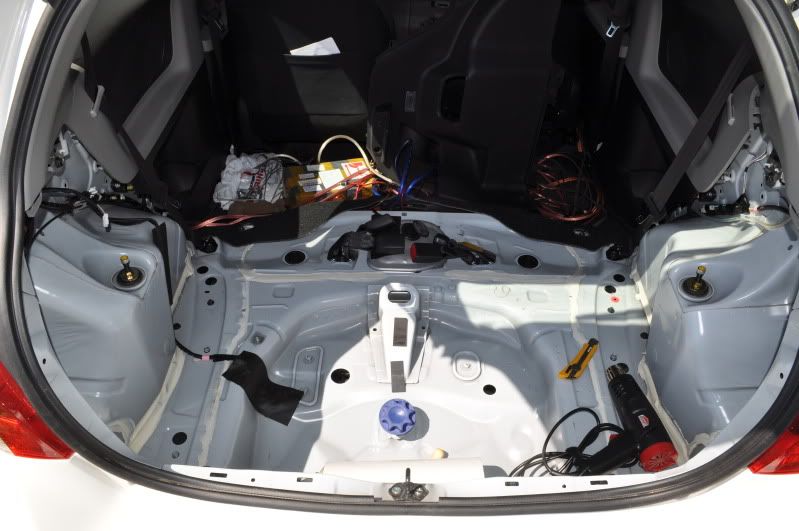 Deadening and start of wiring 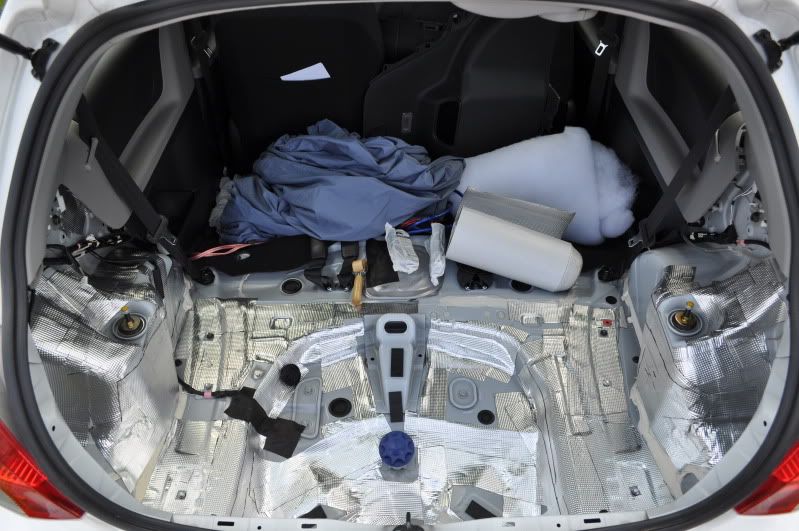 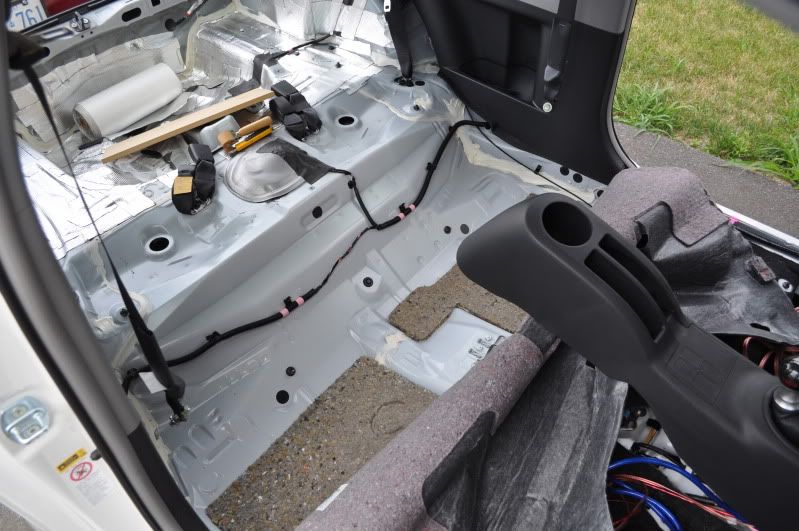 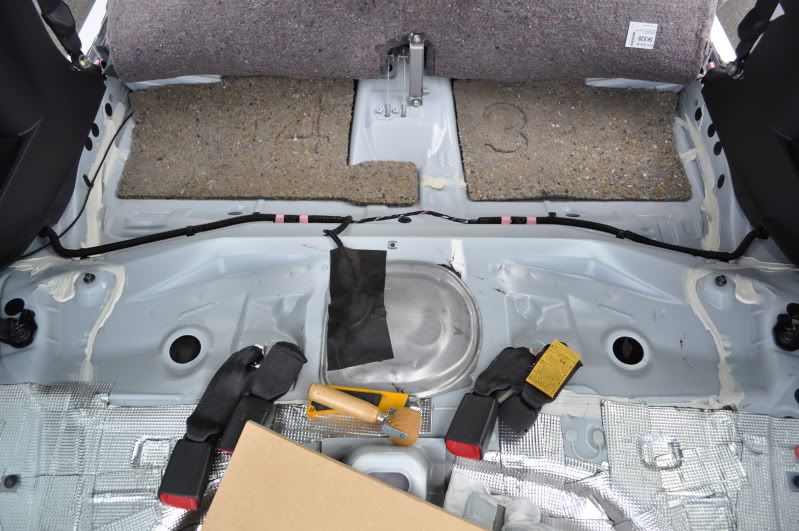 TechFlexing everything  Firewall grommet above and to the left of ECU 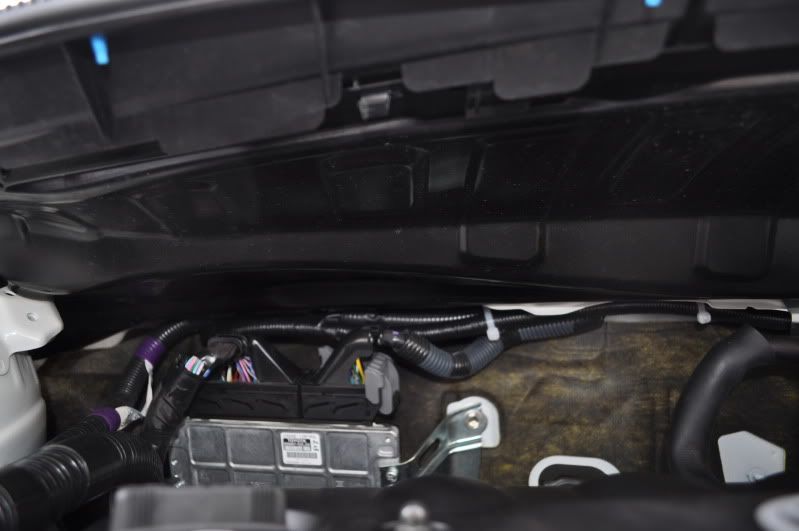 ECU dropped for easier access 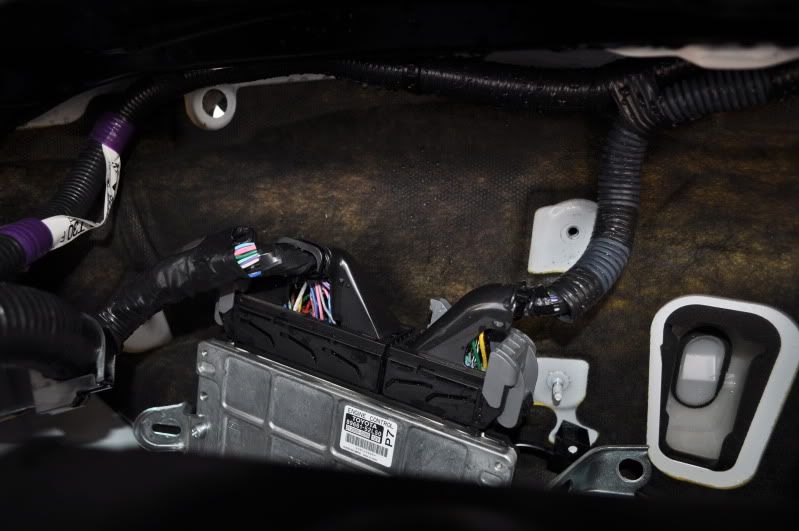 Underhood 4 AWG techflexed / then that was inserted into flex loom / then the loom was wrapped in electrical tape and wiretied to OEM underhood wires (the wire ties were swapped to black after these pics) 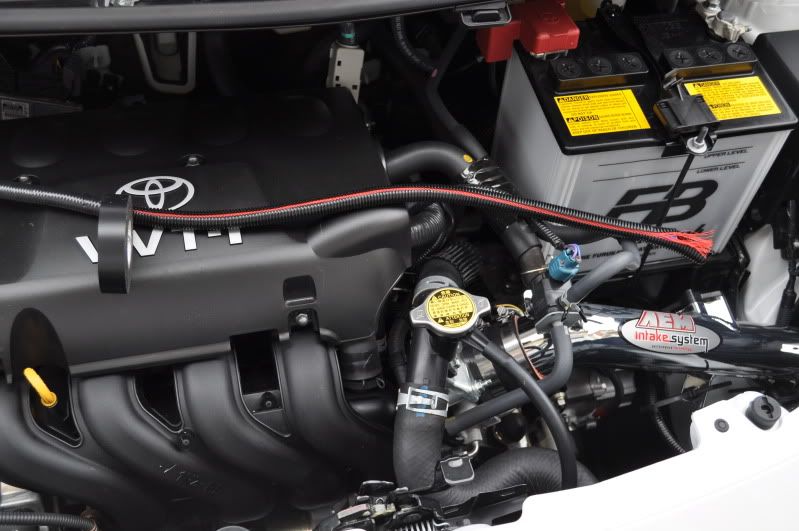 4 AWG pulled through firewall (not run yet) 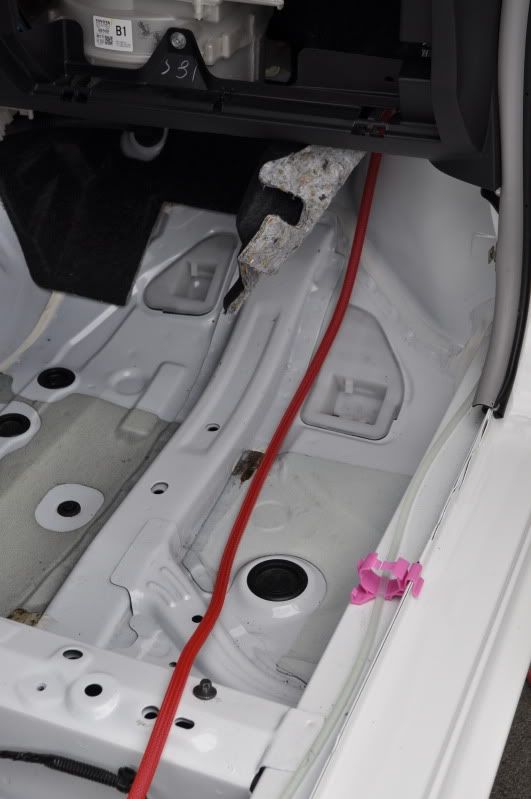 Most wiring done and most of the deadening complete 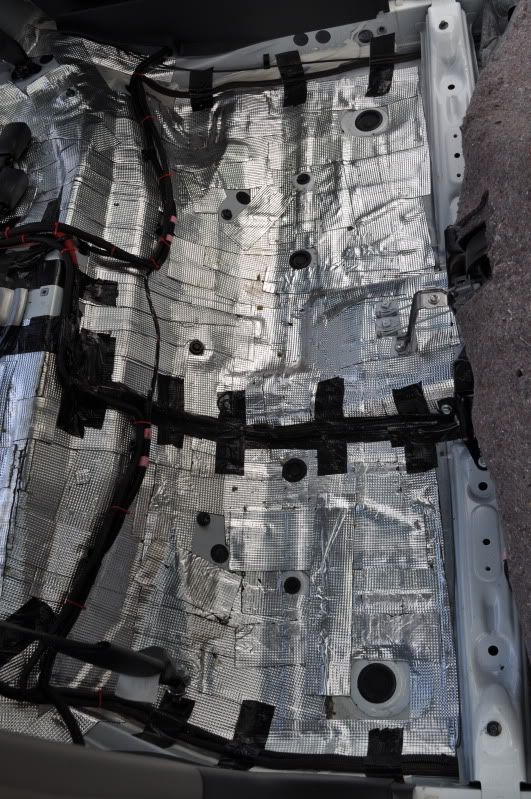 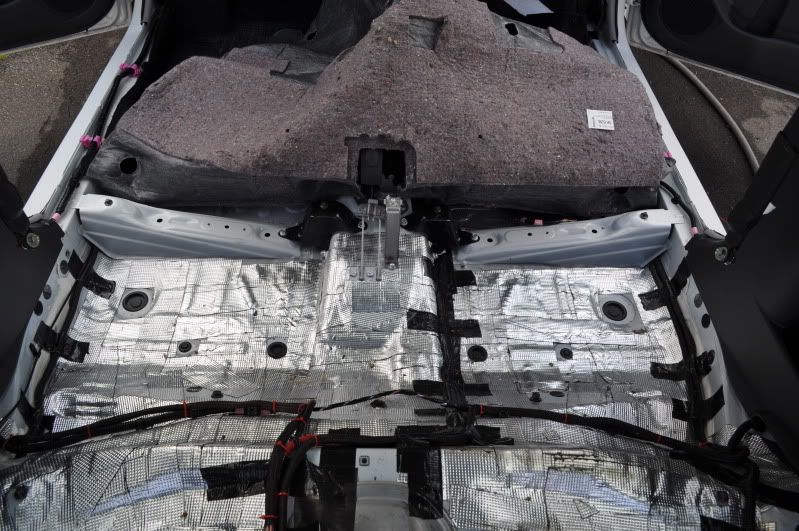 Back of the rear seat being excavated to make room for recessed amp rack and EQ rack 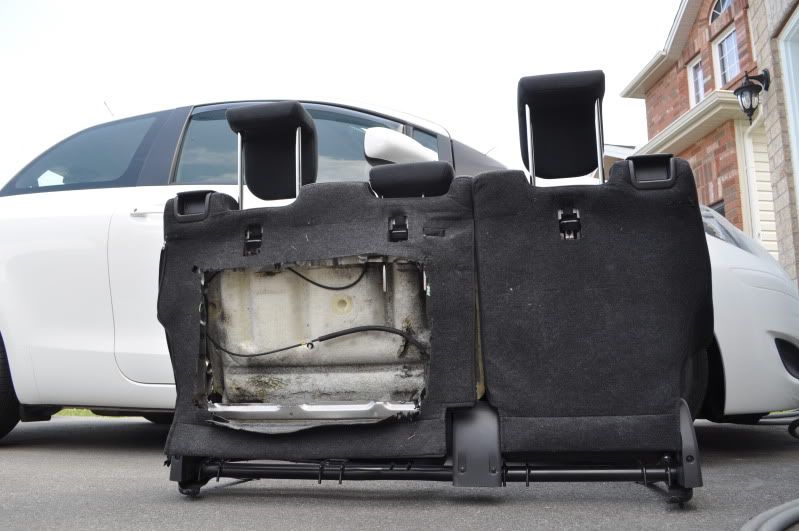 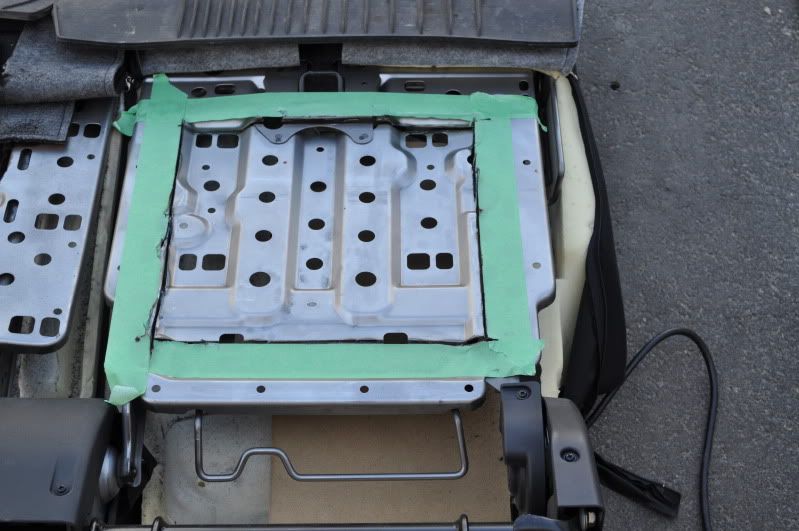 Starting the Amp Rack and the EQ rack 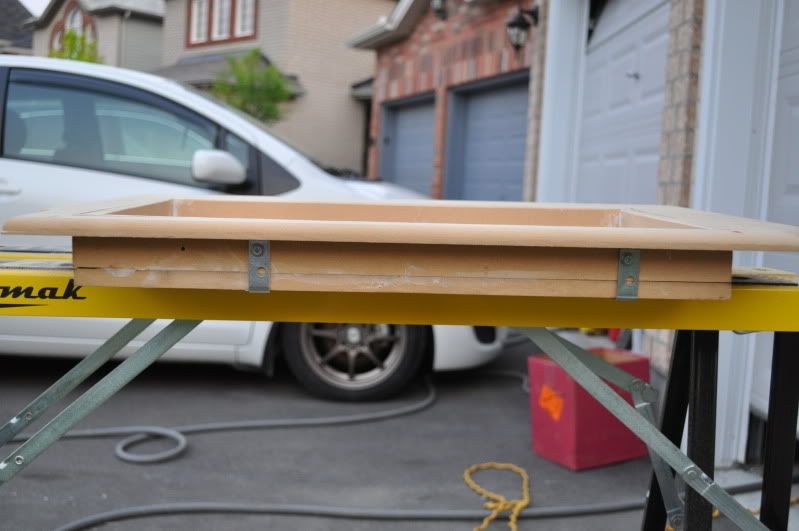 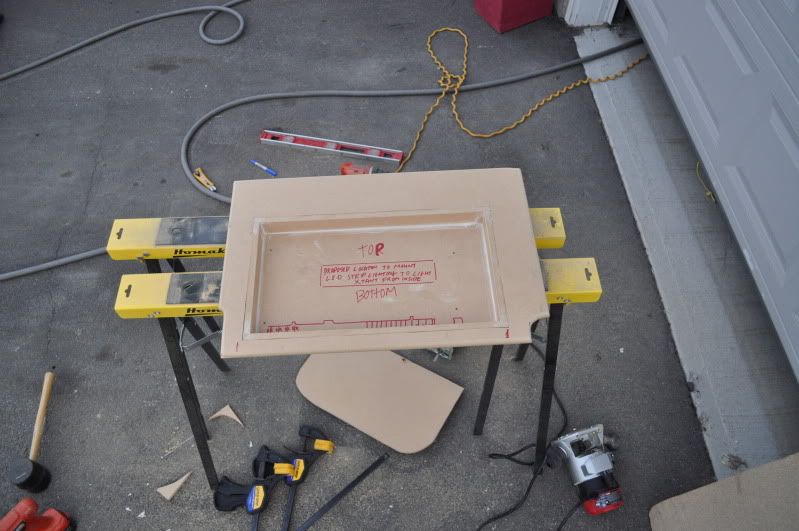 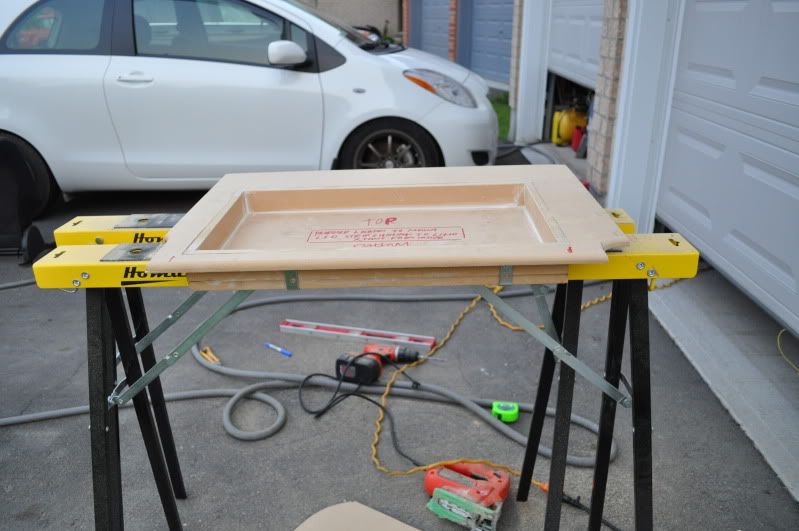 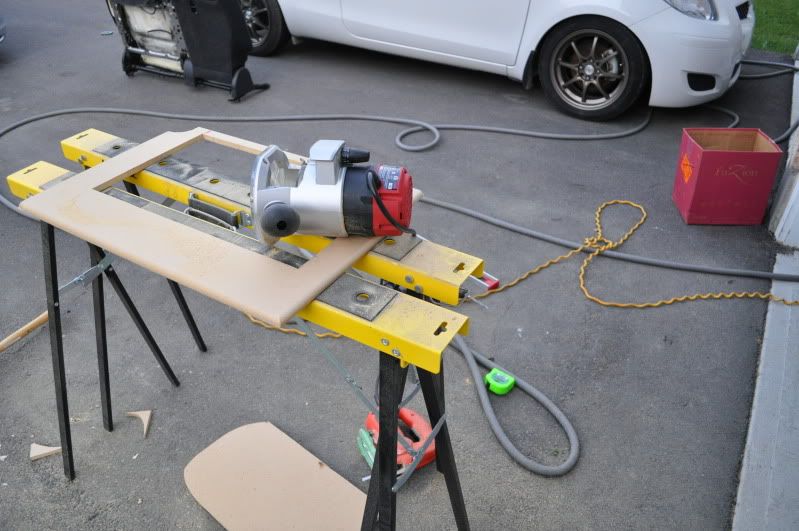 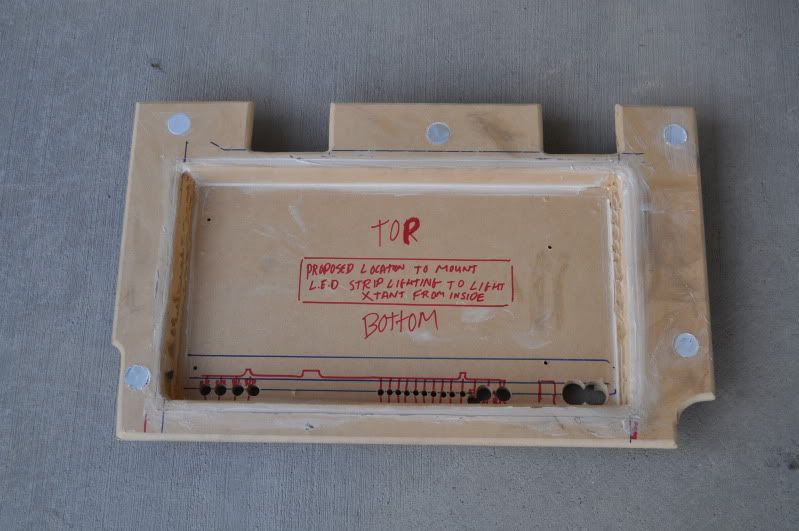 I used these bolts recessed into the Amp rack and EQ rack so that no fasteners would be visible 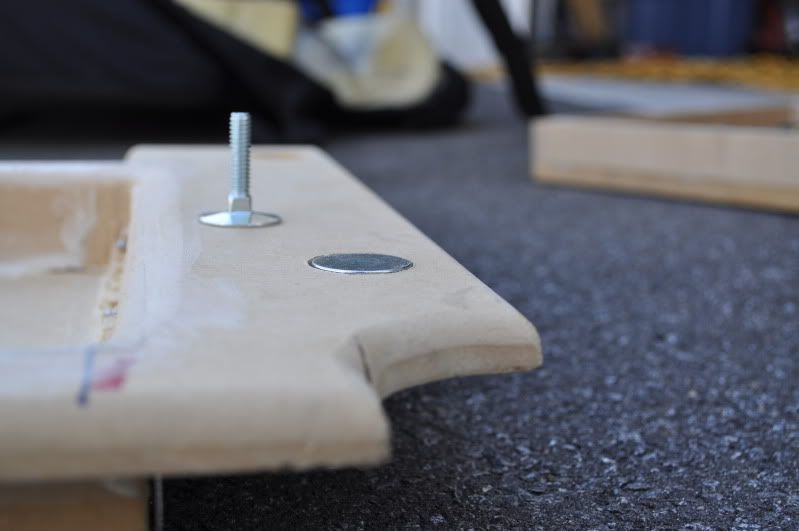 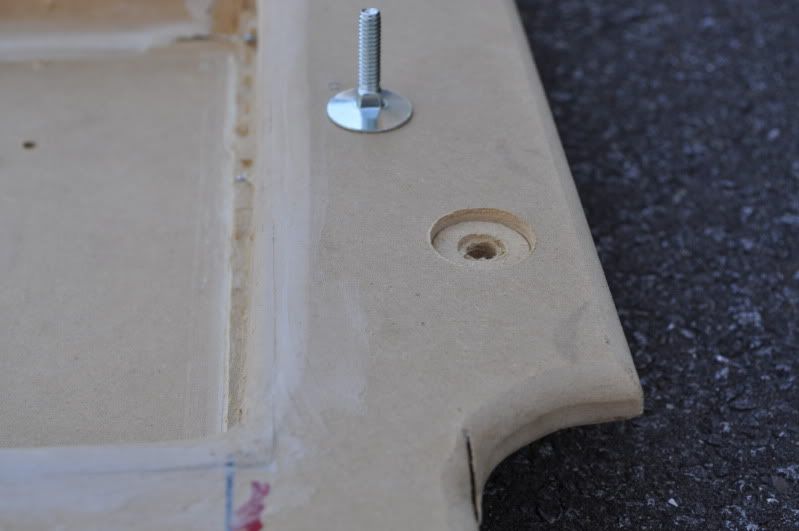 Then a whole bunch of pictures are missing - which documented, completing the amp rack and EQ rack / making the floor and the recessed compartments and then wrapping the recessed compartments and first layer of floor in Neffy carbon fibre vinyl. Here are some pics of the pretty much finished product. 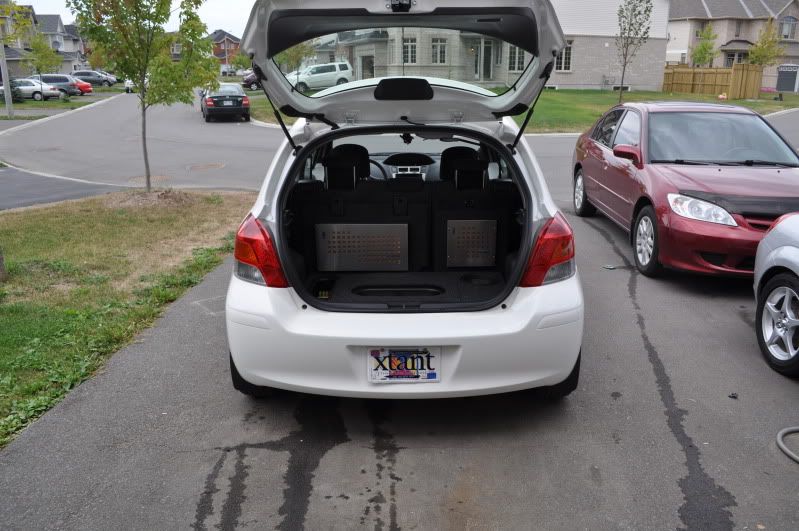    With the covers and the sub grill installed (for some reason the camera makes the carpet on the removable covers look a different color and it exagerates the seams. Trust me when I say that its the exact same roll of carpet and the seams in person are very flat) 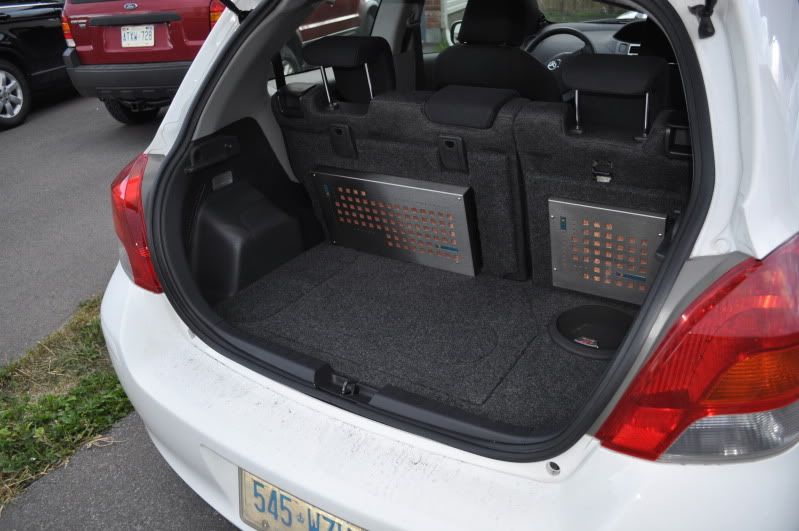 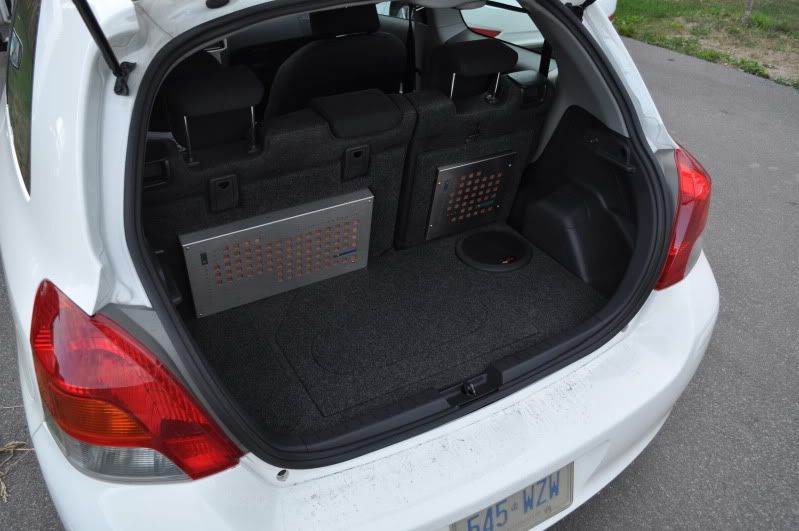 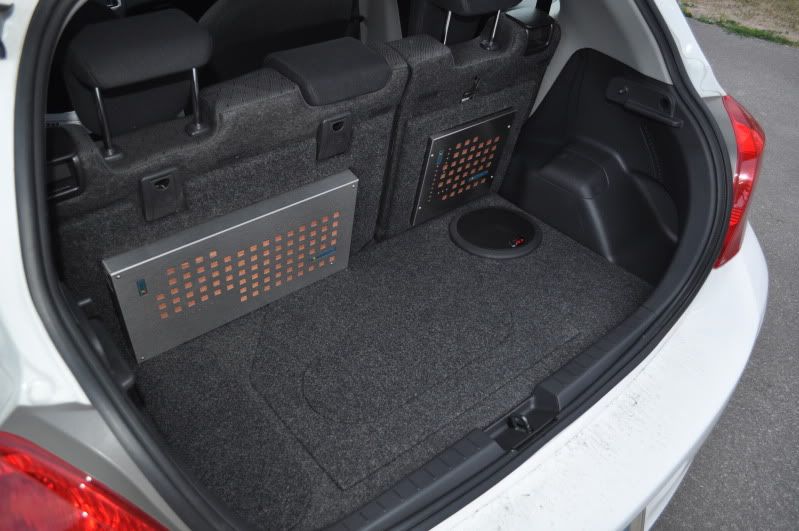 Here are a couple pics of the outside of the car (with the wing and a little more drop than before) 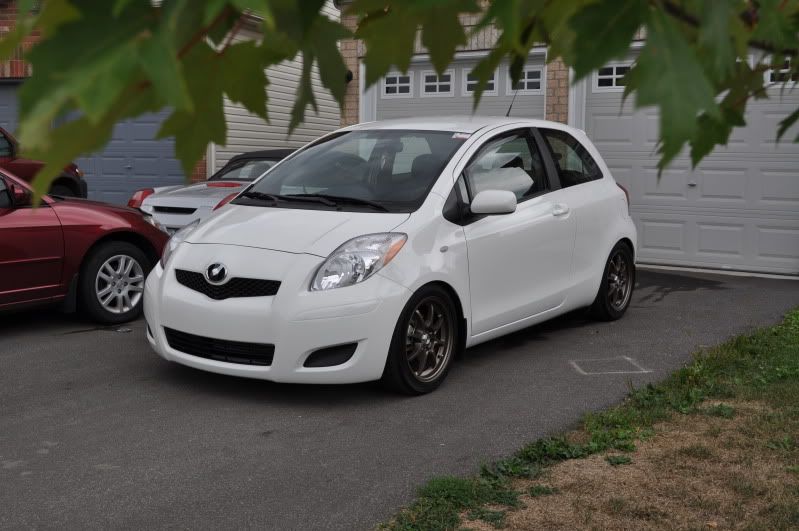 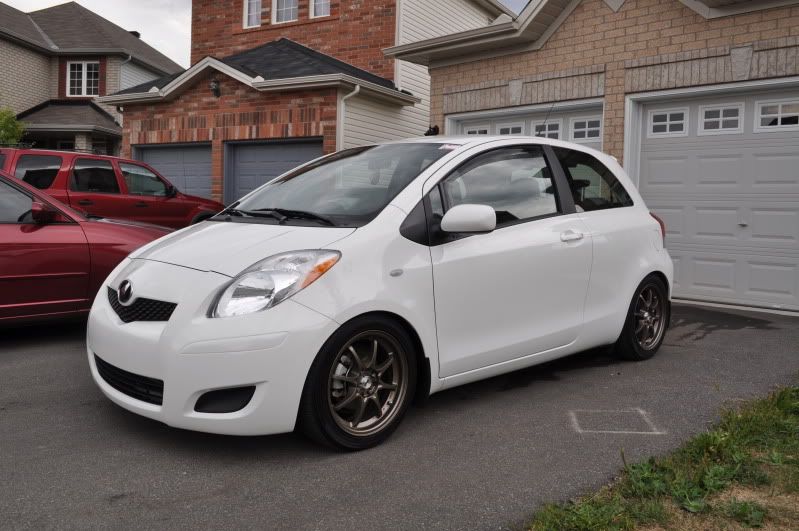 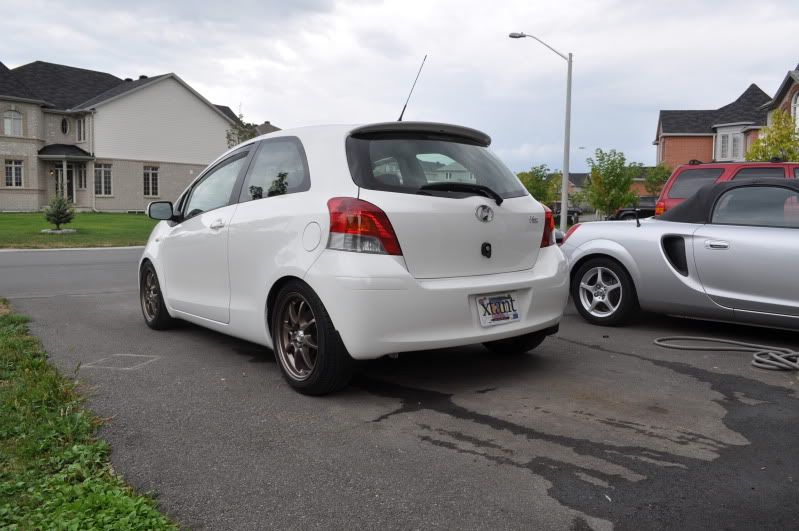 Future audio plans include: -new midbass drivers upfront (TangBand underhung 6.5's / or Denmark made Alpine hemp fibre Type X 6.5) -finish remaking the sealed box to accommodate a second Alpine SWR 8" that will go under the dash) -try out the TangBand 3.5" bamboos in the A-pillars (already have them and some passive crossovers for them) -finally install the Optima battery I have sitting at home -finally do the big 3 under the hood Thanks for looking Cheers Will |

|

|
|
|
 Similar Threads
|
||||
| Thread | Thread Starter | Forum | Replies | Last Post |
| sound deadening: sq footage amount for 3dr | goku87 | In Car Entertainment + Electronics (audio / video / alarm) | 29 | 11-14-2013 12:37 PM |
| 2008 Yaris sedan S sound deadening project. | Herbicidal | In Car Entertainment + Electronics (audio / video / alarm) | 155 | 09-04-2011 11:56 PM |


 Threaded Mode