 |
 |
 |
|
|
|
#73 |
  |
Sounds like it's installed upside down...

|
|
|

|
|
|
#74 |
|
'07 to '12:2 wipers to 1?
Drives: '12 5-door LE & '14 5-door LE Join Date: Apr 2007
Location: Orlando
Posts: 1,999
|
I dunno...words read fine....lol
__________________
MicroImageonline forums - Shroomster Xda Forums - Shroomster Androidforums - Shroomster I'm noticing a pattern...... |
|
|

|
|
|
#75 |
|
It's the illusion you see
Drives: 07 Yaris Sedan Aero Join Date: Oct 2006
Location: Brossard, QC
Posts: 3,888
|
i'm pretty sure it's who does it first. lol
too bad i wasn't in the crowd who "ordered it first" |
|
|

|
|
|
#76 | |
      Drives: 2008 Yaris Liftback (Sprocket) Join Date: Oct 2008
Location: San Antonio, Texas!
Posts: 2,799
|
Quote:
 Plus, if that is aftermarket, what does the factory set-up look like? BTW, the Rostra has been discussed before... |
|
|
|

|
|
|
#77 |
|
'07 to '12:2 wipers to 1?
Drives: '12 5-door LE & '14 5-door LE Join Date: Apr 2007
Location: Orlando
Posts: 1,999
|
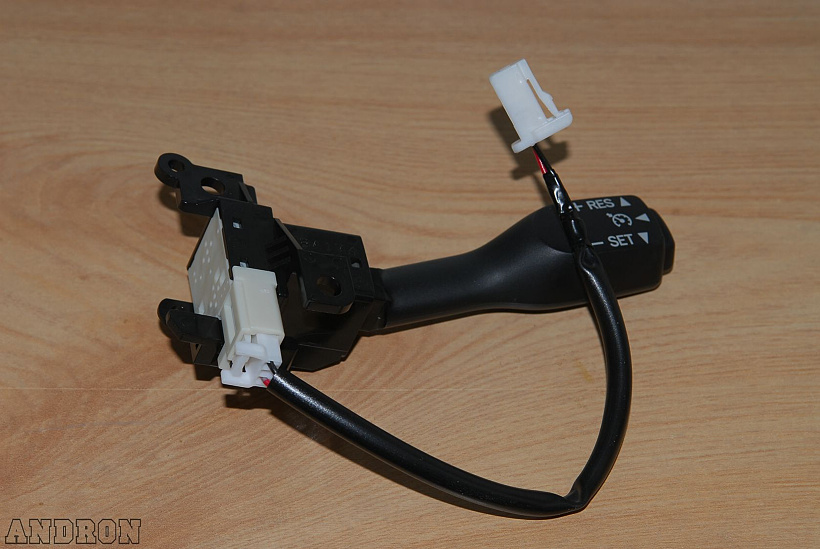
^^^that is the stalk that's installed
and this BELOW, is what an O.E.M toyota cruise stalk looks like...  courtesy of a toyotanation.com DIY
__________________
MicroImageonline forums - Shroomster Xda Forums - Shroomster Androidforums - Shroomster I'm noticing a pattern...... |
|
|

|
|
|
#78 |
      |
So does this need to be run through the clock spring
 if so does that mean we have to replace it as well. just a thougt ,and probably a bad one. 
|
|
|

|
|
|
#79 |
   Drives: Yaris Join Date: Nov 2008
Location: Perth, Australia.
Posts: 189
|
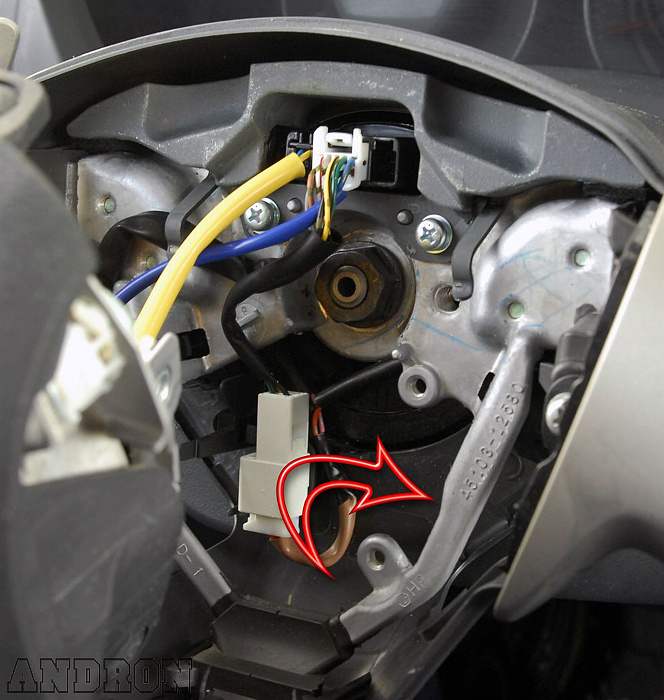
you may need the wire to connect it to the clockspring.
  top pictures are from the corolla... assuming it will be some what similar to the yaris. i think the part number for that wire is 84633-42030 |
|
|

|
|
|
#80 |
     |
I think the pic of the one I Bought showed a wire with it. If not Ill just make one, no biggie.
The guy told me it shipped but no tracking #? is that because its USPS? |
|
|

|
|
|
#81 |
     |
lol, okay. I usually deal with UPS and FedEx, I guess im spoiled that way.
|
|
|

|
|
|
#82 |
   Drives: Yaris Join Date: Nov 2008
Location: Perth, Australia.
Posts: 189
|
|
|
|

|
|
|
#83 |
     |
The thought crossed my mind as well
|
|
|

|
|
|
#84 |
     |
Pulling the cover was a piece of cake. Changed out my steering wheel to a Scion and the install took me 20 minutes. To disable the airbag, I disconnected the battery the night prior. Check here on the forum, I can't for the life of me remember who did this first but they did a good write up on how to. It really pointed out battery disconnect and prying the wires for complete airbag removal.
|
|
|

|
|
|
#85 |
   Drives: Yaris Join Date: Nov 2008
Location: Perth, Australia.
Posts: 189
|
Yeah. its just two T30 torx bits on each side of the steering wheel. then just pull the horn/airbag off, be careful not to deploy the airbag and dont disconnet the airbag when battery is still connected. Its recommended to disconnect the battery and wait 60seconds or so to discharge power. I just wanted to check whats behind the steering wheel so i didn't disconnect the battery. Took less then 5mins to take out.
|
|
|

|
|
|
#86 |
|
It's the illusion you see
Drives: 07 Yaris Sedan Aero Join Date: Oct 2006
Location: Brossard, QC
Posts: 3,888
|
my dealer had remove the top cover of my dashboard, and they did remove the passenger air bag without disconnecting the battery.
|
|
|

|
|
|
#87 |
|
Reluctantly Crouched...
Drives: 2008 Yaris HB M/T Join Date: Oct 2008
Location: DFW, TX
Posts: 867
|
Airbag pullers: its very easy. Make sure the battery is disconnected for a few minutes (I think the manual says 3-6, I waited 10), then use the CORRECT torx driver to remove the 2 side-bolts (you'll need one with a bit of reach), and it might take a decent tug to break the bolt initially, but then its easy). You should matchmark your wheel before you pull it. You shouldn't need a wheel pullet, just tug back-and-forth till it comes off. If you move your closckspring at all, read the directions on how to reset it. Its not hard, but needs to be done right or it will be an EXPENSIVE repair, and might set-off the airbag when you are turning. This is not a process to be afraid of, just take your time and know the steps. BTW - the "clockspring" is the name for the circular plastic unit behind the steerign wheel that allows all the wires to reach the steering wheel/cruise/airbag/horns and still spin the steering wheel round-and-round, where some very old vehicles ran the wires through a hollow center shaft.
|
|
|

|
|
|
#88 | |
    Drives: '07 Yaris HB Join Date: Apr 2006
Location: Sudbury, Canada
Posts: 520
|
Quote:
|
|
|
|

|
|
|
#89 |
|
First time DIYer
|
I was just reading this DIY a little while ago. I'm a huge fan of picture step-by-steps lol.
__________________
LED tails - debadged - 17" wheels - LED door handles - Painted Headlights - 30/35% tint - Blue LED Interior - DIY Cruise Control - Python 460HP Alarm - DIY Power Locks - K&N CAI - Lowering Springs |
|
|

|
|
|
#90 | |
|
'07 to '12:2 wipers to 1?
Drives: '12 5-door LE & '14 5-door LE Join Date: Apr 2007
Location: Orlando
Posts: 1,999
|
Quote:
no...the TORX refers to the head/socket....  courtesy of fakeplasticrock.com courtesy of fakeplasticrock.com
__________________
MicroImageonline forums - Shroomster Xda Forums - Shroomster Androidforums - Shroomster I'm noticing a pattern...... |
|
|
|

|
 |
|
|
 Similar Threads
|
||||
| Thread | Thread Starter | Forum | Replies | Last Post |
| DIY - 2009 Cruise Control for $10, without pulling the steering wheel and airbag | CTScott | DIY / Maintenance / Service | 307 | 04-04-2023 04:43 AM |
| DIY Cruise Control on 07-08 Yaris (step by step) | Vince87 | DIY / Maintenance / Service | 431 | 12-28-2020 02:37 AM |
| Cruise Control - Again! | CB900F2 | DIY / Maintenance / Service | 47 | 06-17-2010 07:29 PM |
| Cruise control vs MPG | YarisOwnersDad | Fuel Economy Forum | 15 | 05-29-2009 04:55 PM |
| Using Cruise control | Driver | General Yaris / Vitz Discussion | 14 | 11-09-2006 11:12 PM |