
 |
 |
|
|
 08-03-2006, 06:16 PM
|
#19 | |
|
Super Moderator

|
Quote:

|
|

|

|
|
08-03-2006, 08:16 PM
|
#20 |
  
Drives: Red Yaris Hatchback on 18's Join Date: Jul 2006
Location: Puerto Rico
Posts: 270
 |
I like your idea Chris. I want some HID's for my Yaris too. From what company are yours? What price are each pair w/o group buy?
|
|
|
|
|
08-03-2006, 08:19 PM
|
#21 | |
|
Super Moderator
|
Quote:
 Here's a taste. 
|
|
|
|
|
|
08-03-2006, 08:26 PM
|
#22 |
|
Drives: Red Yaris Hatchback on 18's Join Date: Jul 2006
Location: Puerto Rico
Posts: 270
|
 Mmmmm It's taste good. Mmmmm It's taste good.
|
|
|
|
|
08-03-2006, 09:00 PM
|
#23 |
|
Evil Kitty

Drives: 07 Yaris Liftback A4 AB/Red Join Date: Aug 2006
Location: Atlanta, GA
Posts: 55
|
 Very Nice Very Nice
__________________
07 Yaris A4 Absolute Red: No mods "YET" 04 GTO www.purplegto.com 01 Camaro SS Convertible SLP#1331 http://www.2001CamaroSS.com |
|
|
|
|
08-04-2006, 03:34 AM
|
#24 |
|
Drives: Toyota Yaris T-Sport 1.8 Join Date: May 2006
Location: Greece
Posts: 16
|
I want to get these...they look awesome!!
Cool dude! What brand and how much does it cost!?! |
|
|
|
|
08-04-2006, 03:49 AM
|
#25 |
|
Look mum no stars!!

Drives: Toyota Yaris 06 Join Date: Aug 2006
Location: Australia Sydney
Posts: 1,469
|
Im interested on a tutorial on how to paint the front lights :(
|
|
|
|
|
08-09-2006, 11:49 AM
|
#26 |
|
Drives: 07 yaris 3dr mblue Join Date: Jul 2006
Location: Jersey
Posts: 15
|
Sorry guys have been away for a while but im back and will post the how to soon
|
|
|
|
|
08-11-2006, 07:48 AM
|
#27 |
|
Look mum no stars!!
Drives: Toyota Yaris 06 Join Date: Aug 2006
Location: Australia Sydney
Posts: 1,469
|
YAY I LOVE U, seriously i think were all dying for a tutorial!!!...even if its a quick but effect tutorial!!
Last edited by hasher22; 08-12-2006 at 02:59 AM. |
|
|
|
|
08-13-2006, 01:22 PM
|
#28 |

Drives: Yaris LB 1.3lt 06 Join Date: Aug 2006
Location: Under the hood!
Posts: 1,124
 |
GREAT result.
I wanna do the same with my black Yaris. We need a tutorial soooooon!If someone can, I would like an advice on what specific type of paint to use.
__________________
|
|
|
|
|
08-14-2006, 06:11 PM
|
#29 |
|
Drives: 07 yaris 3dr mblue Join Date: Jul 2006
Location: Jersey
Posts: 15
|
How to paint the headlights
1>Start by removing the front bumper clips across the top above the radiator
2>remove the clips in the fender well towards the front bumper. 3>Now gently pry the the front bumper near da fender until it pops and reveals the screw for the headlight. 4>Now remove the top screw holding the headlight on, theres one more screw behind the bumper by the radiator. 5>Now remove the headlight. 6>Now take the headlight and either put in the oven for about 10 mins @350 degress or heat with a blow dryer and slowly pry apart. once aprt move too next step 7>on the back on the housing the 2 aiming notches can be twisted and popped out 8> the 2 chrome ieces in the housing now can be popped out, this is where u do all of the masking off the section u want to remain chrome( mainly the reflector for the turn signals and headlight reflector. 9>This part should be done while your first coat is drying. With the glass part of the housing u can remove the amber reflector for painting or complete removal whatever ur preference, by GENTLY prying the clear part out which can also be painted or removed. 10>Painting: I cleaned the reflector with alcohol first, grabbed a can of dupont flat black paint and layed down about 5 coats(each one light with about 3 mins between each coat.I used the time between coats to seperate the other light for prepartion. 11>After all painting is done and masking tape removed be sure to wipe down the inside of the lense and reflector housing to remove finger prints and paint residue. 12>Put everything back together. 13>Wrap headlights with tape to provide clamping force and reheat to let the glue get soft again, now reapply pressure and let glue cool. 14>The fun part BEER, WATER u choice put headlights back in car, refix the bumper, install all clips. Enjoy u new JDM Jbann blacked out headlights. Hope this helps if n e ? feel free to hit me up, i'll be on regularly now, also i take back my 1st offer i will do headlights for $25 a pair or if ur in the area i'll give u a hand for free. HEY we should setup up a meet before it starts getting cold. GOOD LUCK |
|
|
|
|
08-14-2006, 06:14 PM
|
#30 | |
|
Super Moderator
|
Quote:
 You quoted me 150 bucks falker! You quoted me 150 bucks falker! 
|
|
|
|
|
|
08-14-2006, 06:17 PM
|
#31 |
|
Drives: 07 yaris 3dr mblue Join Date: Jul 2006
Location: Jersey
Posts: 15
|
DIdnt realize so many wanted to do this mod so i cant charge that much too my fellow yari's members. Also just finished my grounding kit. Will post tonite or tomorrow
|
|
|
|
|
08-14-2006, 06:21 PM
|
#32 | |
|
Super Moderator
|
Quote:
|
|
|
|
|
|
08-15-2006, 10:50 PM
|
#33 |
|
Look mum no stars!!
Drives: Toyota Yaris 06 Join Date: Aug 2006
Location: Australia Sydney
Posts: 1,469
|
Hey guys....ill be doin this mod soon, but im just gonna spray the top part. I cant explain it
All i need to know is HOW DO I TAKE OF THE FRONT BUMPER?? can anyone plz tell me a detailed tutorial on how to removed the front bumper! "1>Start by removing the front bumper clips across the top above the radiator 2>remove the clips in the fender well towards the front bumper. 3>Now gently pry the the front bumper near da fender until it pops and reveals the screw for the headlight." great tutorial but im just lost with removing the bumper. THANKS |
|
|
|
|
08-15-2006, 11:35 PM
|
#34 |

Drives: 2007 Yaris S Join Date: May 2006
Location: Milwaukee WI
Posts: 582
|
from what i gather, you do not need to remove the bumper...havnet removed my lights yet, but looks like you only need to take off the sides, and move a bit to gain access to the final screws to the headlights
|
|
|
|
|
08-16-2006, 03:21 AM
|
#35 |
|
Look mum no stars!!
Drives: Toyota Yaris 06 Join Date: Aug 2006
Location: Australia Sydney
Posts: 1,469
|
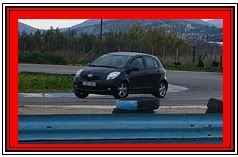
Hmm ill provide pics on what im sayin. I think you do need to take off the bumper cuz the front light screws is right behind the bumper.
Ok here are some pics of the bolts, or stumps whatever u wanna call it. I just wanna know.....how do you take them out??  
Last edited by hasher22; 08-16-2006 at 03:44 AM. |
|
|
|
|
08-16-2006, 03:47 AM
|
#36 |
|
Drives: Yaris LB 1.3lt 06 Join Date: Aug 2006
Location: Under the hood!
Posts: 1,124
|
Oh dammit still confused!
What kind of black paint I should use?
__________________
|
|
|
|
 |
|
|
 Similar Threads
|
||||
| Thread | Thread Starter | Forum | Replies | Last Post |
| who is gonna be the first person to "bake" the headlights? | birdy | Cosmetic Modifications (Exterior/Interior) | 44 | 01-11-2007 02:48 PM |
| Painted Lamps | Kitt | Cosmetic Modifications (Exterior/Interior) | 21 | 09-27-2006 01:30 PM |
| Clear Corner Headlights | Ran Kizama | Cosmetic Modifications (Exterior/Interior) | 6 | 07-06-2006 02:43 PM |
| Headlights | slvryaris | Cosmetic Modifications (Exterior/Interior) | 2 | 06-26-2006 06:49 PM |
| LB headlights | Supa Lao | Cosmetic Modifications (Exterior/Interior) | 0 | 06-22-2006 11:04 AM |


 Linear Mode

