
 |
 |
|
|
 09-06-2009, 10:43 PM
|
#1 |
 
|
DIY Projector/HID (Liftback) Not 56k friendly.
This is for a 2008 yaris liftback.
I followed Brian's DIY for the sedan version and it was a alot of help. http://www.yarisworld.com/forums/showthread.php?t=22112 However, there were problems that I ran into during the installation that didn't seem to occur during Brian's. I will be copy and pasting the things that were able to be done on the Liftback from Brian's DIY. "Tools needed: 10mm socket 14mm socket (I think for negative battery terminal) Ratchet (1/4" drive works fine) Phillips screwdriver Flat head screwdriver Masking tape Dremel 1.) Disconnect negative (-) wire from battery 2.) Lift vehicle (just the front end or the whole car) 3.) Apply masking take to bumper and fender (prevents paint from getting scratched) 4.) Remove these bolts from the front of the inner fenders with 10mm socket(1 on each side)"  "5.) Remove bolts from underside holding the bumper and underpanels on. I think theres about 6 or 8 of them."  "6.) Remove 6 push rivets from the top of bumper under the hood. Push down in the middle of them and pull the whole thing out."  "7.) Pull the sides of the bumper outwards to release. It should now look something like this:"  "8.) Headlight removal. There are 3 10mm bolts holding each headlight on. 2 on top and 1 on the side and unplug 2 OEM connectors. If you have eyelids remove them at this time."   "9.) Remove all factory wiring and bulbs from each headlight and the 3 screw from the edge of the back of the headlight."  "10.) You should end up with this:"  "11.) Remove the screw holding the headlight bulb clip. (You will not need these)" Brian's pic... 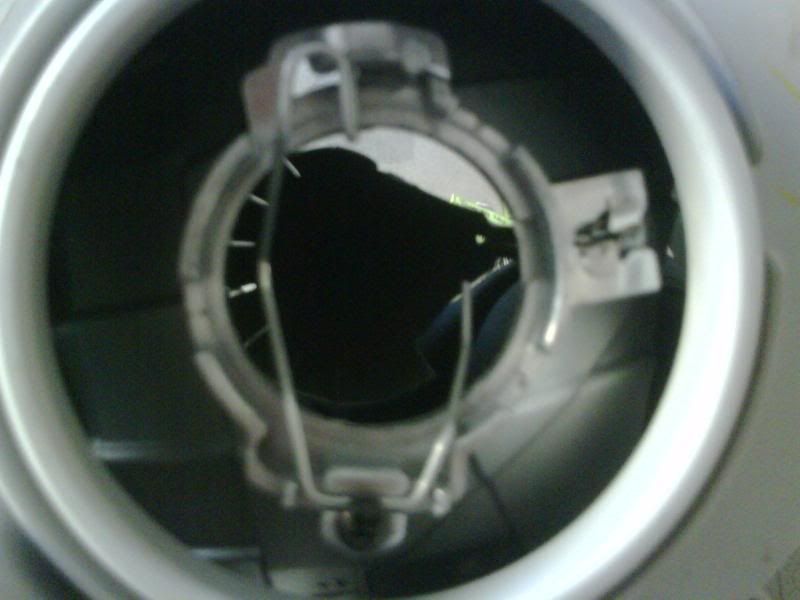 12.) Time to bake the headlights. I only set my oven to 215 and preheat for 10 minutes and let the headlights sit in there for 4 min and that was enough time to pry it open. all ovens are different so you have to decide how long you want to put them in there for. one of the headlights actually melted in the back a little bit after only being in there for four minutes. so keep an eye on it. Place the headlight on a cookie sheet and put aluminum foil on the sheet. Remember to use gloves when handling the headlights when pulling them out of the oven, and then prying them open. You will need a flat head screw driver to pry these open after immediately pulling it out of the oven..  13.) Once you bake and pry open, and you should have this. I also pulled out the existing silicone and will reseal with the silicone that was provided.   14.) IMPORTANT!! This was not mentioned in camell's or Brian's posting about the headlights, but the projector was unable to fit into the existing hole of the headlight housing.   15.) Luckily I test fitted before painting, and because I did so, I then proceeded to use the dremel to open up the hole a little bit more to be able to fit the projector in.  16.) After dremelling out the hole on both headlight housings to fit the projector, i proceeded to clean the housing and prep for paint. Even though I removed the existing silicone, I wanted to tape this section off so there wouldn't be any spray paint that might act funny to the new silicone I will be using to reseal the lens to the housing.  "17.) Remove reflector housing from lens. Sorry no pics" "18.) This next part is up to you. You can paint any color. I used SEM satin black. Does not need to be a high temp paint" "19.) Scuff sand all chrome parts of the headlight housing and reflector housing with 600 grit or higher sandpaper. Don't forget to pop out the amber reflector before you paint the relfector housing. You can use a flat head screwdriver. Be careful when doing so; so you don't chip the reflector. 20.) Paint and allow to dry." Brian's pics.. 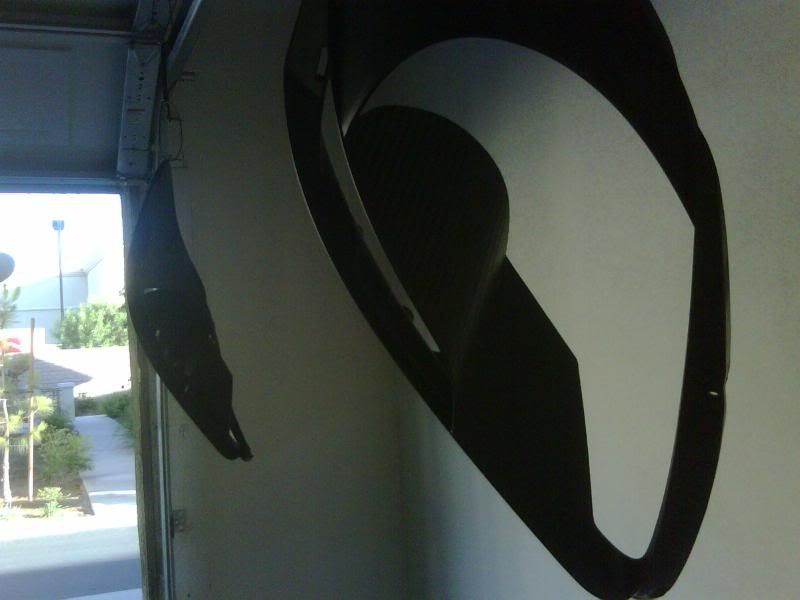 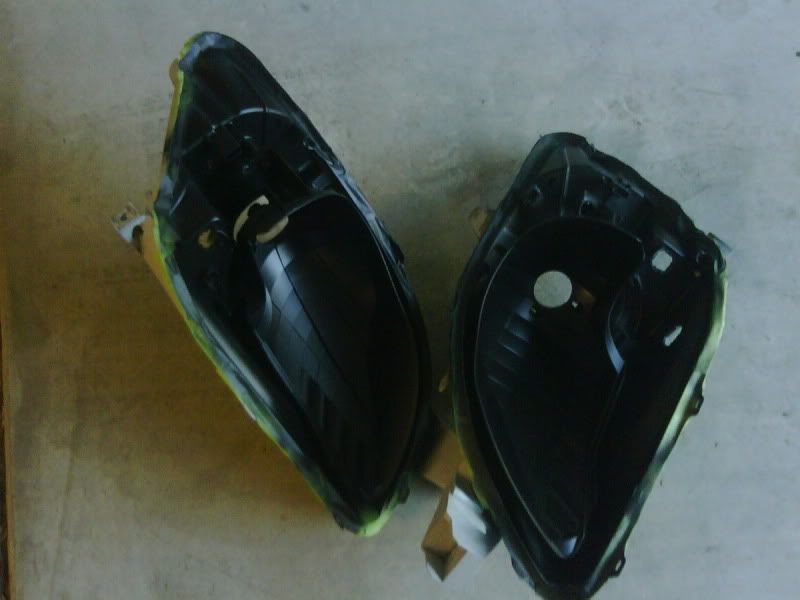 21.) IMPORTANT!!!!!! After putting the projector in the housing, I realized that there is NOT enough thread to be able to thread the two rings, washer, and H4 ring. This was NOT a problem that was mentioned in Camell's or Brian's threads. As you can see, this is with just the two rings, before you put on the lock washer and final H4 ring (which holds the bulbs down).  22.) There is clearly not enough threading. So I decided to go without the lockwasher, but still use the two rings and the final H4 ring ( which holds the bulb down ). 23.) However, you can see that where the CCFL wires are suppose to come out, the H4 ring would pinch those wires.  24.) I did not like that idea, so I decided to use a dremel to notch out an opening for the CCFL wires. I marked where I would be doing the cut..  Here is the notch made, and you can see the wires fit good now.  25.) Because I was only using the two rings and not the lock washer, I decided to make my own spacer that would hold the bulb down securely when I put the H4 ring on. This is my spacer I made...   26.) This is the spacer sitting in place..  27.) This is what it will look like when the H4 ring is screwed on last. You can see the rubber spacer in the middle.  28.) Now that the projector is sitting securely in the housing, I gather my parts.  *You can see that I made a small chip in the amber reflector. This was when trying to take it out earlier before spray painting the reflector housing.    29.) Put the reflector housing carefully back in the lens. Make sure you know how to put it in, so you can do it in one motion. This will allow you to not scratch the paint on the reflector housing.   30.) Now apply the sealent that was provided.   31.) After putting on the lens, you should have something like this....   32.) Re insert factory grommit into back of headlight. Brian's pic...  "33.) The HID harness with the long power wire goes on the passenger side. 34.) Run the single red power wire to the battery and attached them to the positive (+) post. I ran the passenger side along the firewall and the drivers side behing the battery." Brian's pics... 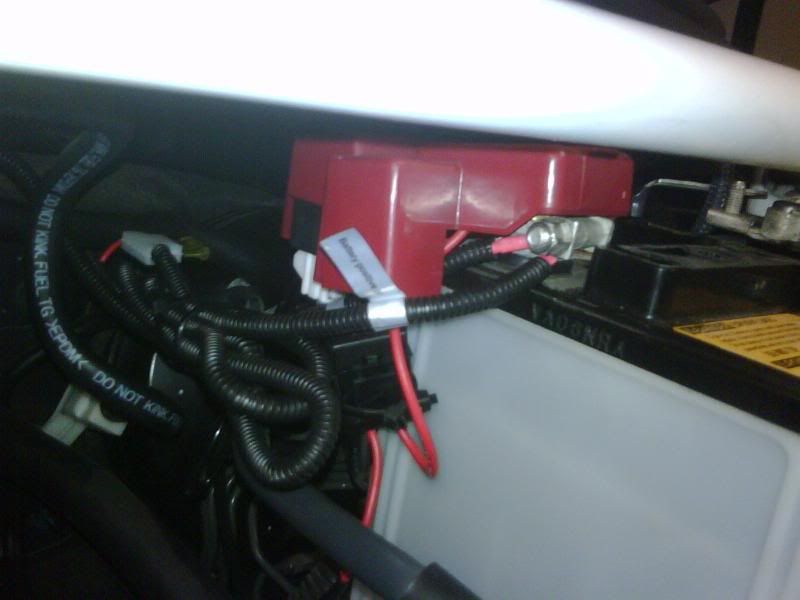 "35.) Passenger side. Attach the single black ground wire to the strut tower (make sure to grind down to bare metal) and mount the black relay box on top of the ground wire utilizing the threaded hole already there. The bolts in the kit fit perfectly." Brian's pic... 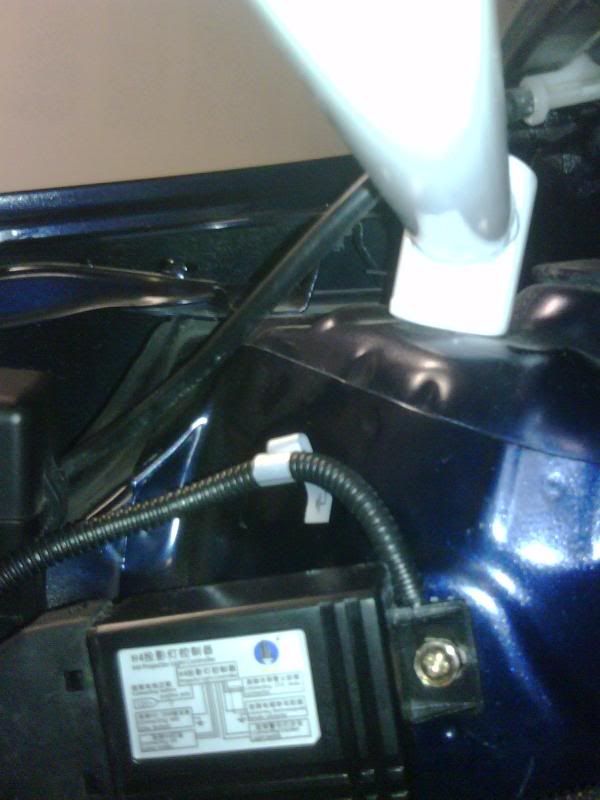 Because my nitto torque damper used the screw hole that Brian used; I decided to put my slim ballast and black relay box here....    This is where I installed them on the driver's side..   "36.) Driver's side single black gound wire. There is already a ground wire, by I think its the airbag sensor, you can use." Brian's pic.... 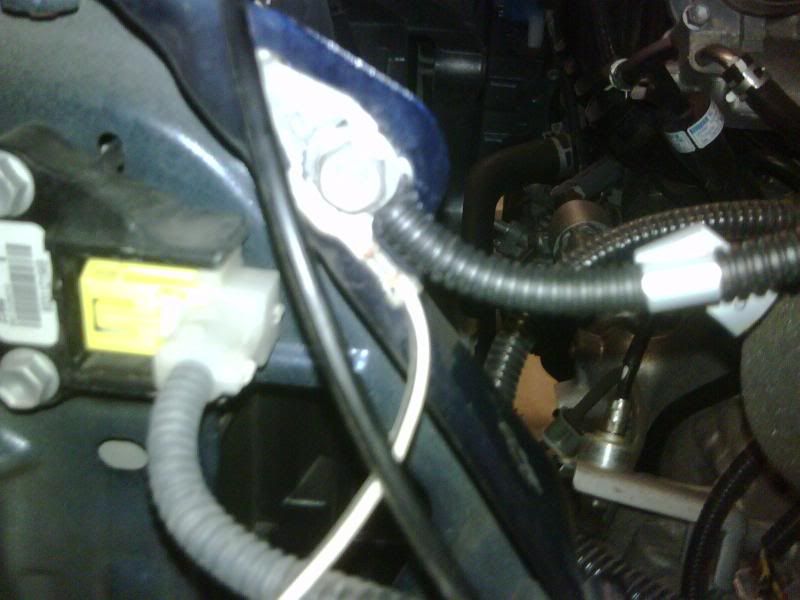 "37.) Plug all the other wires together, except the single red and black wires with no terminal and bare wire showing. "  38.) Now for the halos. The single red and black wires with no terminals. Use the provide wire splicers or you can solder. Attach the black wire to the white wire w/black strip (-) coming out of the connector for the city driving lights (pic shown below) and the red wire to the green wire (+) next to it. City driving light that you splice into for the halos..   The two pictures below only show the black wire solder'd/shrinkwrapped to the white wires with black stripes. Don't forget to solder/shrinkwrap the red wire to the green wires..   39.) I cut the wires that went to the city driving light bulb that was below the projector. When I had the lights turned on, the halogen color really took away from the projector's light and made it look quite ugly. Here is the bulb that I snipped... (brown plastic)  "40.) Bolt the headlight assemblies back on with the 3 bolts each and reinstall the bumper." Horrible pics, but gives you an idea:           Getting better pics taken of the car next week. Last edited by PETERPOOP; 09-07-2009 at 06:17 PM. |

|

|
| Thread Tools | |
| Display Modes | |
|
|
 Similar Threads
|
||||
| Thread | Thread Starter | Forum | Replies | Last Post |
| DIY - Liftback Intermittent Wipers via Stalk Replacement (v2.0) | CTScott | DIY / Maintenance / Service | 140 | 04-15-2023 07:12 PM |
| DIY (08' USDM Liftback): ESUSE Fog Light Install v2.0 | goku87 | DIY / Maintenance / Service | 127 | 02-19-2023 07:01 PM |
| DIY Projector/HID (sedan) | Brian | DIY / Maintenance / Service | 145 | 02-05-2012 04:13 AM |
| Florida Yaris Roll Call: Part 3- Post Hacking! | Sabretooth | Southeast | 81 | 05-22-2009 10:39 AM |
| DIY KEYLESS ENTRY on Power Liftback? | TC-LIFTBACK | DIY / Maintenance / Service | 0 | 08-23-2006 09:57 AM |


 Threaded Mode