
 |
 |
 |
|
|
|
#1 |
    |
Wheel Bearing Replacement (FRONT)
WORK IN PROGRESS... I'll be updating this througout the day.
Tools: - Your regular assortment of sockets, pliers, etc.. I used 17mm and 19mm more than anything - A small sledge hammer (5lbs) - MIGHT help remove the brake rotor - jack - jack stand - wheel choke (I used 3, cuz I'm all about safety) - a socket for the axle nut. - impact gun. If you don't own one, make friends with someone who does (this was so valuable when I did my bearing!) - ball joint tool like this one link to tool - tie rod/pitman puller - 5lb slide hammer link to slide hammer - hub adaptor for slide hammer link to hub puller - bungee cords (for holding the brake caliper out of the way) - shade (i did it during a hot day so a shade is a tool!) - WD40 You want to start by getting all the new parts you will be using. I have a second car, so I don't mind going to the store as needed. I also killed a few hours doing it this way. So get what you need now. Wheel bearing, hub, nuts, cotter pins, axle nut. Basically whatever you will need to replace, want to replace, or replace because the Repair Manual states to do so. Tools. I don't own all the tools above. I borrowed the impact gun from a friend. Best tool ever for a job like this. I bought the ball joint separator from Harbor Freight (I tried many other ways of removing the lower ball joint nut with no success. It's also why I got so good/fast at replacing the spindle assembly). I also bought the axle nut socket from Sears. Had I known I'd be making a visit to Toyota (for a new axle nut) I would have bought their socket as well. Get all the tools together. Plan ahead. I rented the slide hammer, hub puller, and tie rod puller from Kragen (o'reilley) auto parts. Free tool rentals. They charge your card, but put the funds back when you return the tools. They're pretty good about doing it fast too. TIP: I like to get the tools together the night before. I ended up having to go to 4 diffrent Kragen's because none of them had all the tools at the same time! Prep. Spray the axle nut with WD40 the night before. I also spray it before I start gathering all my tools and parts together. It makes it much easier to remove that tough axle nut! Disclaimer: Now is a good time for this, I guess. PROCEED WITH CAUTIION. Read the manual thouroughly, and follow their procedure. This process is one I used, and it worked for me. I can not guarantee you will have the same results. ALWAYS wear eye protection, gloves, and any other safety equipment. If you don't have confidence in your ability to tackle the job, hire a professional. Process: So this is the way I did it. It worked for me. There are other ways, of course, but I don't know them? LOL START! - Pull your Yaris to where you are going to do the work. I used an inclined driveway (hence, why I used 3 wheel chokes) and get your shade ready. 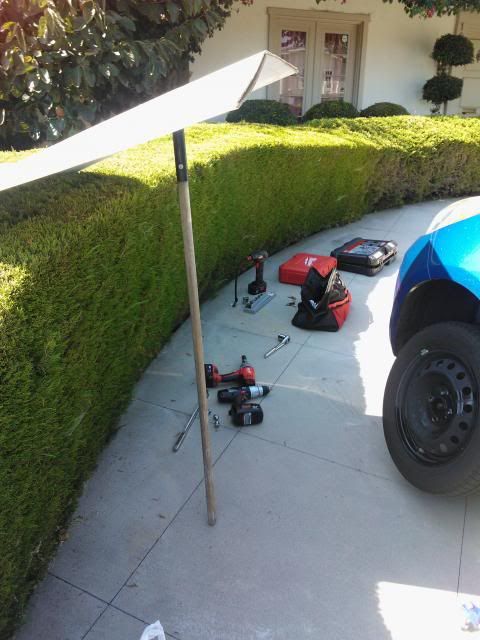 WHOA! - I took this pic after I removed the wheel. BEFORE YOU REMOVE THE WHEEL.... - break the axle nut loose. If you don't have a pal to hold the brakes while you do that, then this is the first thing I would do first. While the car is parked, in gear, with the e-brake firmly up, take a breaker bar (and I used the tube from my harbor freight jack as an extension for added torque) and the axle nut socket, and break that nut loose. I didn't try the impact gun for this for personal reasons. I prefer the slow break loose option. After I broke it loose, I went a few turns to make sure it can keep going. - AFTER I broke the axle nut loose, I broke the lug nuts loose as well. Before I lifted the driver side corner up, I placed the wheel chokes on 3 tires. I lifted the car at the proper jack points, and then used a jack stand to secure the veh in the lifted position. - Remove the wheel. you will see the brakes and shock, etc. There are two bolts holding the brake caliper to the spindle assembly, and two bolts that hold the spindle to the shock/strut (i'll just keep calling it shock moving forward) here's a pic of where the bolts would go on the shock portion 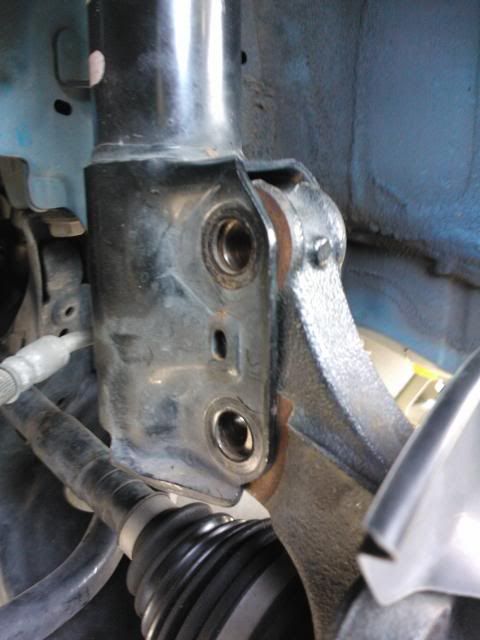 and here's a pic of where the bolts would go for the brake caliper 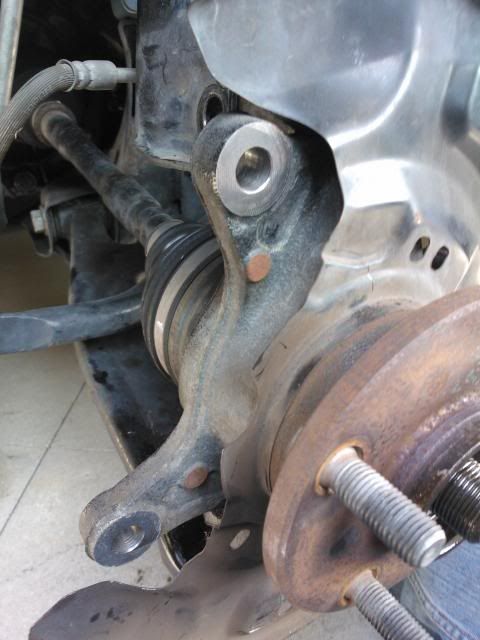 What I did first, was to remove the lower bolt on the shock body. this makes it easy to remove the brake caliper bolts. After removing the two bolts holding the caliper assembly, i tucked the caliper out of the way using the bungee cords. You don't want to tear/pinch that rubber hose for the brake fluid! BE CAREFUL here's what it looks like tucked up and away: 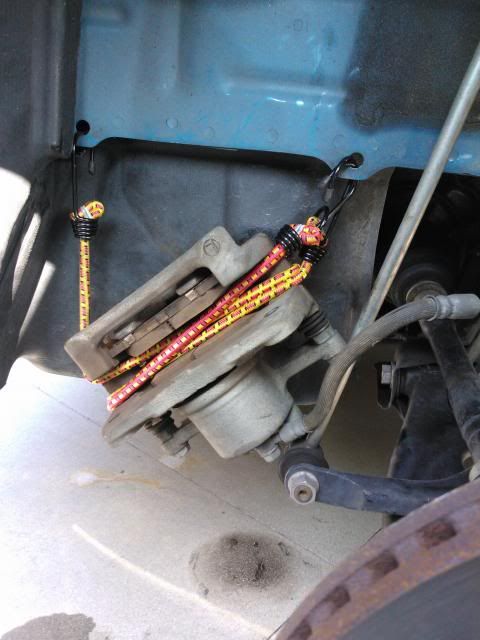 Next up, the disc rotor. The first time I tried pulling it off, it was stuck on there. I thought I missed a little bolt or something. I tried whacking it with a rubber mallet. I then used a 5lb sledge on it. No deal. I tried every kind of banging possible. Top, sides, from back, etc. Finally gave up and used a gizmo and some sockets to pull it off. I'm guessing a better way is to use those little bolts? I don't do brakes, so I wouldn't know! Anyway, here's a pic of how the gadget thing i used to pull off that stinking rotor 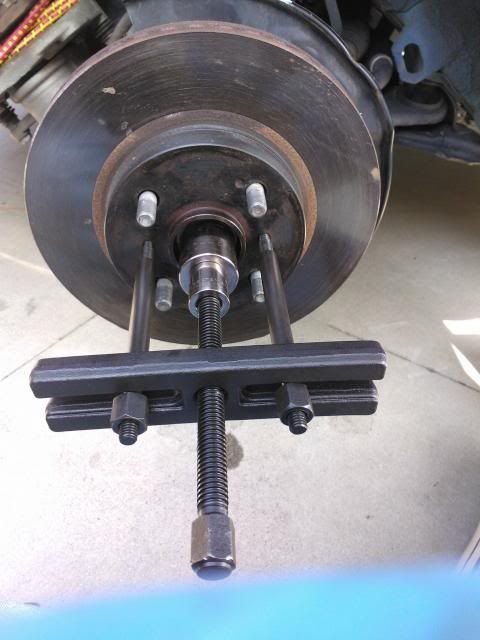 I finished removing the axle nut somewhere along the line. Forgot where, but I did use the impact gun to finish the job once it was broken loose. I'm guessing you could do it at this time. With the impact gun I used (a nice heavy duty cordless Milwaukee) it came off like fleas on a dog who...never mind. It came off easy. NO pic. I went ahead and put the lower bolt back onto the shock at this time. I wanted to make sure it was secure for this next step. REMOVING THE HUB ASSEMBLY! Since I would be using a slide hammer to hammer that sucker out, I wanted to have it as secure as possible. BEcause I kept getting angry with not having all the proper tools the first time I tried this job, I neglected to take some pics... here's a pic of what the hub puller looks like mounted on the hub itself. It's a diagram, actually. I used to lug nuts mounted on either end of the puller, 180* apart (or 6 o'clock and 12 o'clock). And I also removed that center bolt that is sometimes used for this job. I replaced the bolt with the end of the slide hammer. The hammer screws threw the same hole, and the nut attaches on the other end. Be sure to do the hammer and puller attachment BEFORE you connect it to the hub assembly Here's sort of what that would look like: 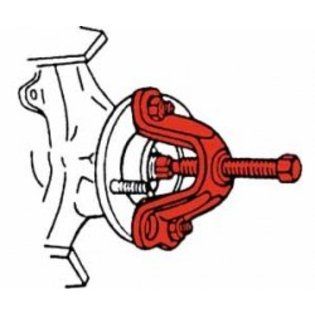 and with the hammer on (again, these aren't my photos, but to get an idea) 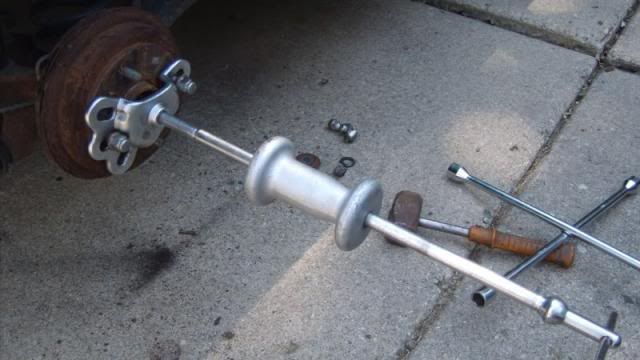 After several blows with the hammer, it moved a tiny amount. It takes a lot of force, and several blows. Once it starts moving, and you see the light at the end of the tunnel, it comes out quicker. Be careful not to stand right behind it. You wouldn't want to hammer yourself with that thing. OR, the assembly might pop out at the wrong moment and catch you asleep! (no, it didn't happen to me, promise) There you have it. The hub has been removed. 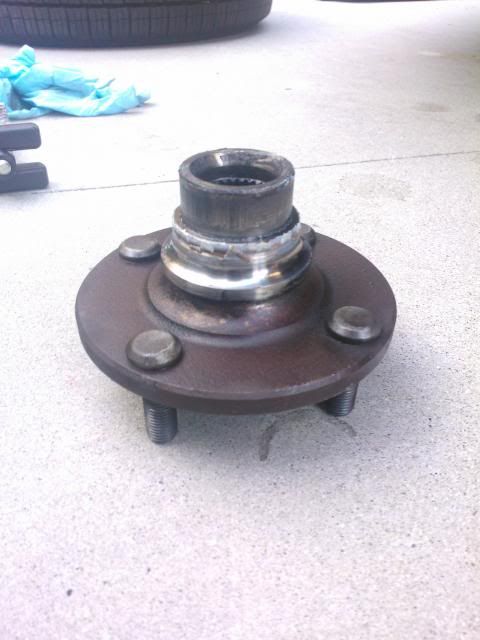 But what now, Mr MonkeyWrenchWieldingMonkey Dude? Like I said, in my case, I had to have a shop do the pressing for me. That being the case, I also had to remove the spindle assembly as well. Eventually, I took both the spindle assembly, the replacement hub, and bearing, to the shop to have it all pressed together. Fun stuff. more to come... Last edited by justjesus; 06-19-2013 at 04:49 PM. |
|
|

|
|
|
 Similar Threads
|
||||
| Thread | Thread Starter | Forum | Replies | Last Post |
| Massive inside wheel spin + outside wheel fender rub | CrankyOldMan | Tracking, Racing, Auto-X Forum | 8 | 06-04-2013 08:57 PM |
| Wheel Bearing Upgrade? | fnkngrv | DIY / Maintenance / Service | 6 | 05-24-2013 05:46 PM |
| front strut replacement | bubbajones101 | DIY / Maintenance / Service | 1 | 02-03-2013 08:43 PM |
| Front Passangerside wheel bearing | yaris4062007 | DIY / Maintenance / Service | 5 | 03-09-2012 01:34 PM |