
 |
 |
 |
|
|
|
#1 |
       Drives: '14 GT86, '08 Vitz Join Date: Dec 2006
Location: Central Valley, CA
Posts: 9,873
|
DIY Sedan Spoiler Install
tools needed: most likely will vary, but i used a flat head and Phillips screw drivers, a drill, 3 and 5 mm drill bits, and some elbow grease
time needed: shouldn't be this long if you have a step-bit, we took 4 hours, including several breaks and waiting for the drill to charge back up, some chatting, picture taking, and cleaning up. amount of gallons of water needed for thirst: at least two gallons for each of us okay, i finally got around to installing my Vios spoiler. i have school tomorrow, so i don't have time to fix the exposure, brightness, etc. i was also pressured in time since i was a couple hours late in helping my friends move (towards the end of the install), so my friend and i may have forgotten to take a pic or two. well here it goes... Step one: Get the spoiler painted (I recommend getting it professionally painted, well worth it). 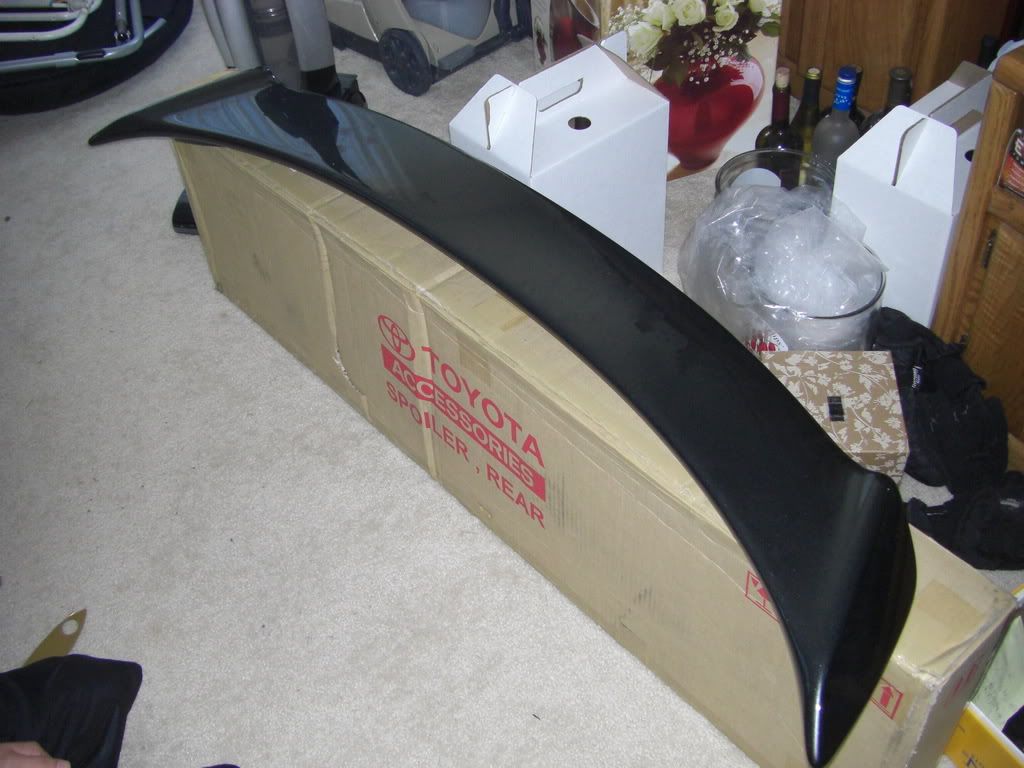 Step two: Peal the top side (spoiler side) film strip off of the protector pad (right pad). Peal off the spoiler side only and leave the film strip on the "trunk side". Place the protector (right) on the right legs. For this spoiler, the right leg protector has three holes while the left leg has two. Firmly and evenly press down to "stick" it on. 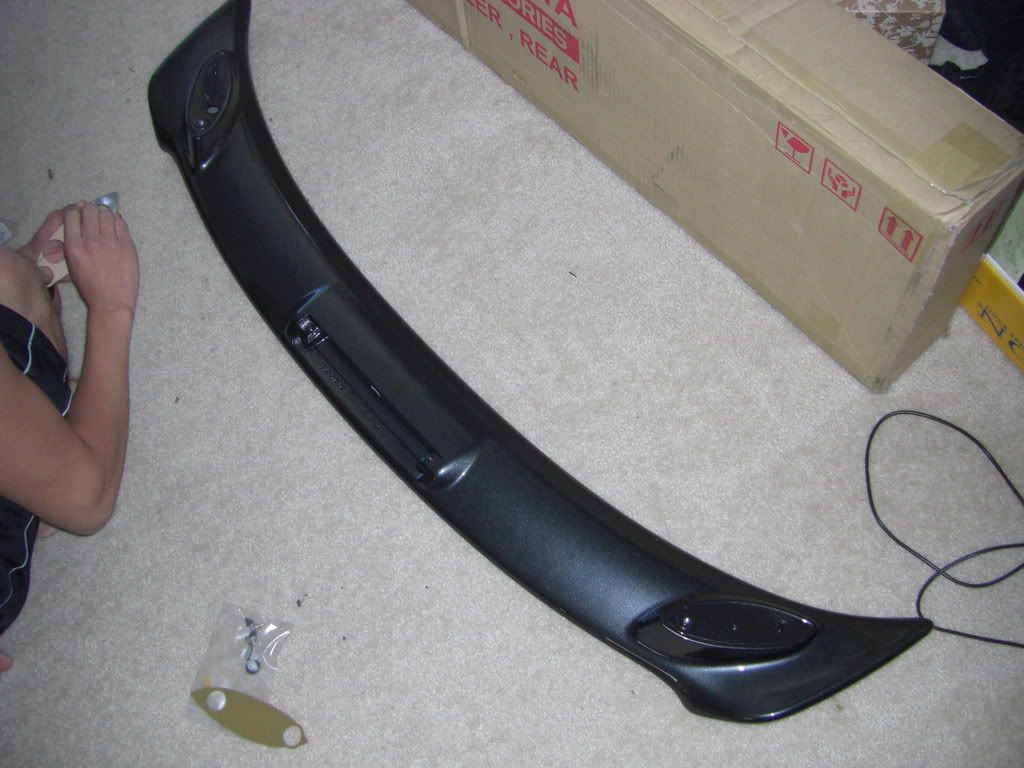 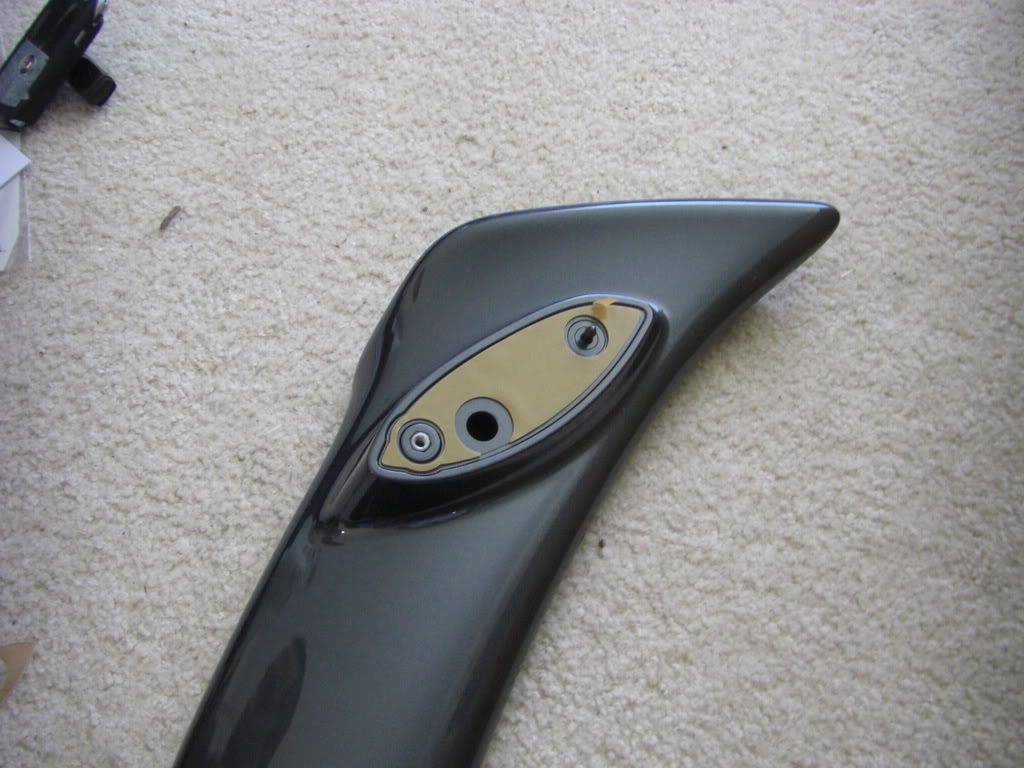 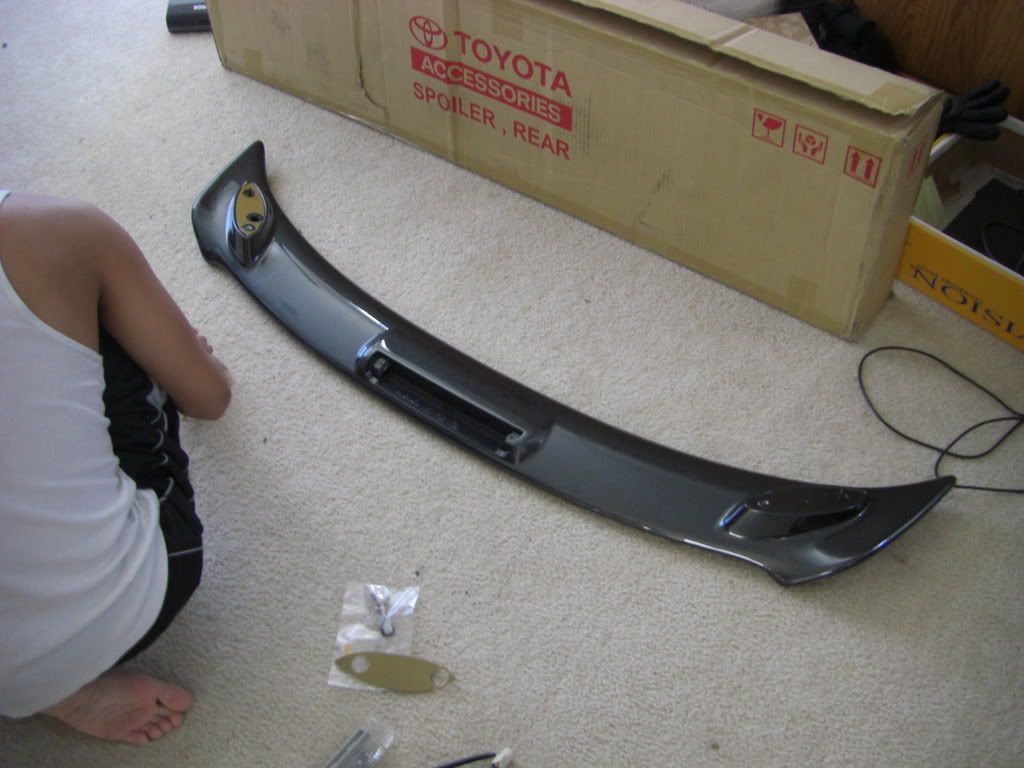 Step three: Peal off one film strip on the seal. Place the seal on the right leg. The seal goes to where the nut is (left hole two pictures above). Again, firmly and evenly press down on it. 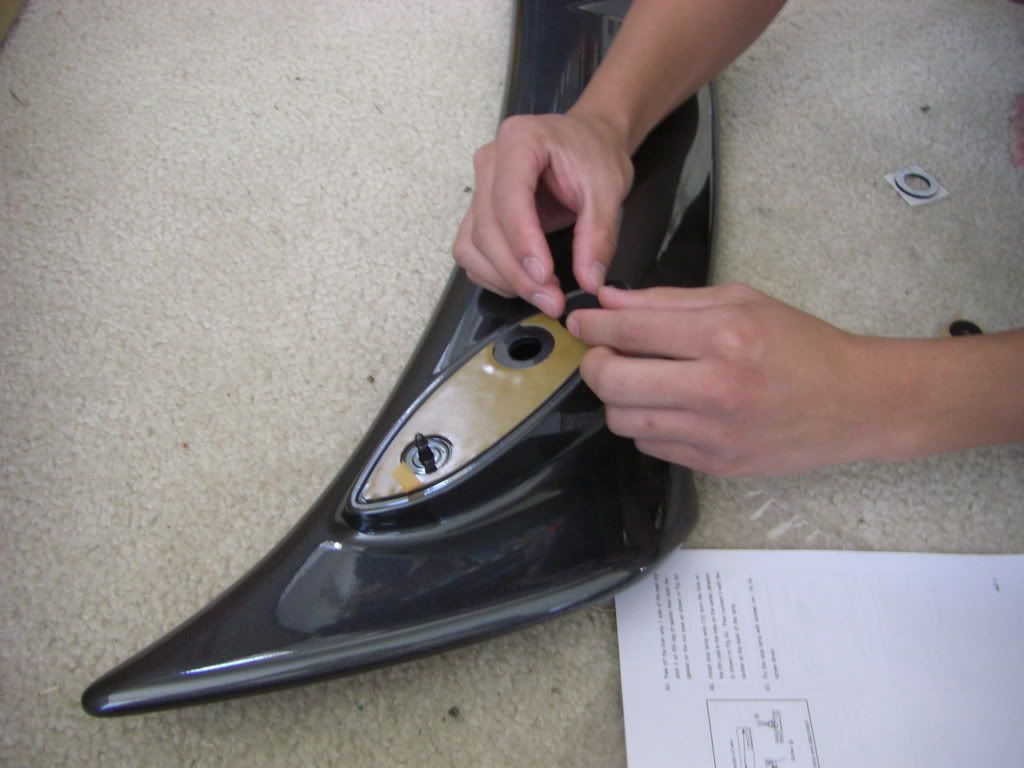 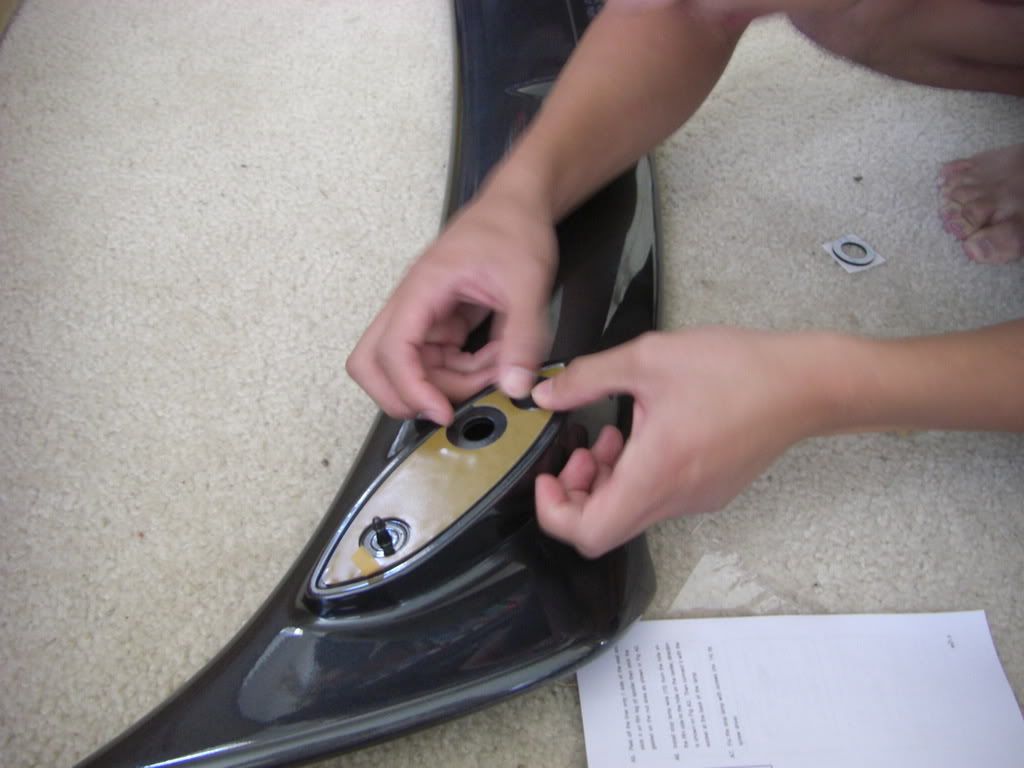 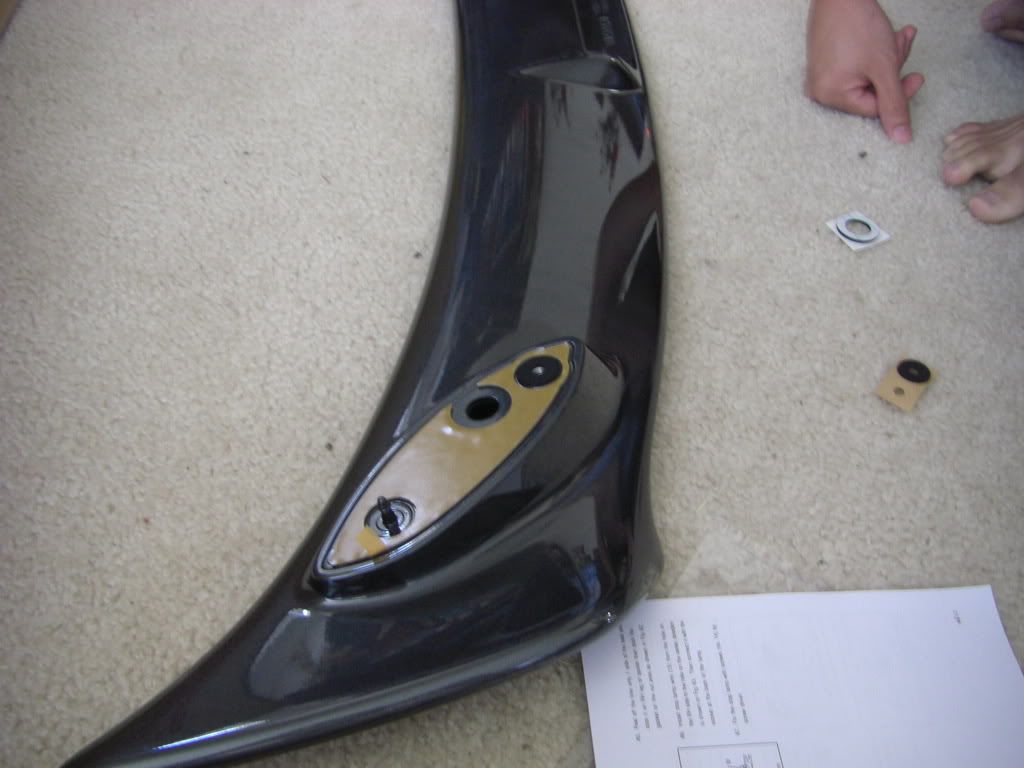 Step four: This only applies to the right leg. Peal off the film strip on one side of the gasket. Place the gasket on to the "odd" hole. This hole is for the wiring for the third brake light. Firmly and evenly press down on it. 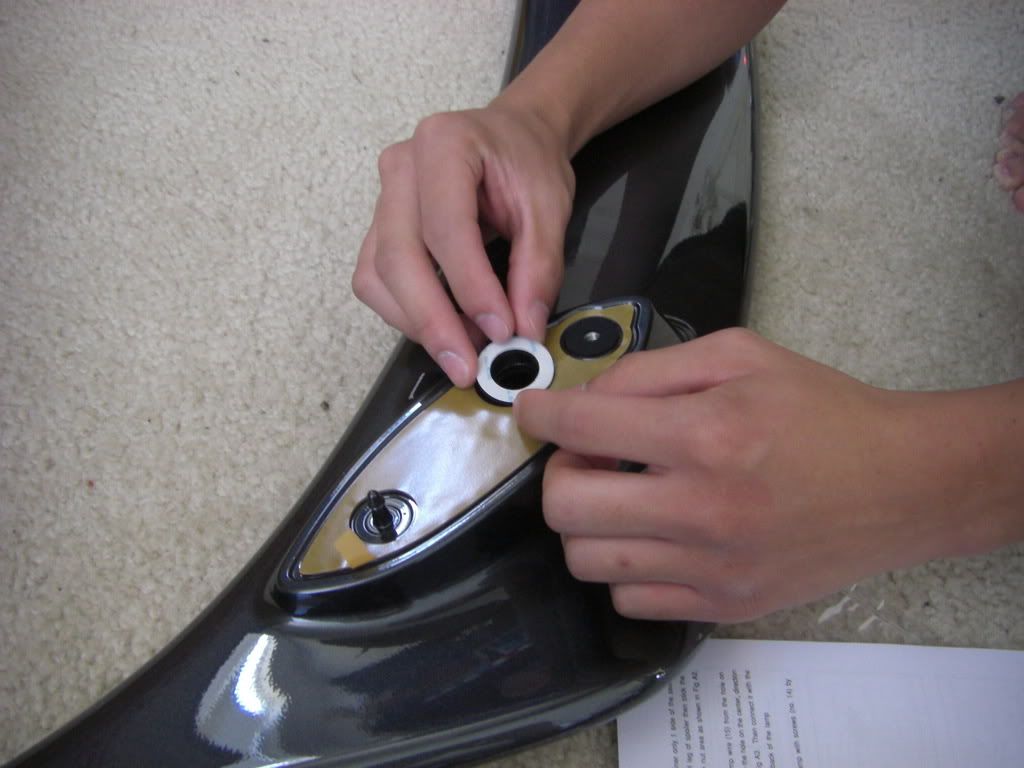 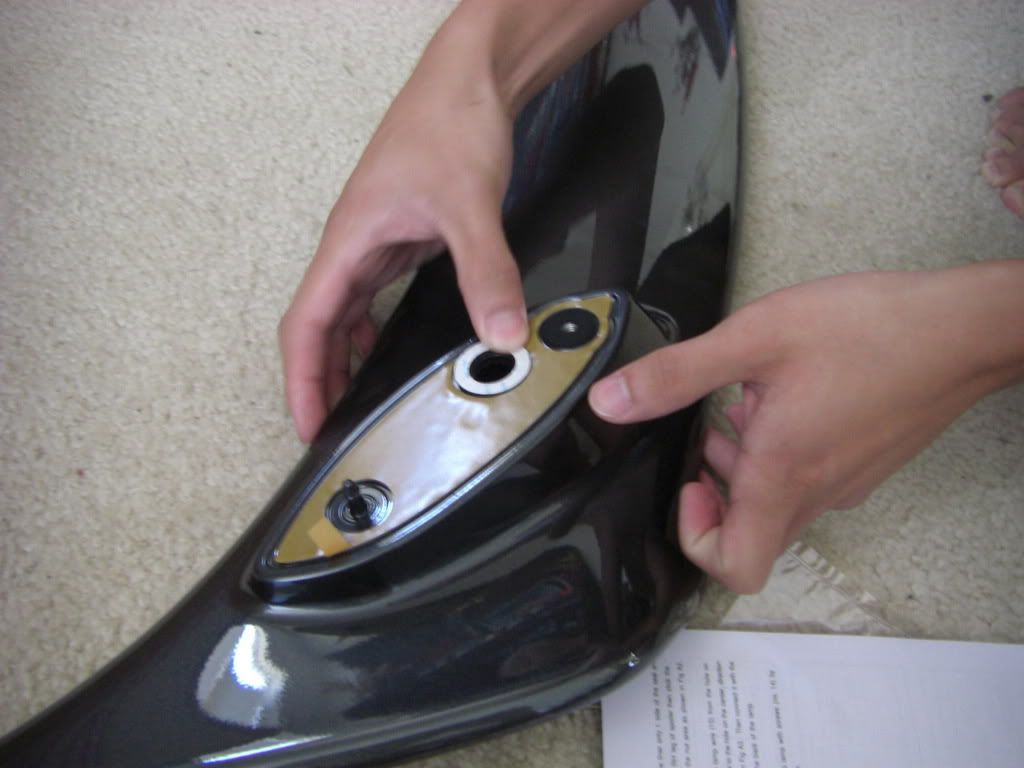
Last edited by Kaotic Lazagna; 09-04-2007 at 02:29 AM. |
|
|

|
|
|
#2 |
     |
sexy!!!!!!!!!!!
-- Blen
__________________
http://www.360voice.com/tag/noobblenjar  My Car http://www.yarisworld.com/forums/showthread.php?t=4245 My DJ www.PainlessWolf.com |
|
|

|
|
|
#3 |
       Drives: '14 GT86, '08 Vitz Join Date: Dec 2006
Location: Central Valley, CA
Posts: 9,873
|
Step five:
Repeat steps two and three for the left leg. 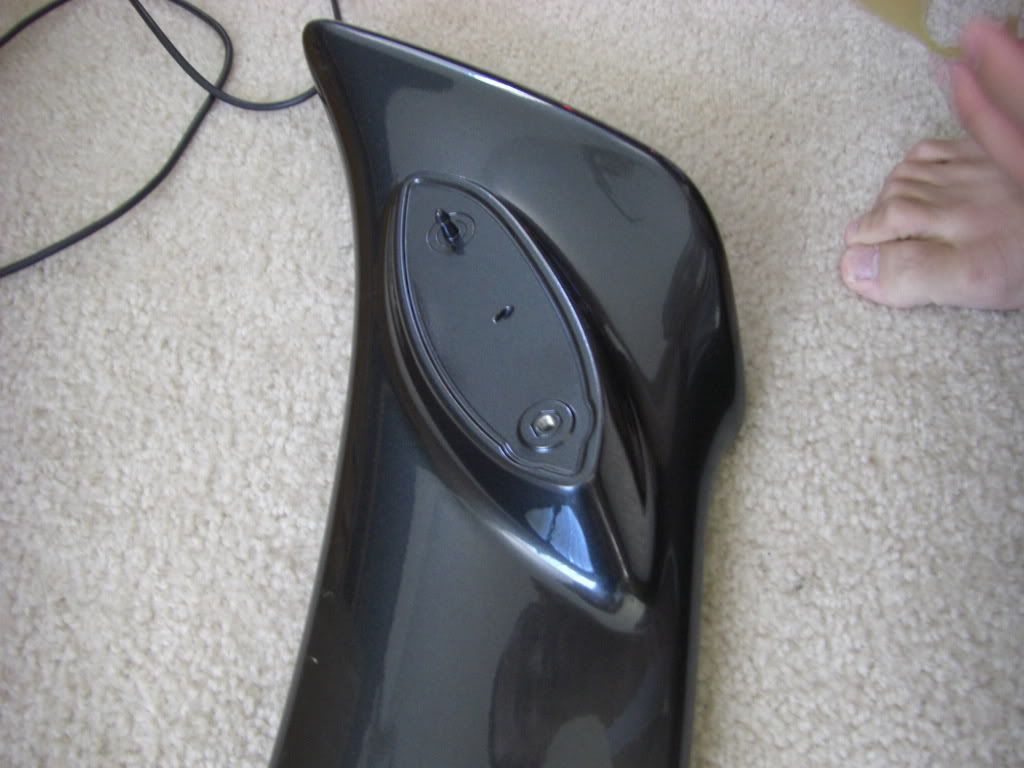 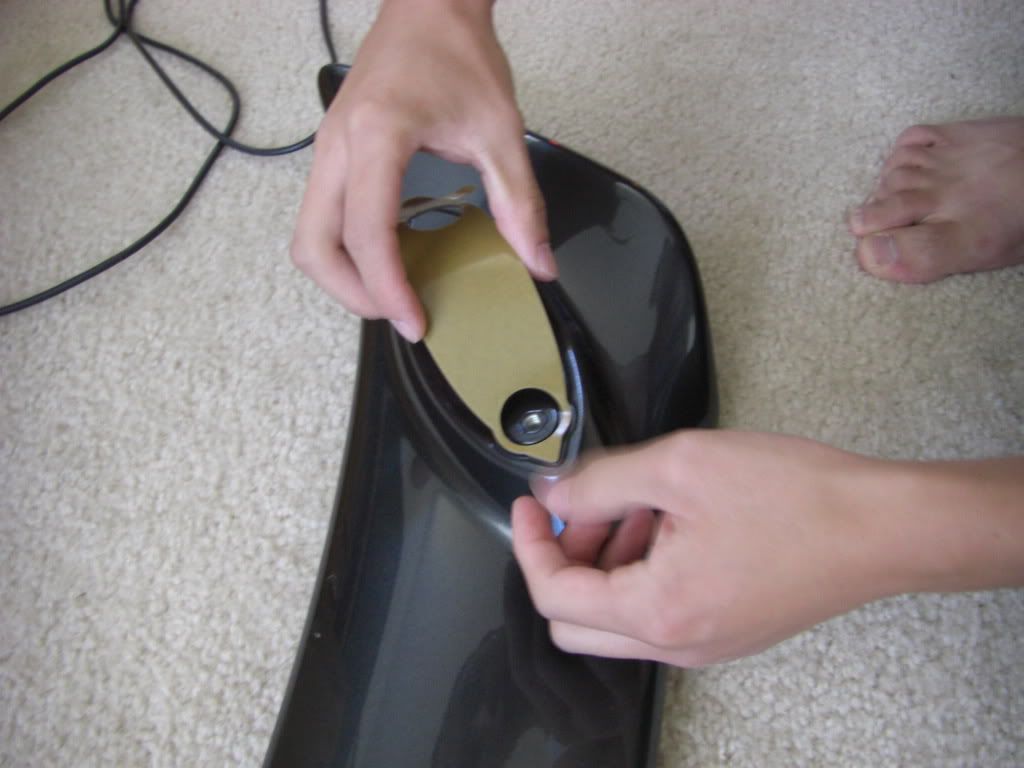 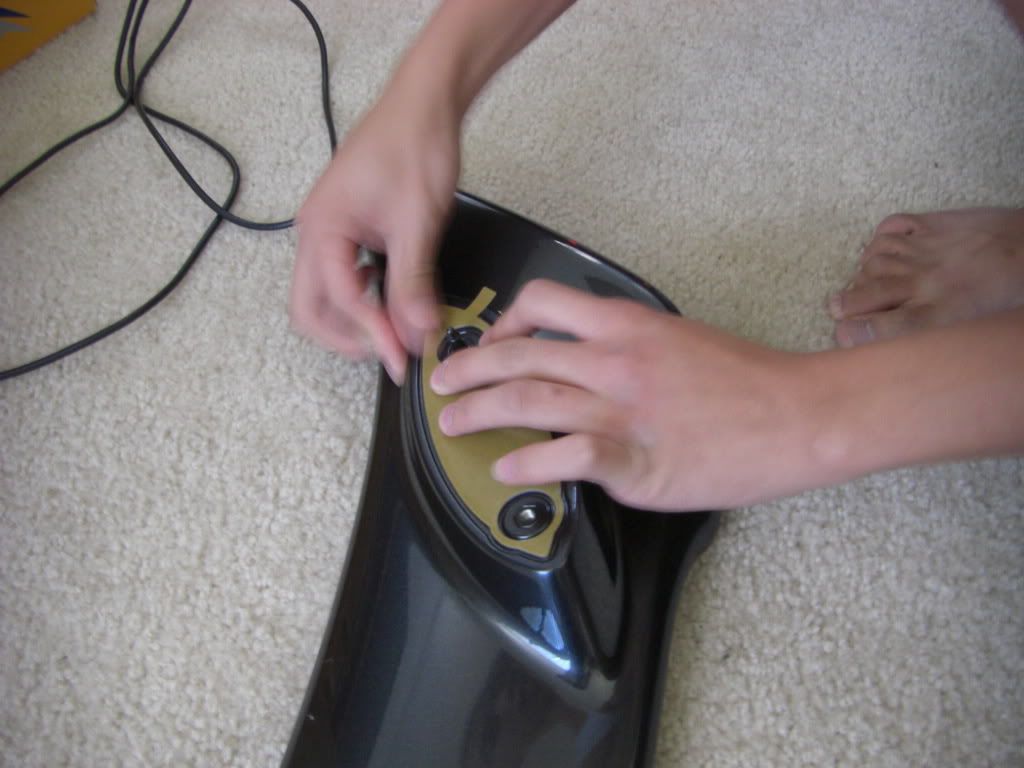 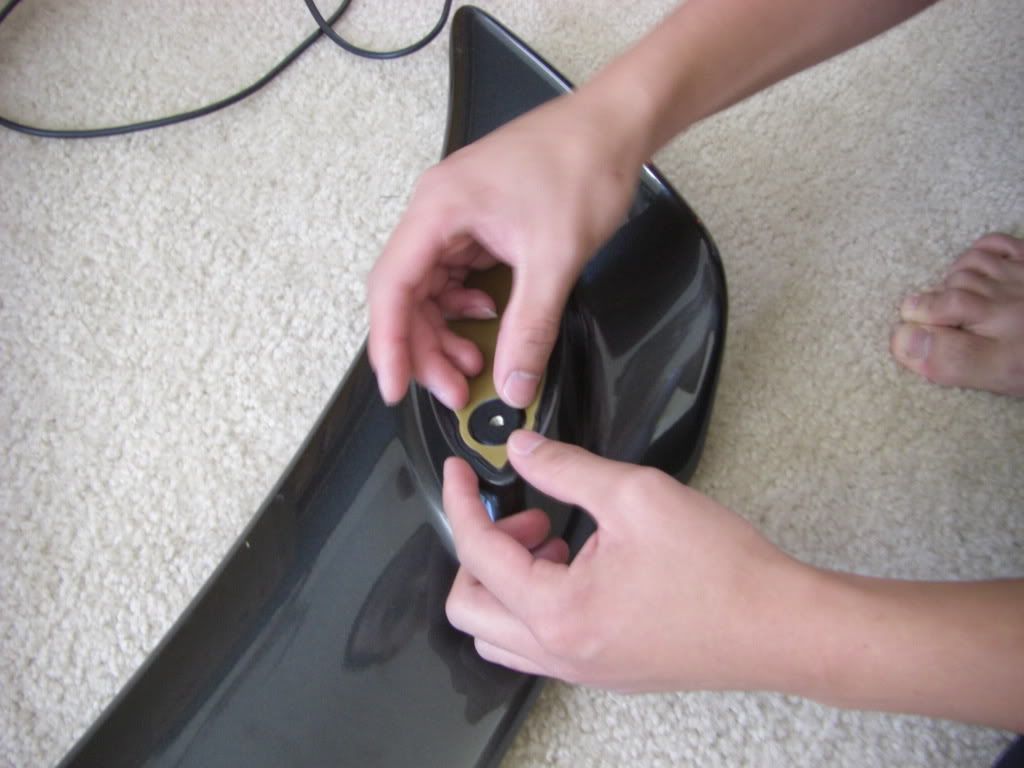 Step six: Now moving onto the third brake light. You have to get the shorter wire from this hole (hole in the middle) 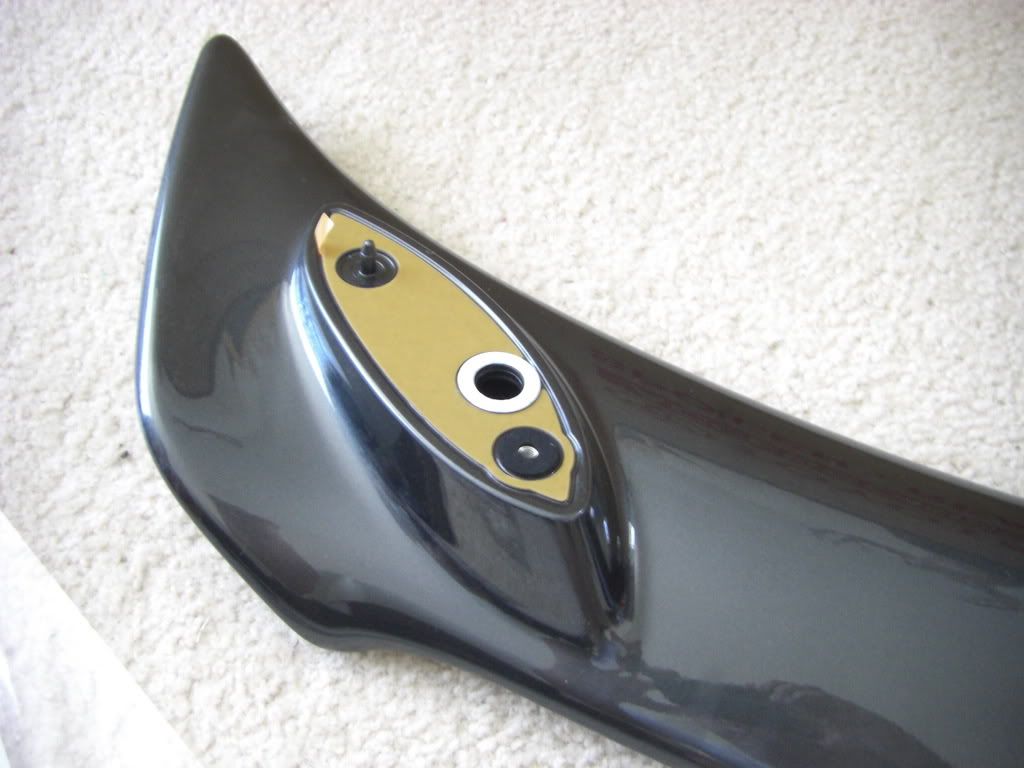 to this hole 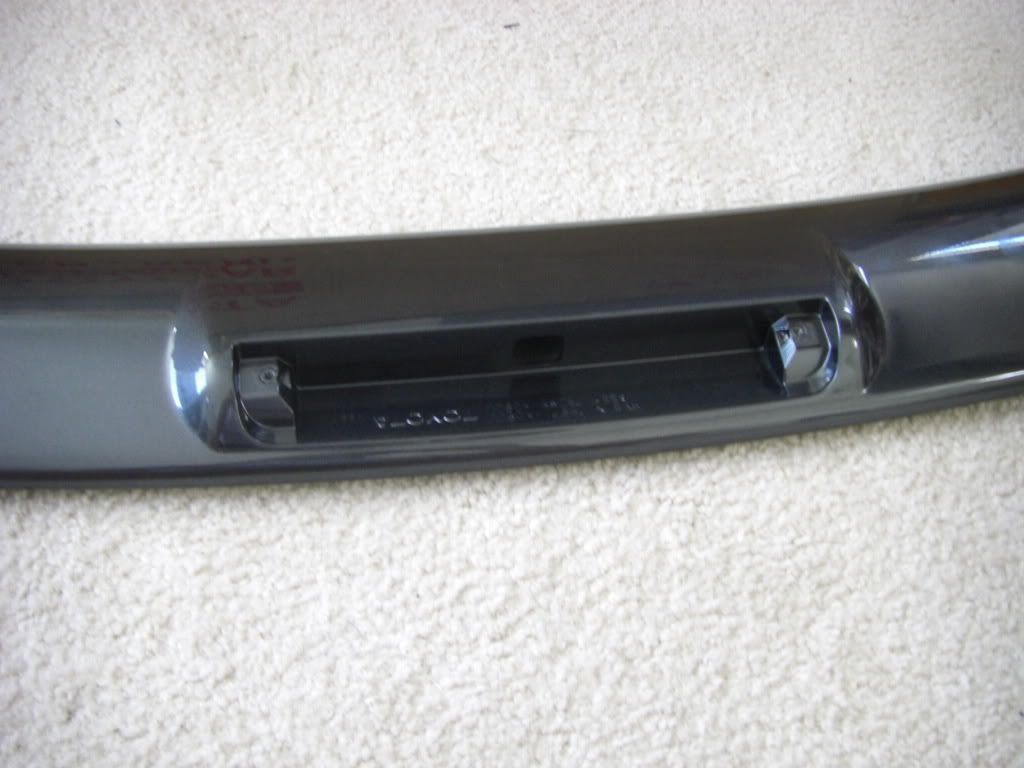 . .I started from the leg hole and threaded it to the light assembly hole. It's basically "fishing" until you can grab the connector and pull it out of the hole. lol...oh yeah, I test fitted the connector onto the LED assembly to make sure which side of the wire should go through first. 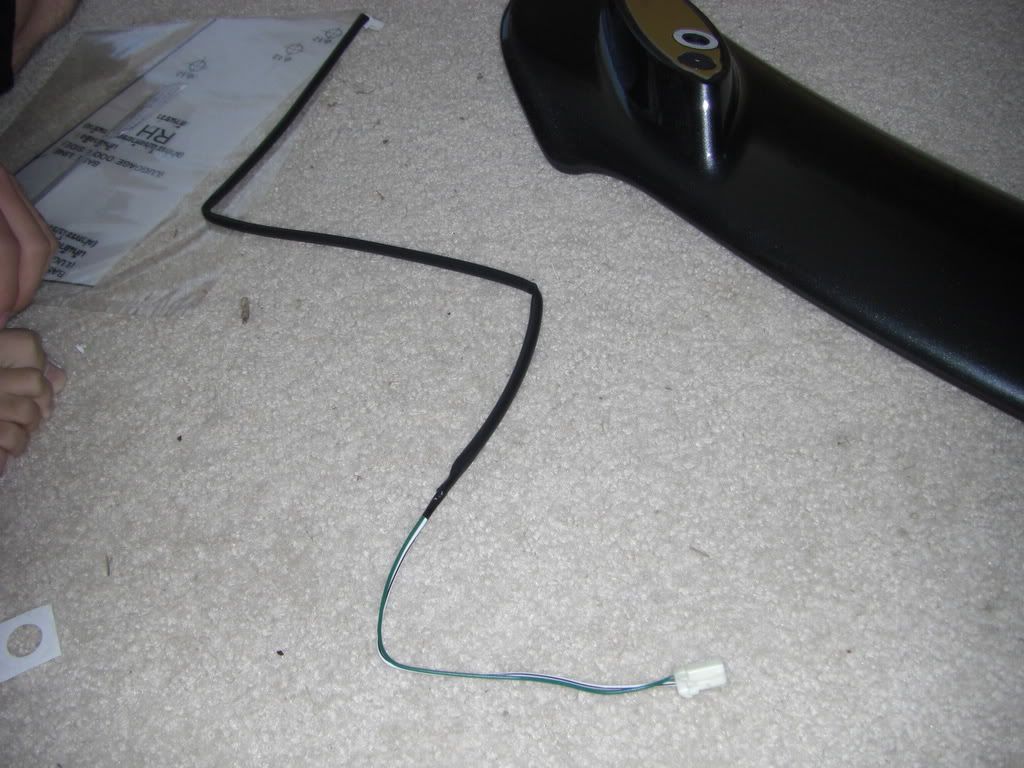 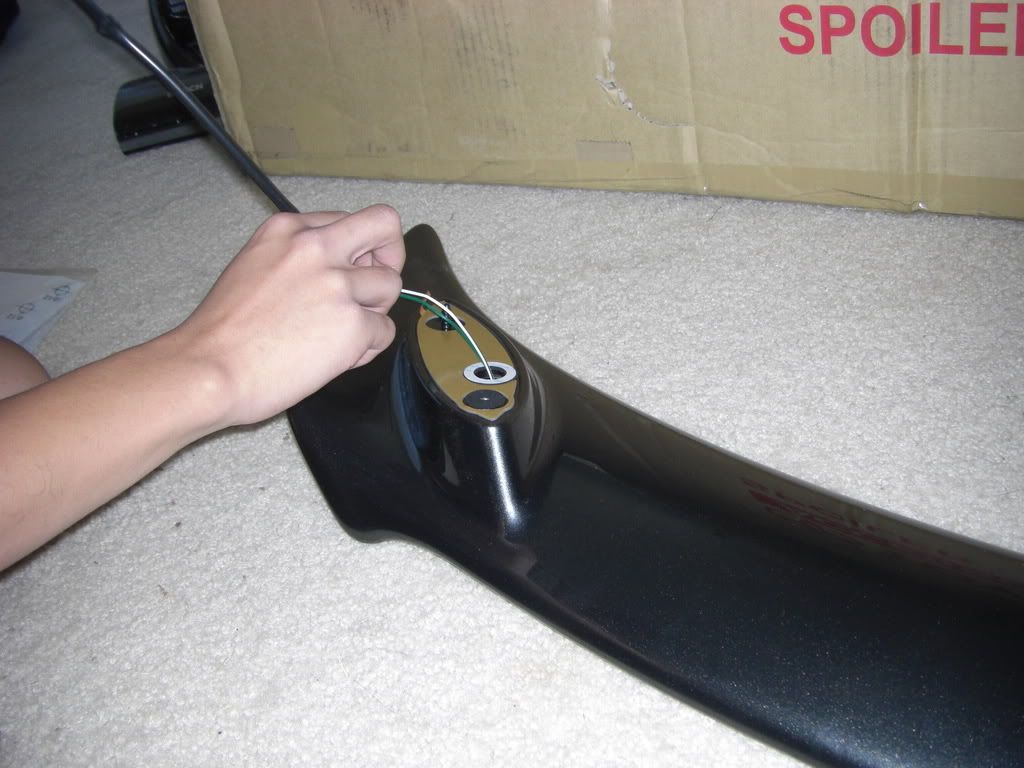 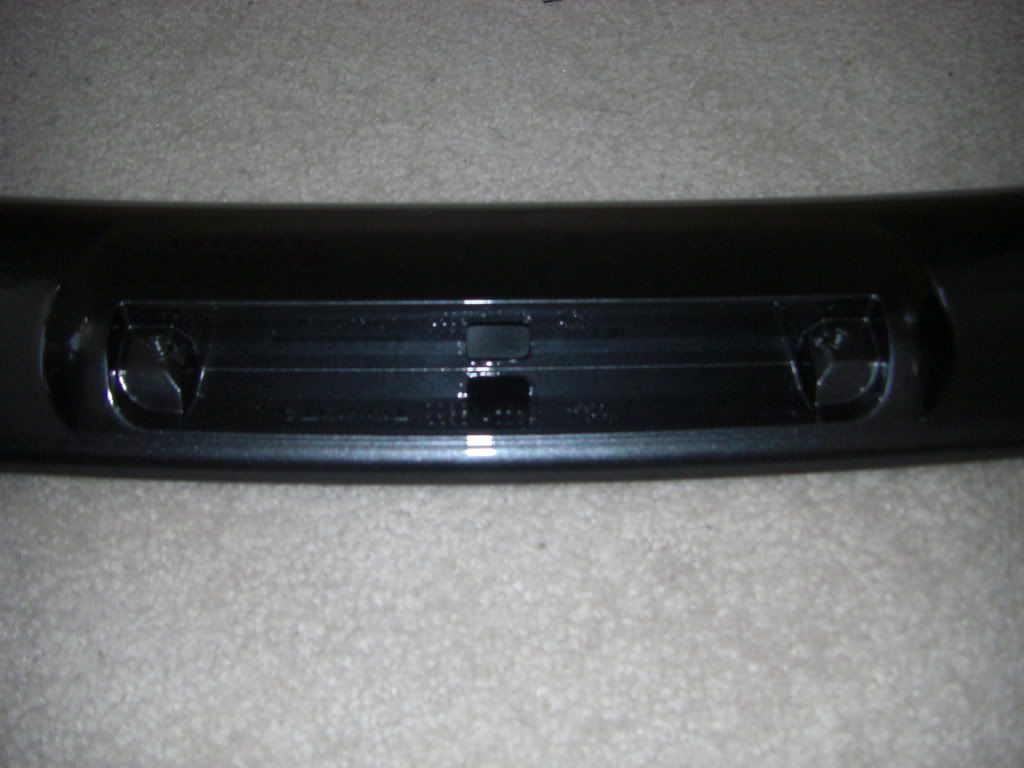 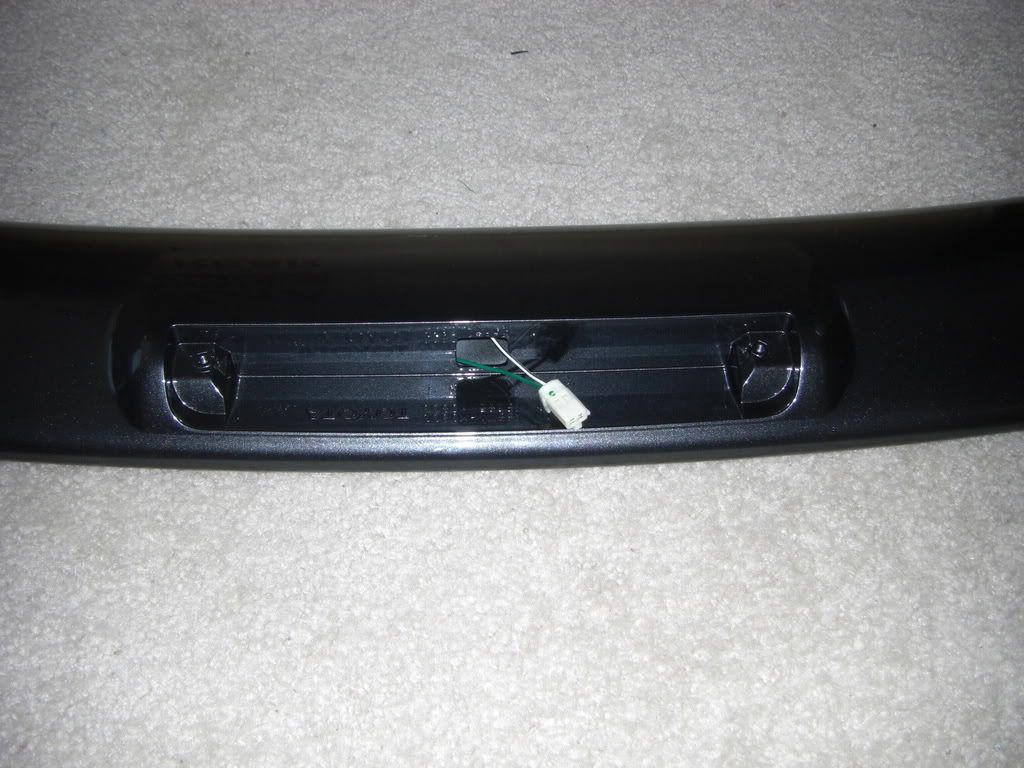 Step seven: It's time now to connect the wire to the LED assembly. Simple plug-and-play here. 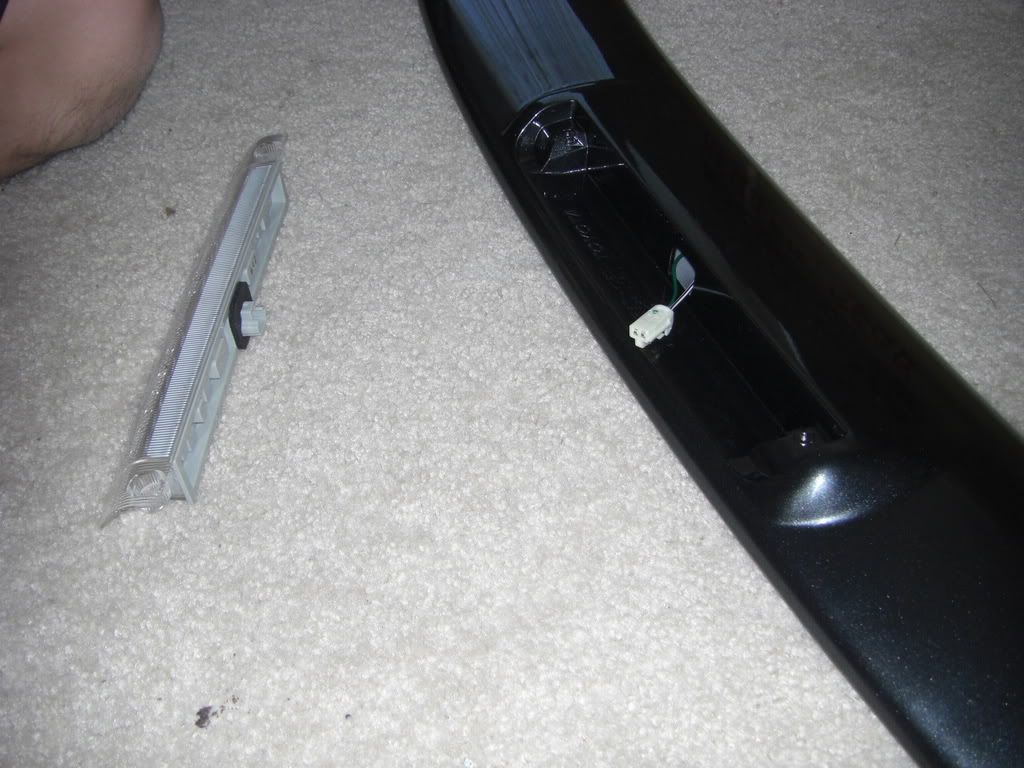 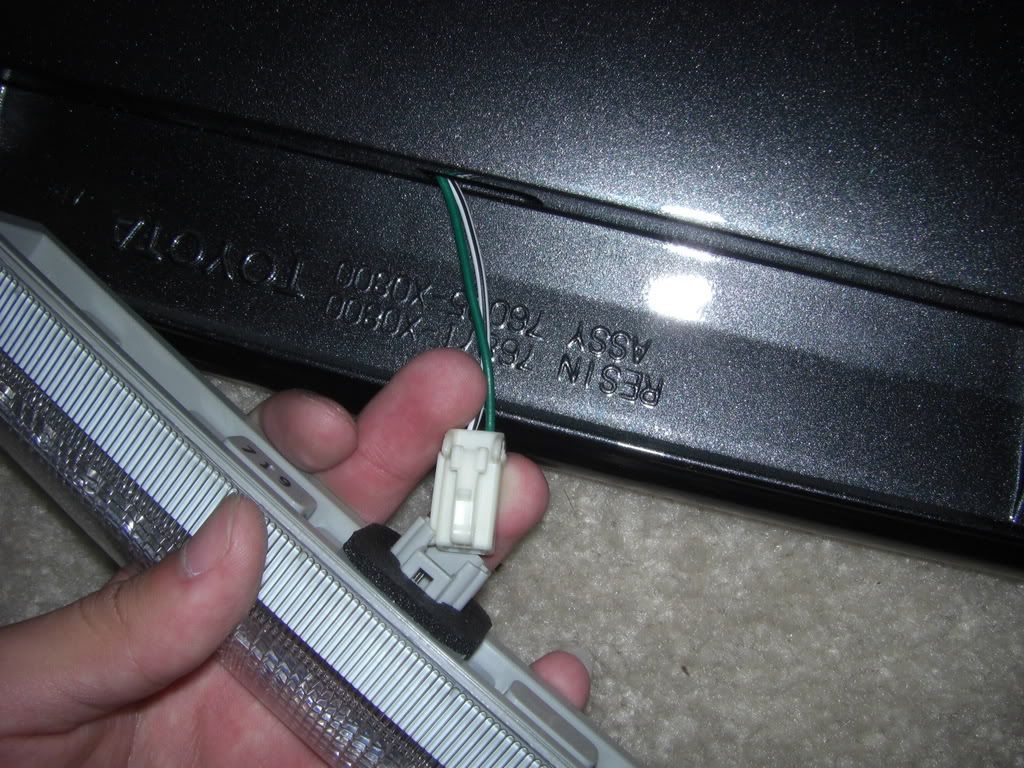
|
|
|

|
|
|
#4 |
       Drives: '14 GT86, '08 Vitz Join Date: Dec 2006
Location: Central Valley, CA
Posts: 9,873
|
Step eight:
Once you have connected the wire to the LED assembly, push the "excess part" of the wire back into the spoiler and screw down the LED assembly. There are two screws for my spoiler, yours may vary. 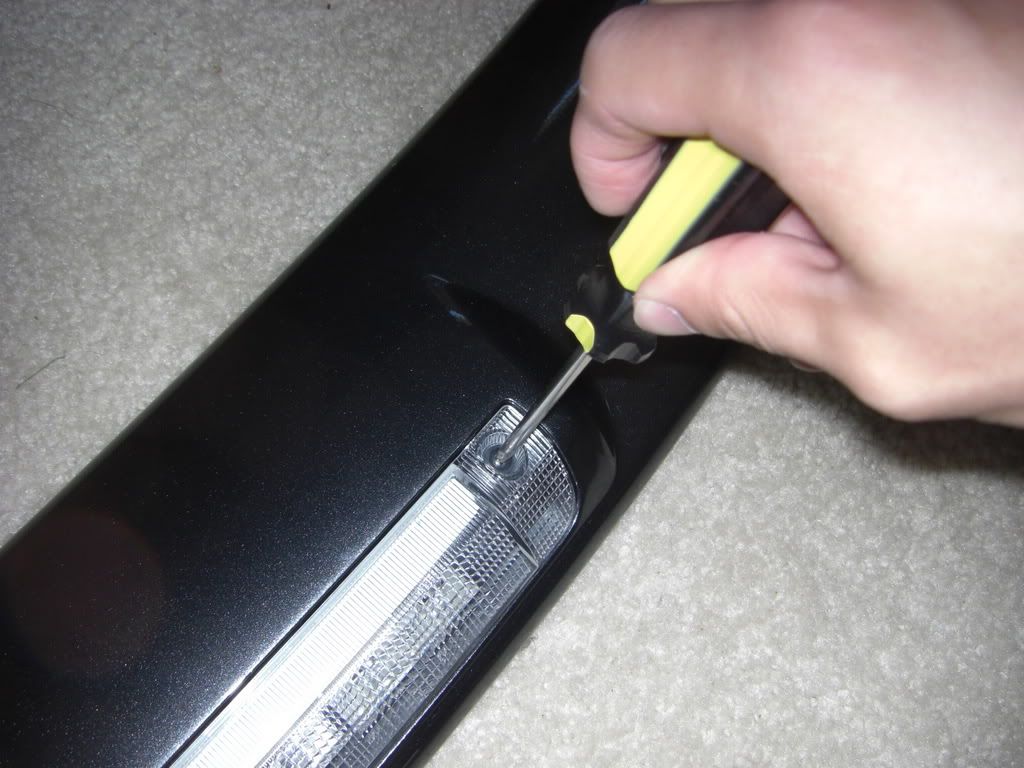 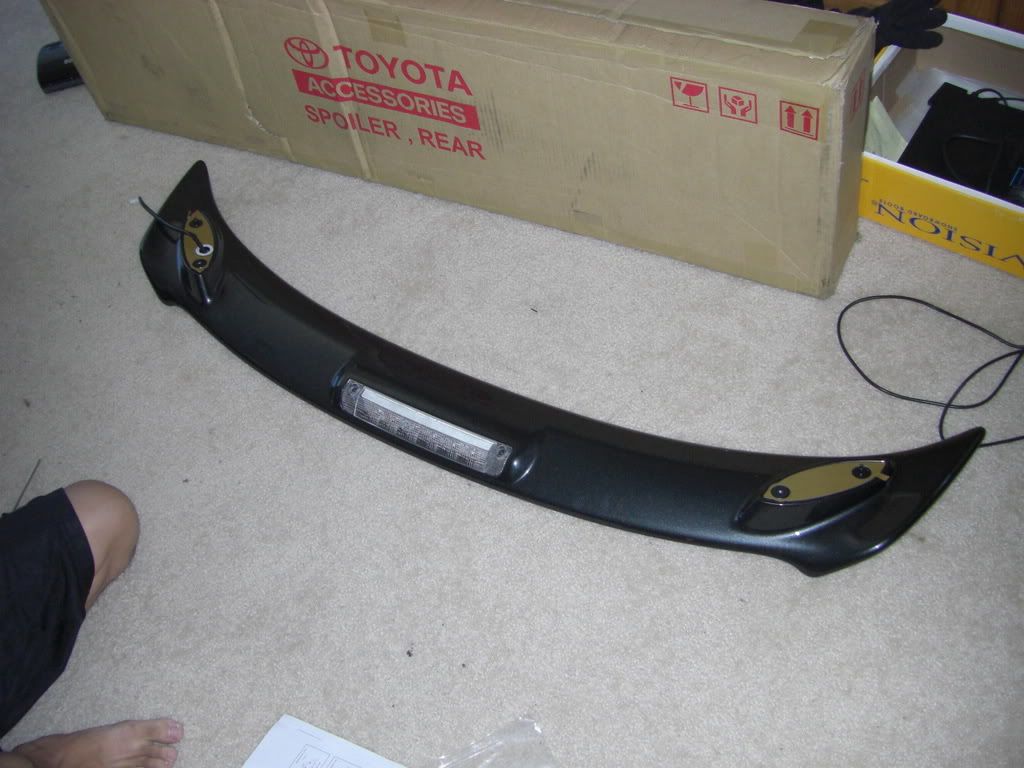 Step nine: You can leave the spoiler in a nice cool place for now. And if possible, do the remaining steps in a shaded area. My friend and I were out in the sunlight, working in what must have been 100+ degree Fahrenheit weather. Rinse off clean the trunk of your Yaris/car. Then dry with a lint/scratch-free cloth/drier. Since it was 100+ degrees, it dried by itself within 30 seconds. I dried the remaining drops with the cloth. 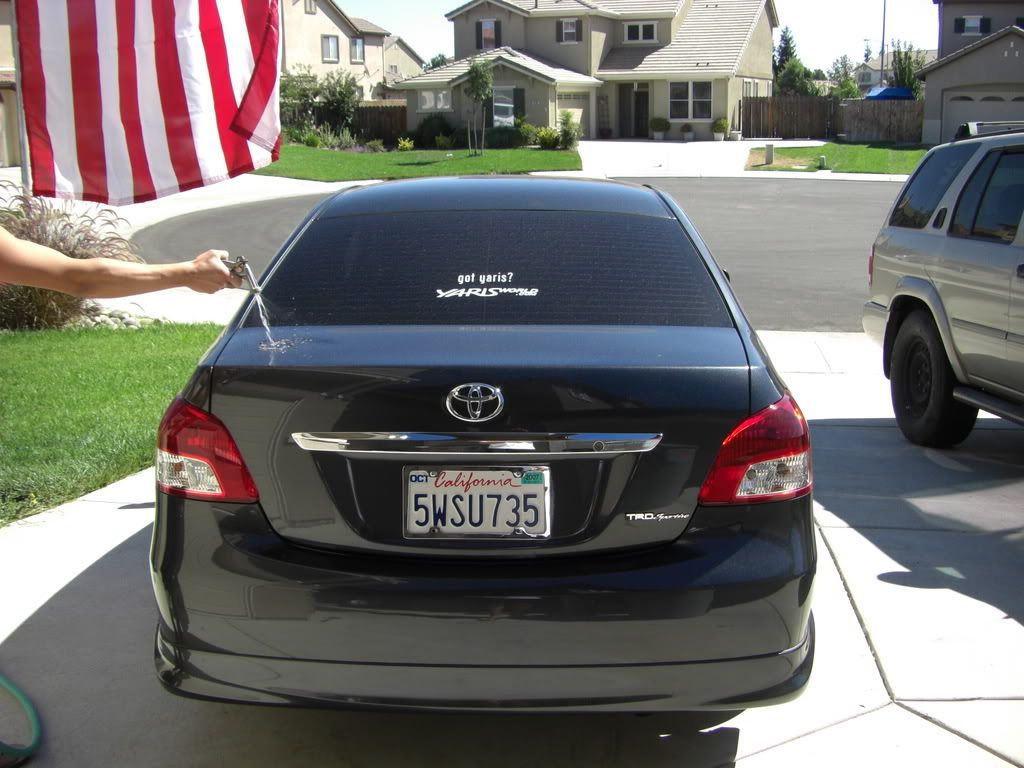 Step ten: Now it gets to the harder parts. Take your time here. If you were given templates, it'll be much easier. Take the templates provided and place them where they're supposed to be. Mine requires the templates to be at the tip of the front and sides of the trunk. Tape a very small section to prevent it from moving. With a measuring tape, measure the specified distance with the most rear cross-hair (with mine at least). Sorry, no pics of the tape measure part since both me and my friend were doing it (no one to take the pic). Once everything is in proper distances, tape the templates down, making sure you do not move it out of place. If you do not get the correct distance, then move the templates and re-measure. Repeat until the correct distance is achieved. *I recommend painters tape (you know, that blue one) instead of the tape we used (regular masking tape). 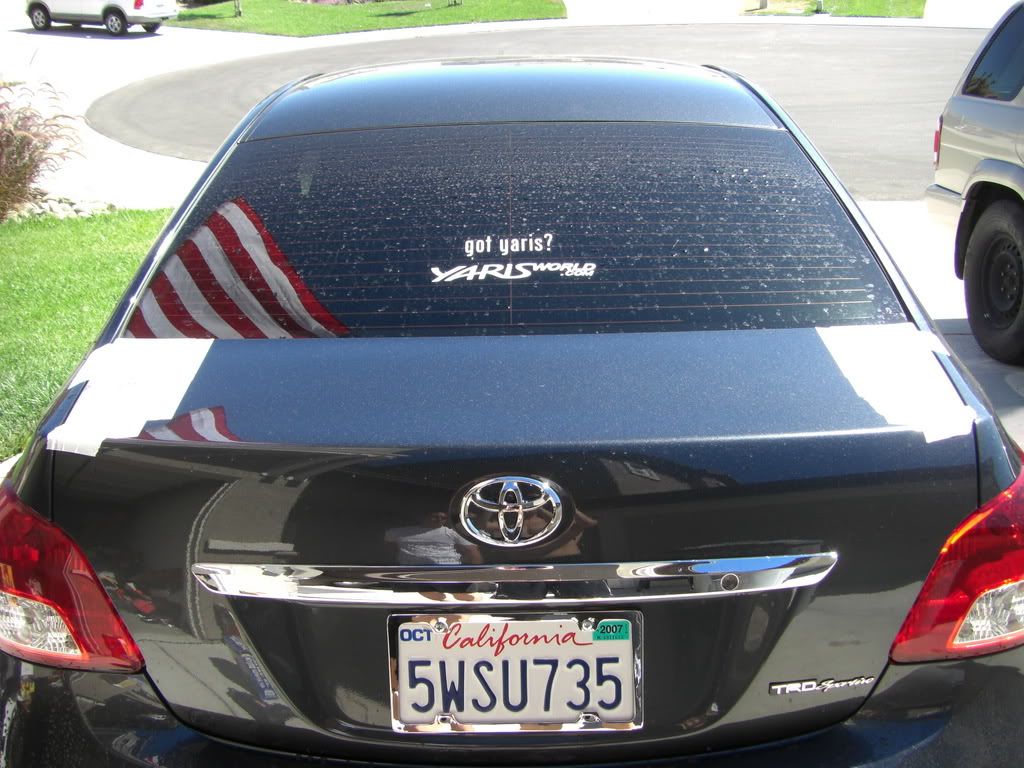 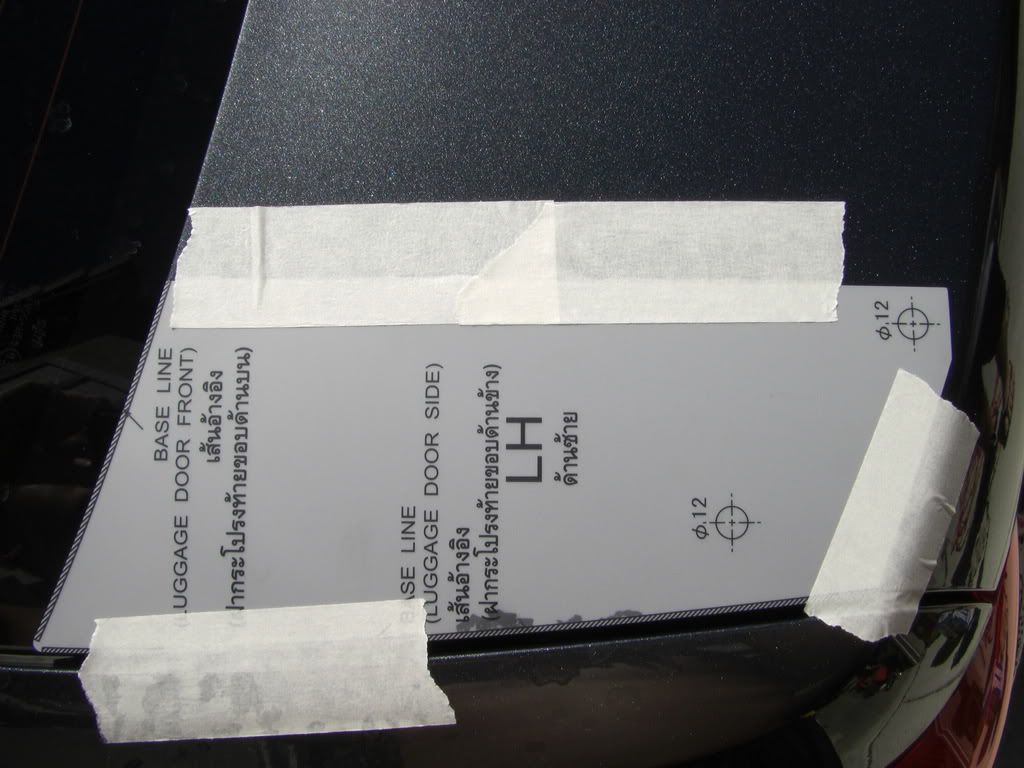 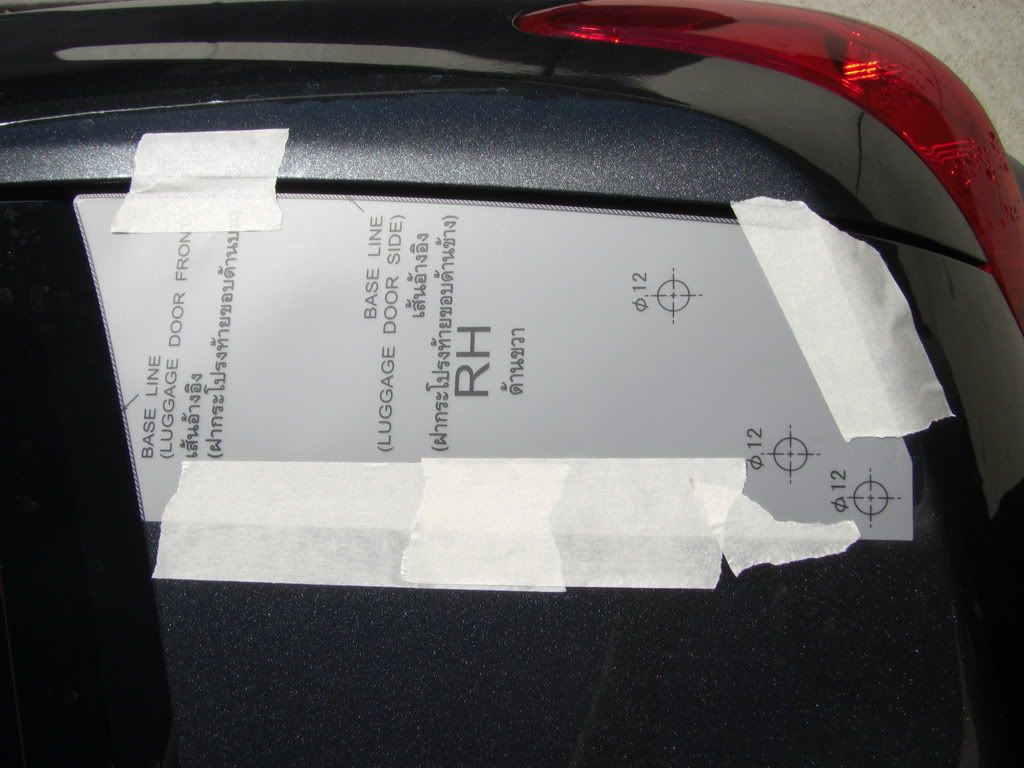
|
|
|

|
|
|
#5 |
       Drives: '14 GT86, '08 Vitz Join Date: Dec 2006
Location: Central Valley, CA
Posts: 9,873
|
Step eleven:
Now that everything has been correctly measured and taped down, open your trunk. You will have to take off the lining/carpeting from the trunk. To do this, you must remove these (not sure what they are called, but i call them suicide screws since if you take them off wrong, they're gone). I didn't have to proper tool for this, so I improvised. I took a flat head screw driver and pried them off slowly by rotating the screw why prying it off. Once all of these are removed, you can take off the carpeting. 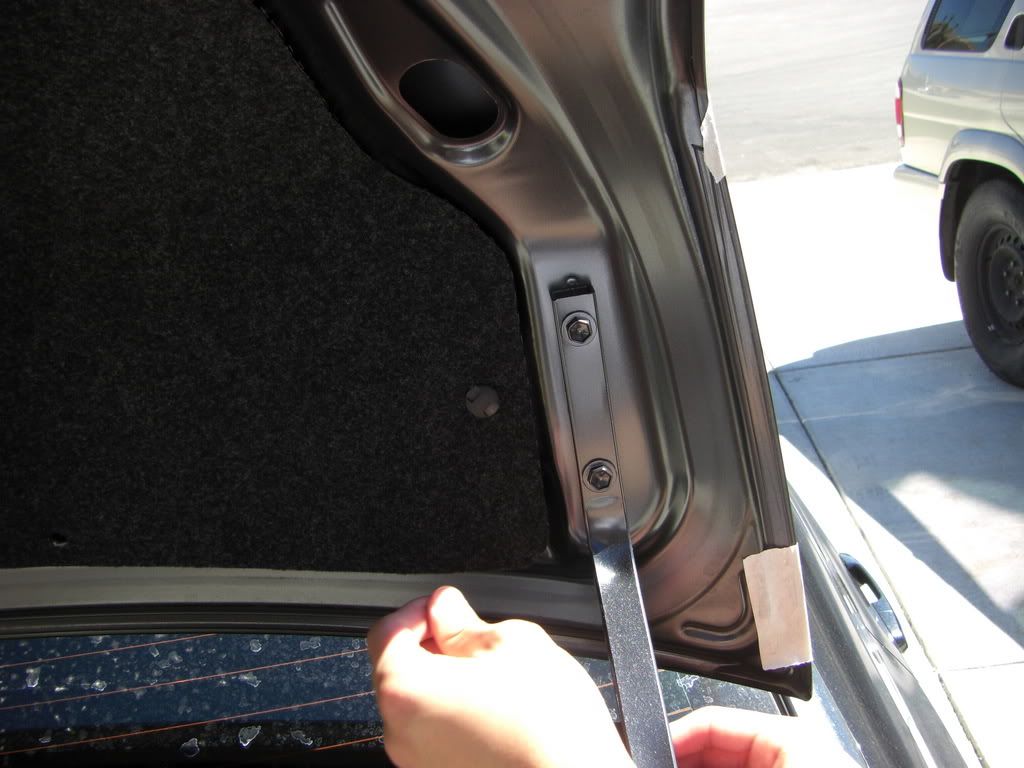
|
|
|

|
|
|
#6 |
       Drives: '14 GT86, '08 Vitz Join Date: Dec 2006
Location: Central Valley, CA
Posts: 9,873
|
i will continue in a bit, it's time for a break for me.
|
|
|

|
|
|
#7 |
       Drives: '14 GT86, '08 Vitz Join Date: Dec 2006
Location: Central Valley, CA
Posts: 9,873
|
Step twelve:
Sorry, I do not have a pic for this step...but it's simple. See all the cross-hairs  on all of them (total of five for me, left and right sides), take a drill bit and place it over the middle of the crosses. Then hammer the bit once or twice to give you a nice guide-dent. Step thirteen: Once you have the guide-dents in, you will need guide-holes. Take a 3 mm drill bit, and drill into the trunk. Be careful to not drill the entire length of the bit or else you'll be drilling into the inner layer. As you can see, I stuck some tape on the bit so I know where to stop. VERY CRUCIAL: mask off the area with at least two layers of tape before you start drilling, or else you might get a scratch like mine! 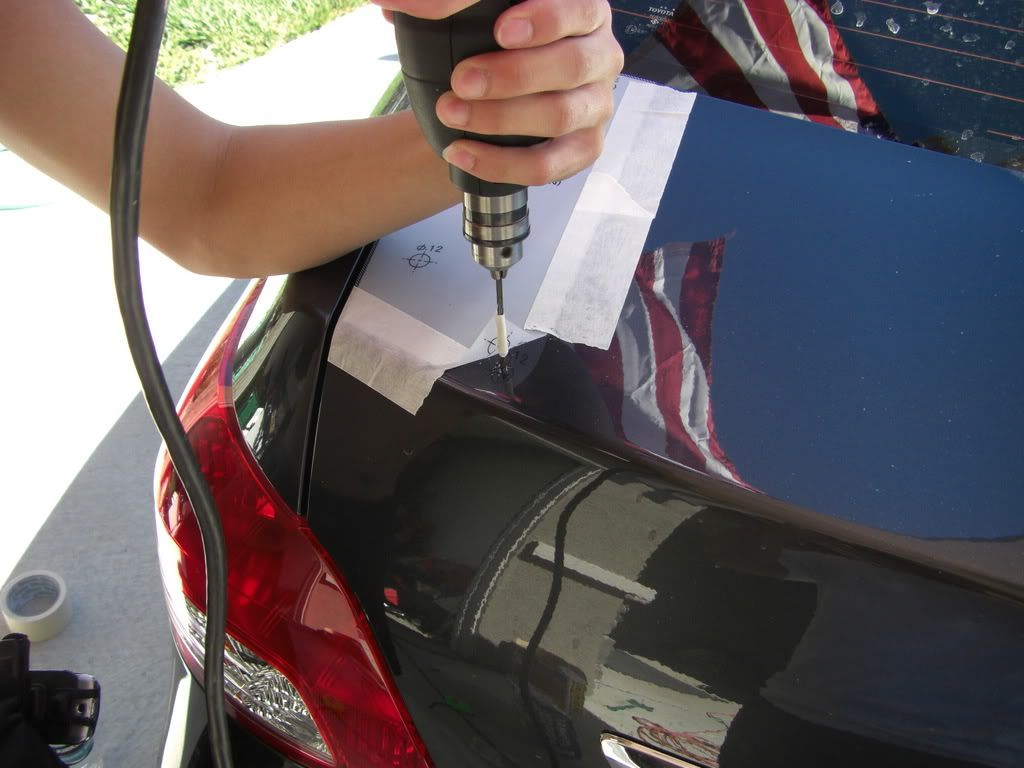 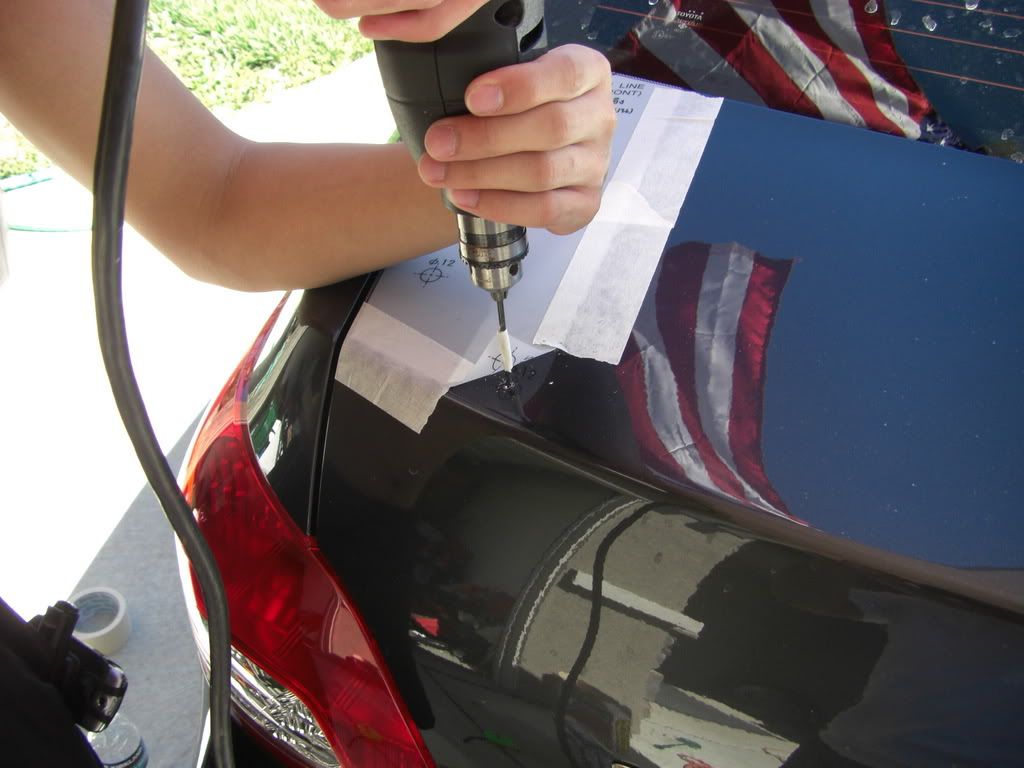 Do this for all the holes necessary. 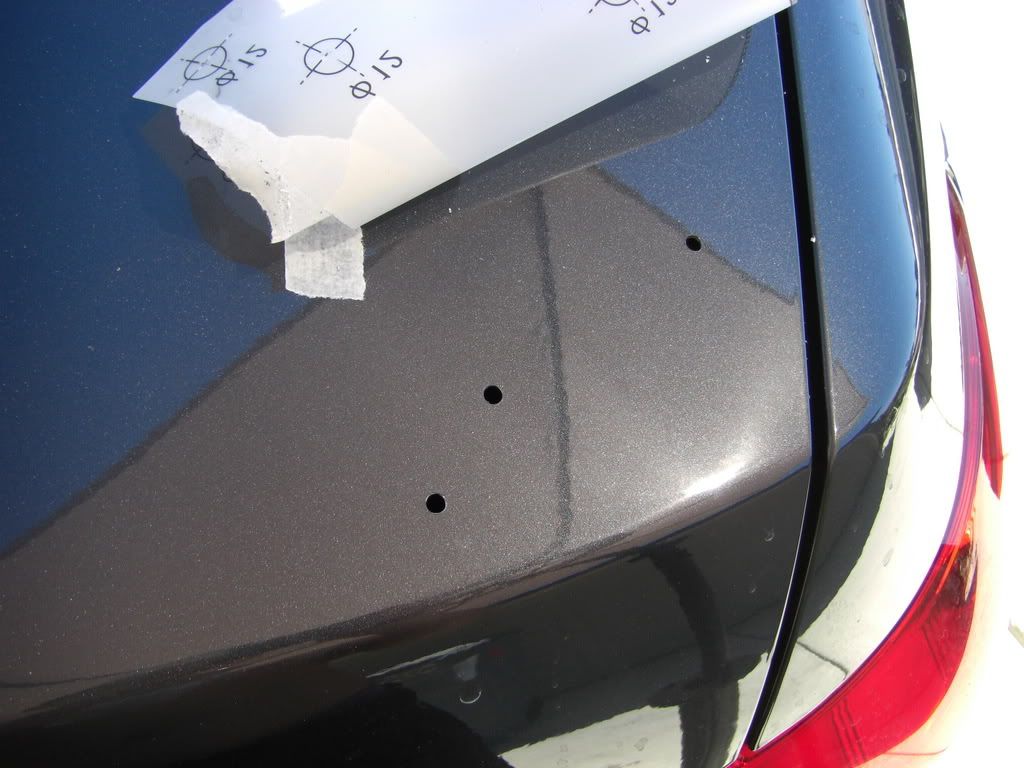 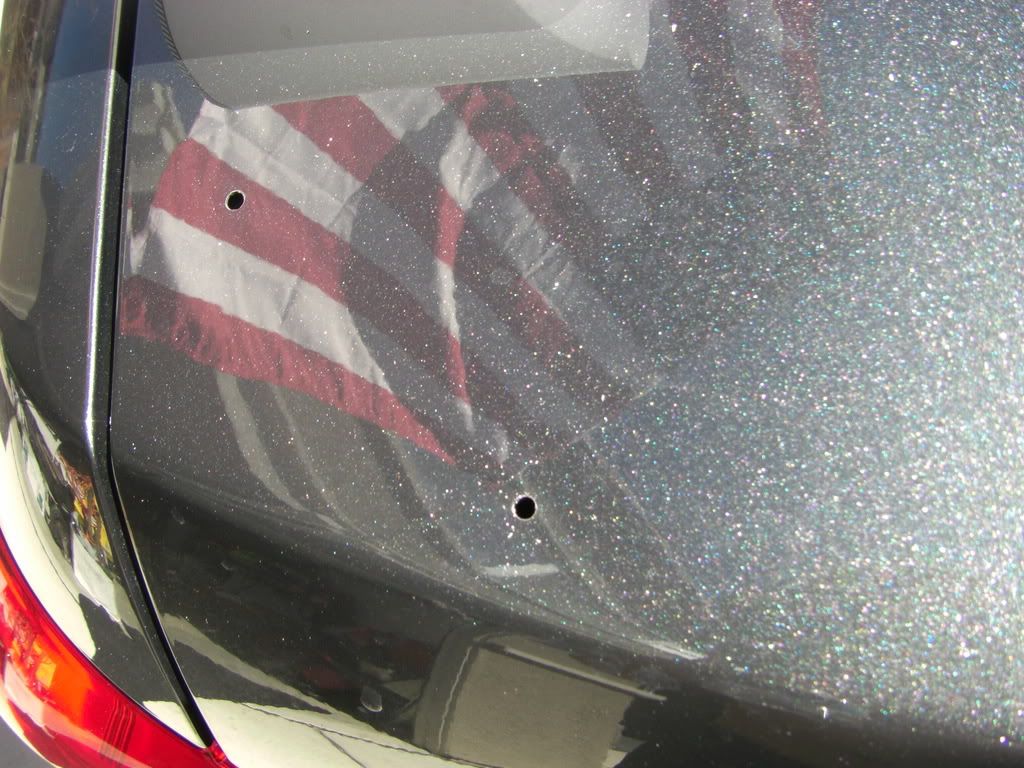
|
|
|

|
|
|
#8 |
       Drives: '14 GT86, '08 Vitz Join Date: Dec 2006
Location: Central Valley, CA
Posts: 9,873
|
Step fourteen & fifteen:
This will be a lot easier if you have a unibit/step bit (what ever it's called, can one of the mods fix this for me) or a hole saw. You want to enlarge the holes to the proper size. For me, it was 12 mm. I did not have these bits, so we just filed away at the metal with the largest drill bit we had. This took forever (90% of the total time). My spoiler uses a nut and a pin-head lock to hold down the spoiler. So after I made the 12mm hole, I plugged the forward most hole with the rubber clip for the pin-head to lock into. My clip had a pill shape lock in it, and required to be in a left to right placement. Like this: <==> 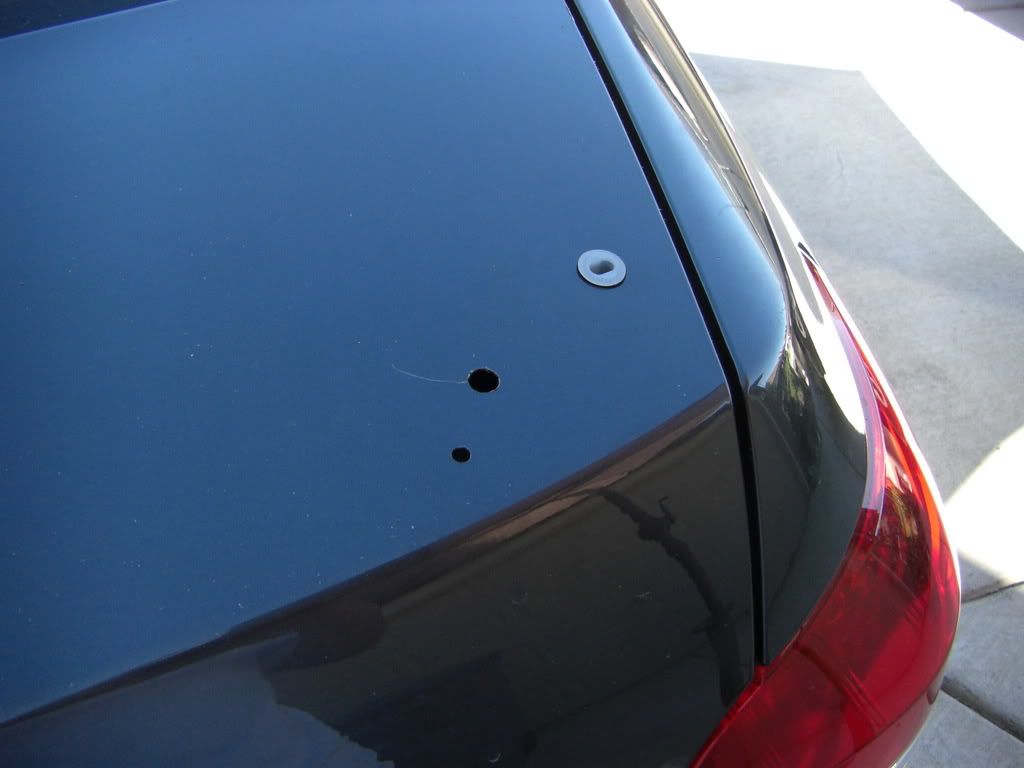 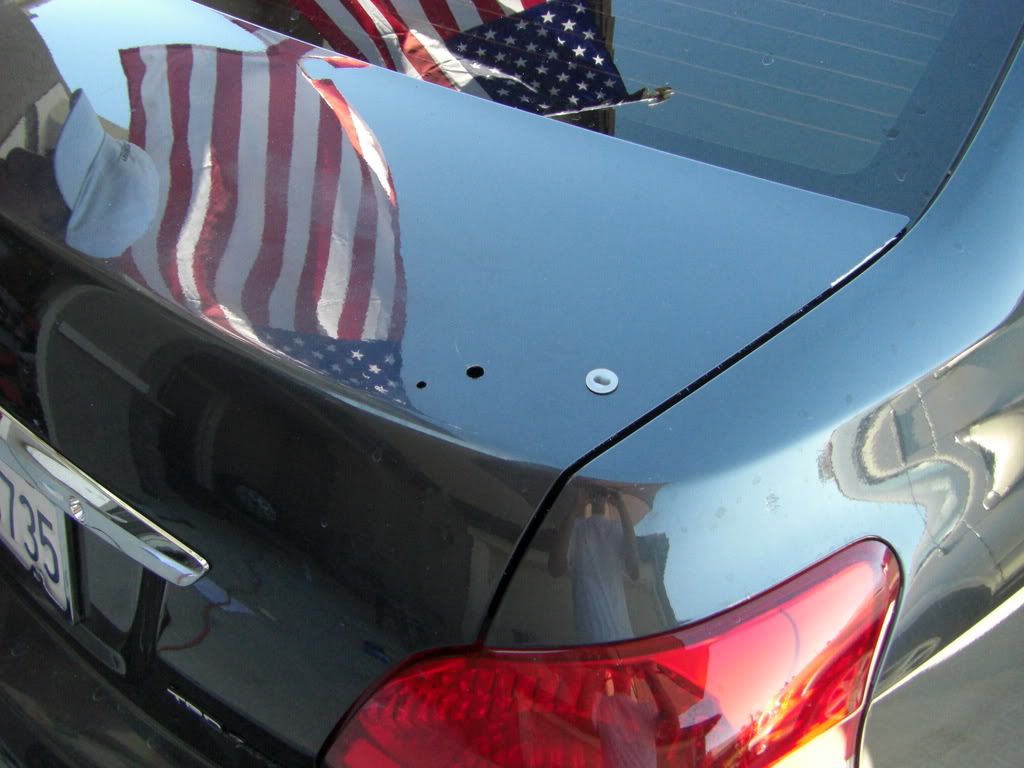 Step sixteen: Unclip the connector from the existing third brake light. No pictures of this, sorry (really pressured in time by now). Step seventeen: Have a friend thread the wire that on the spoiler through the "odd" hole while you are holding the spoiler. Once it's through, remove all the remaining film strips, position the spoiler correctly, and press down until the spoiler sits flush with the trunk. (Sorry, no pics for this step either). Step eighteen: With a socket wrench and an extension, screw down the provided bolts. To prevent losing the bolts, I recommend rolling a small piece of tape inside out and sticking it to the bolt before you put it in the wrench. I only have a picture showing where it is at... 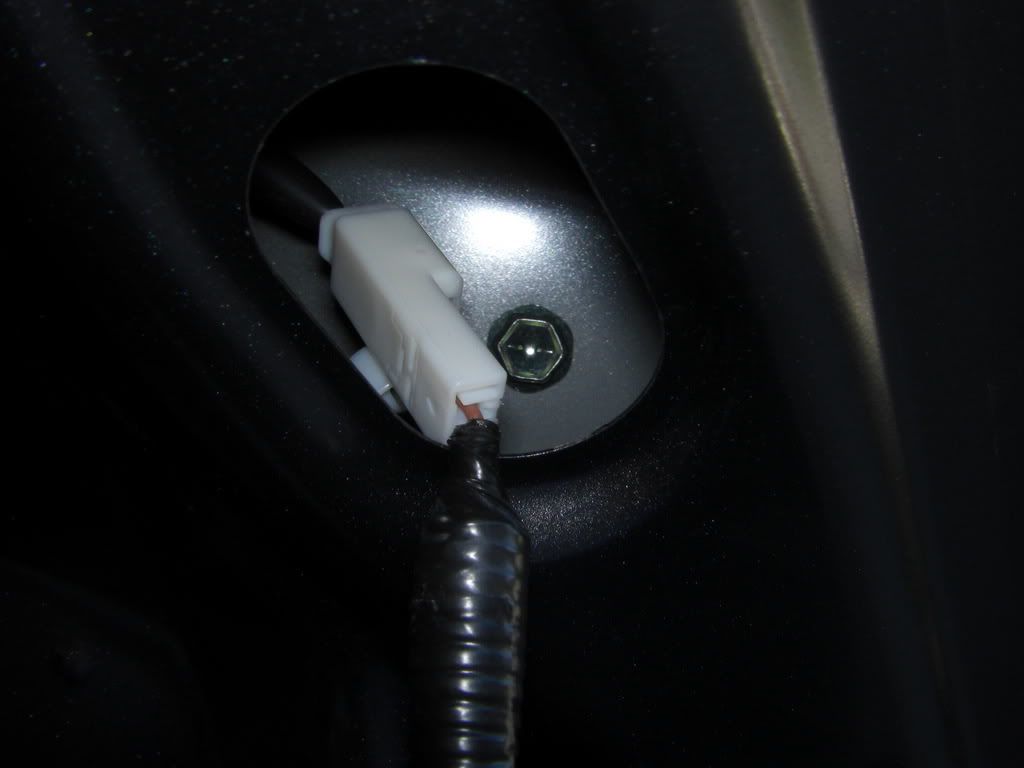 Step nineteen: Connect the longer wire to the existing third brake light connector and to the short wire that's from the spoiler. 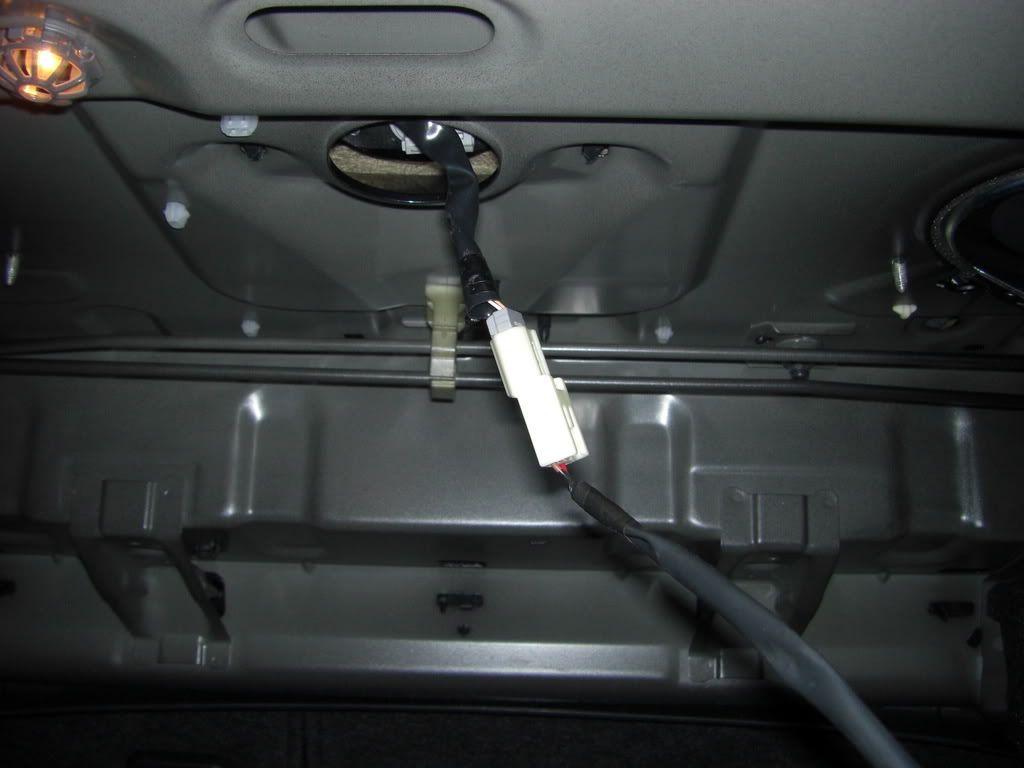 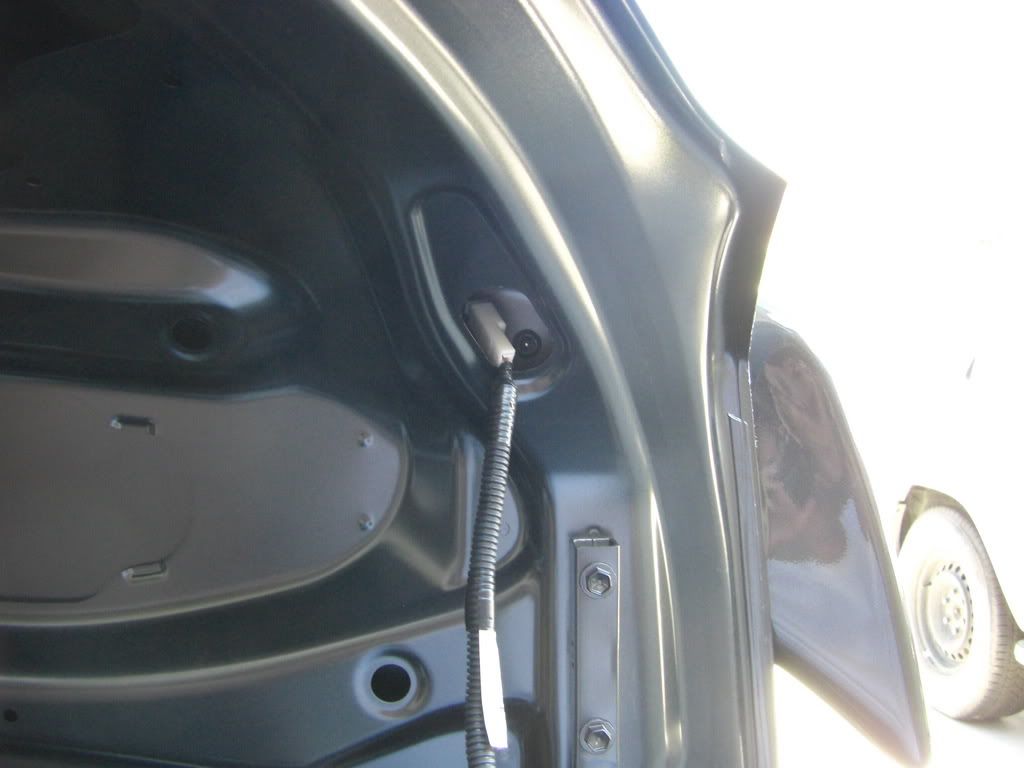 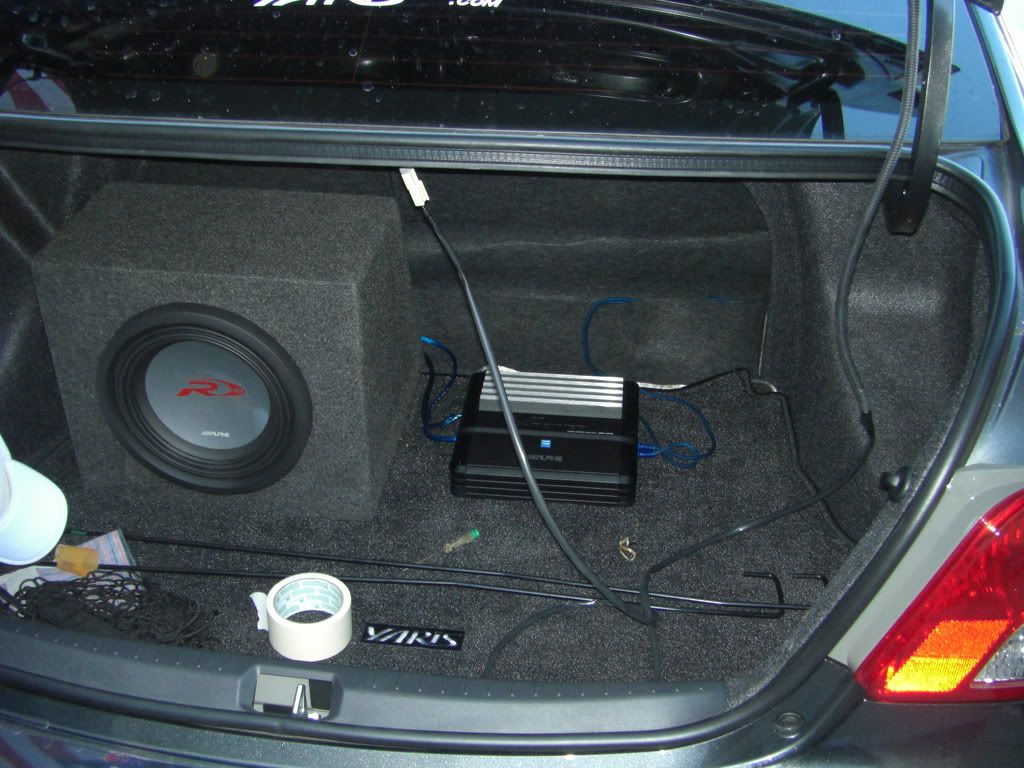 With the provided zip-ties, tie down the wire so it does not dangle (didn't have the time to do this, so mine is still hanging). Step twenty: I did not get the chance to do this, but you should replace the tension rods with the ones provided. I'm not sure if you have to, but it makes opening and closing the trunk easier since the provided ones are stiffer/stronger than the existing ones.  They're the horizontal rods in the background. I was about to replace them, but I absolutely had no more time. And the finished product: 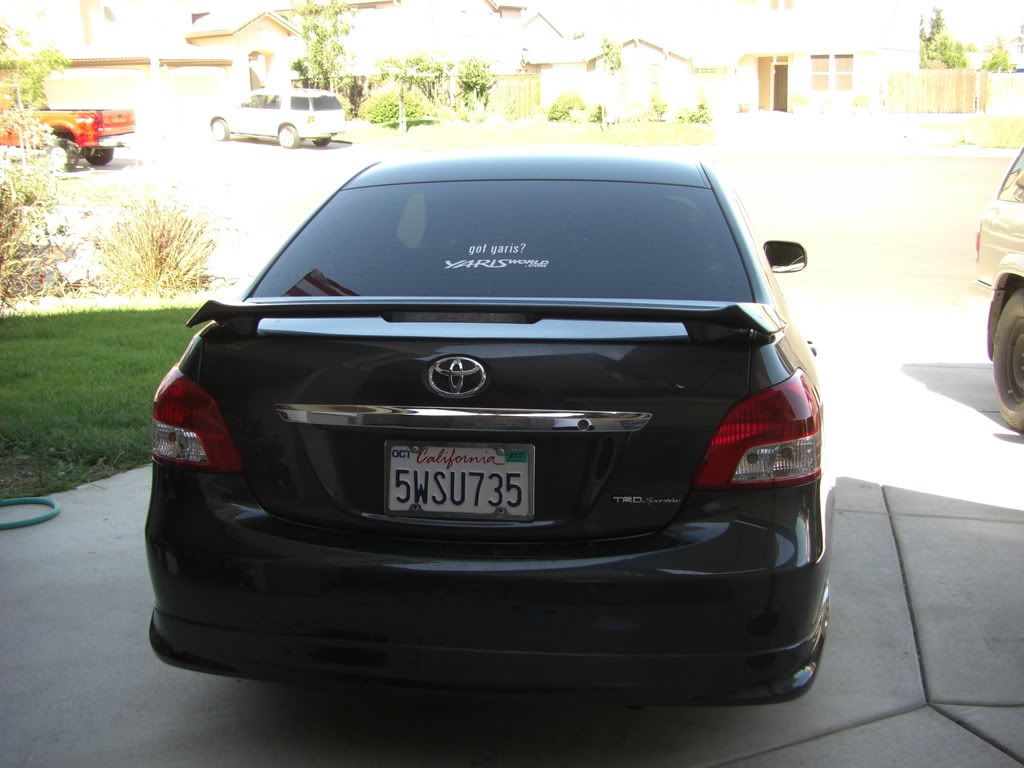 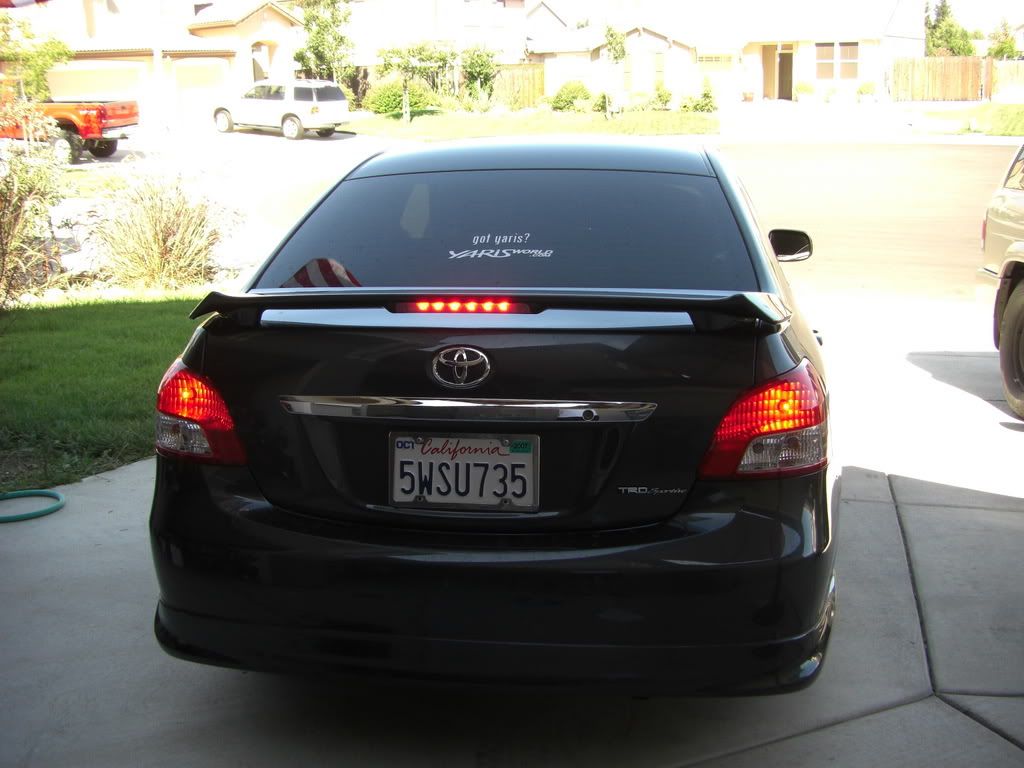
|
|
|

|
|
|
#9 |
       Drives: '14 GT86, '08 Vitz Join Date: Dec 2006
Location: Central Valley, CA
Posts: 9,873
|
|
|
|

|
|
|
#10 |
|
vroom vroom
Drives: lil red 5-door Join Date: Sep 2006
Location: Bangkok, Thailand
Posts: 7,744
|
finally!!!
Looks awesome, man, great writeup too!
__________________
The price of freedom of religion, or of speech, or of the press, is that we must put up with a good deal of rubbish. - Robert Jackson  Bye bye 1NZ... |
|
|

|
|
|
#11 |
       Drives: '14 GT86, '08 Vitz Join Date: Dec 2006
Location: Central Valley, CA
Posts: 9,873
|
hahaha, yeah, it was sitting in my loft for a month or two before i had the money to get it painted. installed it a few days after it was painted. lol...
i think i could have done a better write up if i knew the correct terms for some things. thanks for the compliments. |
|
|

|
|
|
#12 |
    |
VIVA YARIS SEDAN!!!

|
|
|

|
|
|
#13 |
    Drives: 2007 Yaris Sedan "D" package Join Date: May 2006
Location: Barrie, ontario
Posts: 852
|
awesome can we see a side shot also...
__________________
out of respect for nutzoid, I changed my avatar. 
|
|
|

|
|
|
#14 |
|
3,300+ at one point.. >:(
Drives: 2010 Hatchback RS Join Date: Aug 2007
Location: Saint John, NB, Canada
Posts: 542
|
That looks awesome! I think I'd like to do that to mine one of these days!
|
|
|

|
|
|
#15 |
|
Shiny Chromey Coolness
Drives: 2007 Toyota Yaris Liftback Join Date: Feb 2007
Location: Orlando, FL
Posts: 982
|
Excellent DIY. Looks hot. If I was a sedaner id kiss you.
__________________
Bringin the Bling to Yarisworld |
|
|

|
|
|
#16 |
   Drives: '07 Yaris S Sedan M5 Join Date: Jul 2007
Location: Santa Clara, CA
Posts: 208
|
Excellent job!
Thanks for sharing.
__________________

|
|
|

|
|
|
#17 |
    |
Great write up we need more of these. I wish I'd of done a write up of the tach install
|
|
|

|
|
|
#18 |
|
I used to have 1700 posts
|
where'd you get the spoiler? whats it off of?
|
|
|

|
 |
|
|
 Similar Threads
|
||||
| Thread | Thread Starter | Forum | Replies | Last Post |
| NEWS: TOYOTA REVEALS ALL-NEW YARIS SEDAN AT 2006 LOS ANGELES AUTO SHOW | VitzBoy | General Yaris / Vitz Discussion | 7 | 09-20-2023 07:50 AM |
| WTB: 07 Yaris Sedan Spoiler | H4cK | Items for Sale by private party | 5 | 04-25-2010 02:27 PM |
| DIY Sedan Spoiler Install Interest? | Kaotic Lazagna | DIY / Maintenance / Service | 28 | 09-11-2007 11:02 PM |
| sedan lip spoiler | Fenrizwolf | Cosmetic Modifications (Exterior/Interior) | 12 | 09-07-2007 06:40 PM |
| Want to buy a spoiler for my sedan | thomasward00 | Cosmetic Modifications (Exterior/Interior) | 1 | 07-17-2007 01:07 PM |