
 |
 |
|
|
|
|
 09-06-2009, 09:14 AM
|
#1 |
 
Drives: '07 Yaris turbo, '11 Juke Join Date: Mar 2007
Location: Riverside, CA
Posts: 849
|
DIY Projector/HID (sedan)
Here is the DIY for the projectors from Micro Image. This DIY was design for the sedan but most of the steps can be related to the LB as well. Perform at you own risk. If you have any questions feel free to ask or PM me.
Tools needed: 10mm socket 14mm socket (I think for negative battery terminal) Ratchet (1/4" drive works fine) Phillips screwdriver Flat head screwdriver Masking tape Dremel 1.) Disconnect negative (-) wire from battery 2.) Lift vehicle (just the front end or the whole car) 3.) Apply masking take to bumper and fender (prevents paint from getting scratched) 4.) Remove these bolts from the front of the inner fenders with 10mm socket(1 on each side) 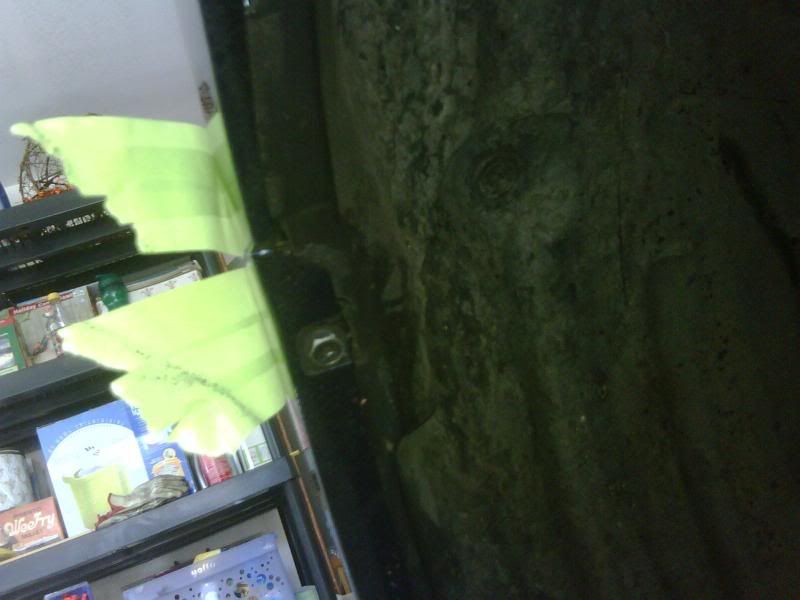 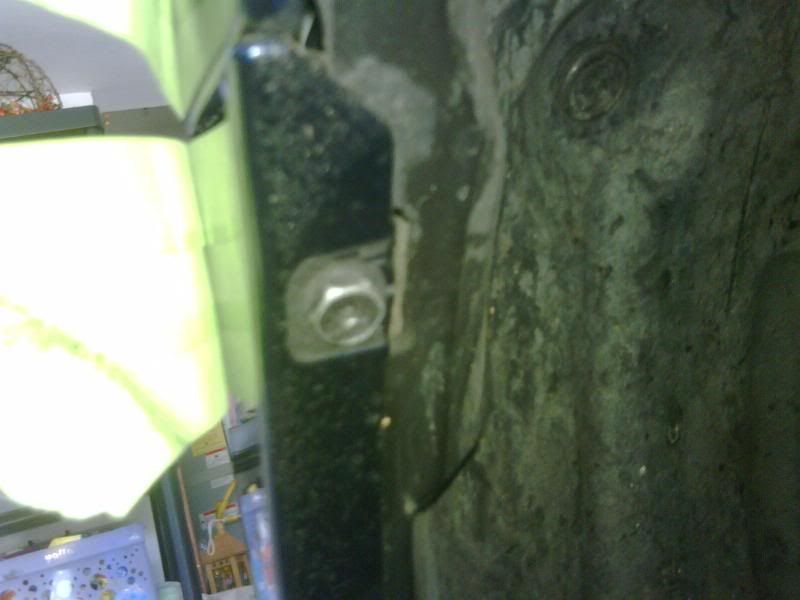 5.) Remove bolts from underside holding the bumper and underpanels on (no pic). I think theres about 6 or 8 of them. 6.) Remove 6 push rivets from the top of bumper under the hood. Push down in the middle of them and pull the whole thing out. 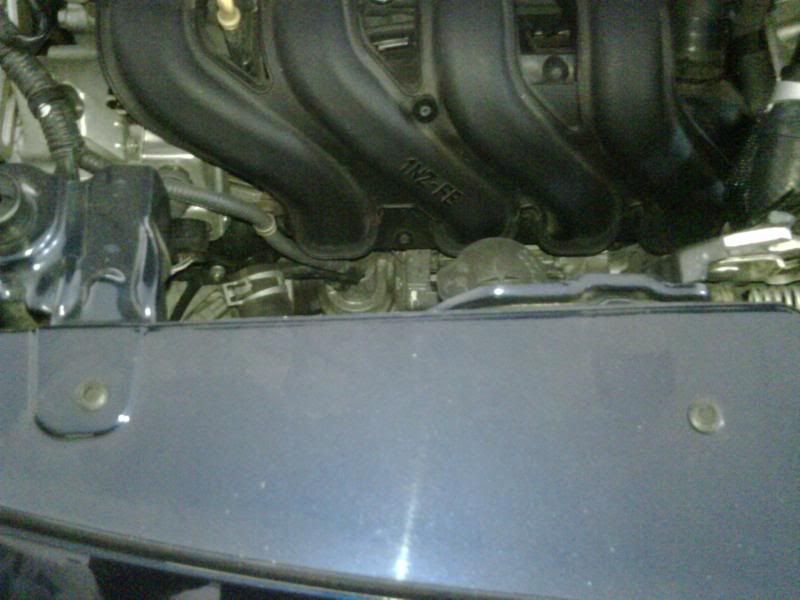 7.) Pull the sides of the bumper outwards to release. It should now look something like this: 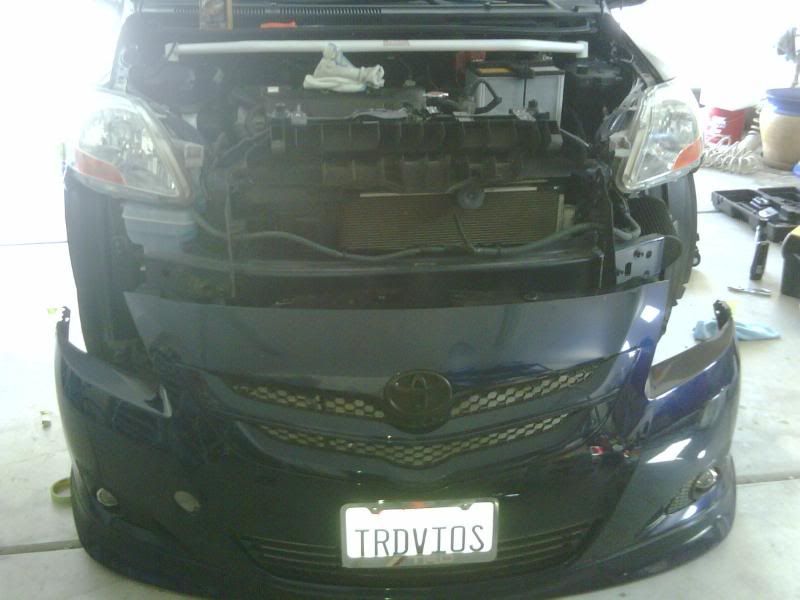 8.) Headlight removal. There are 3 10mm bolts holding each headlight on. 2 on top and 1 on the side and unplug 2 OEM connectors. If you have eyelids remove them at this time.  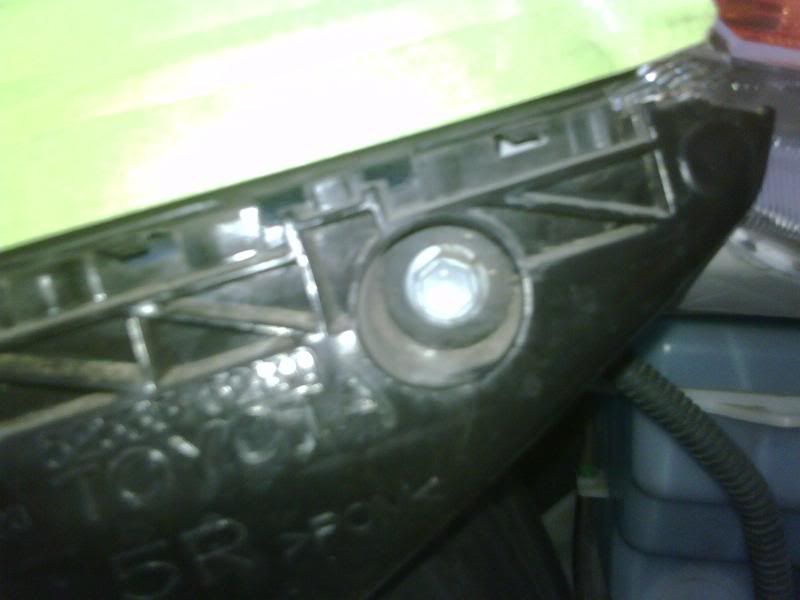 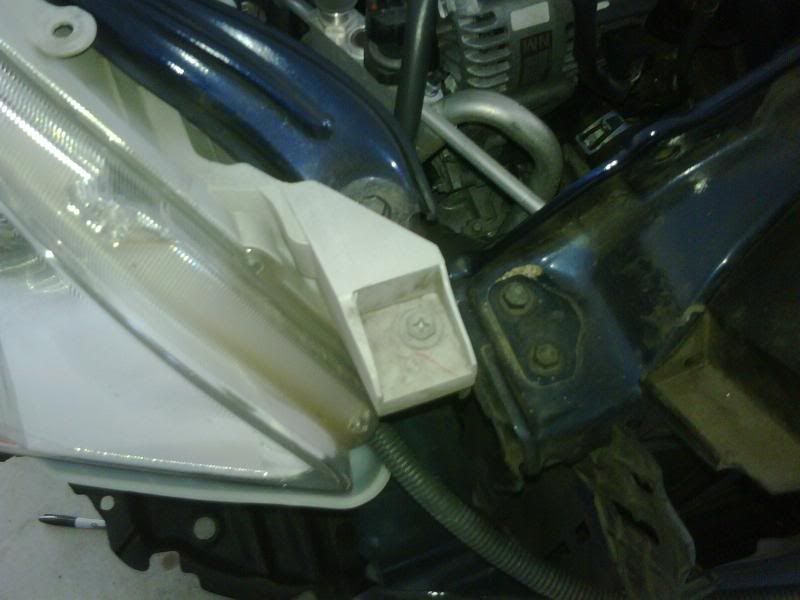 9.) Remove all factory wiring and bulbs from each headlight and the 3 screw from the edge of the back of the headlight. 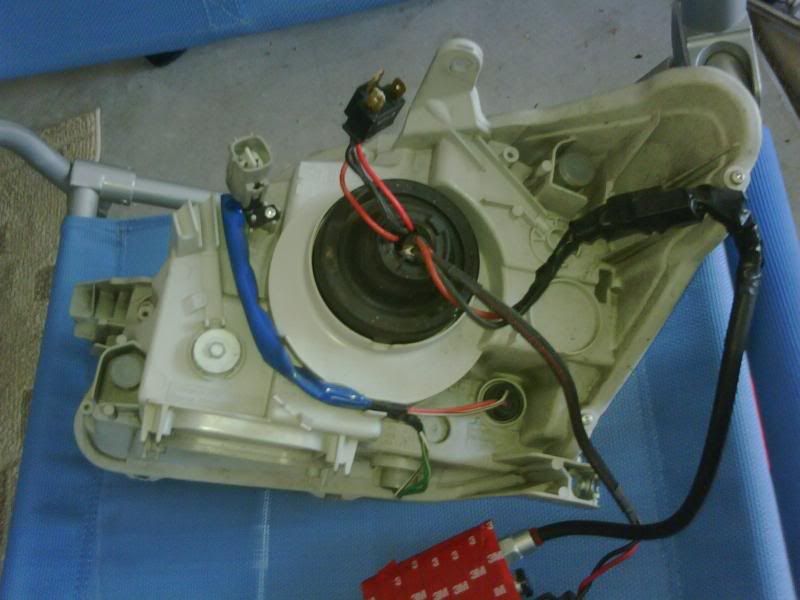 10.) You should end up with this: 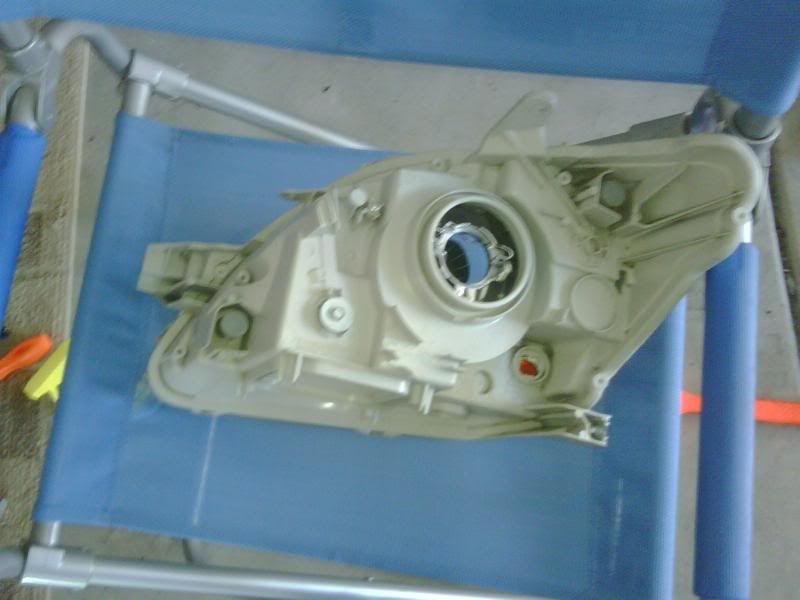 11.) Remove the screw holding the headlight bulb clip. (You will not need these) 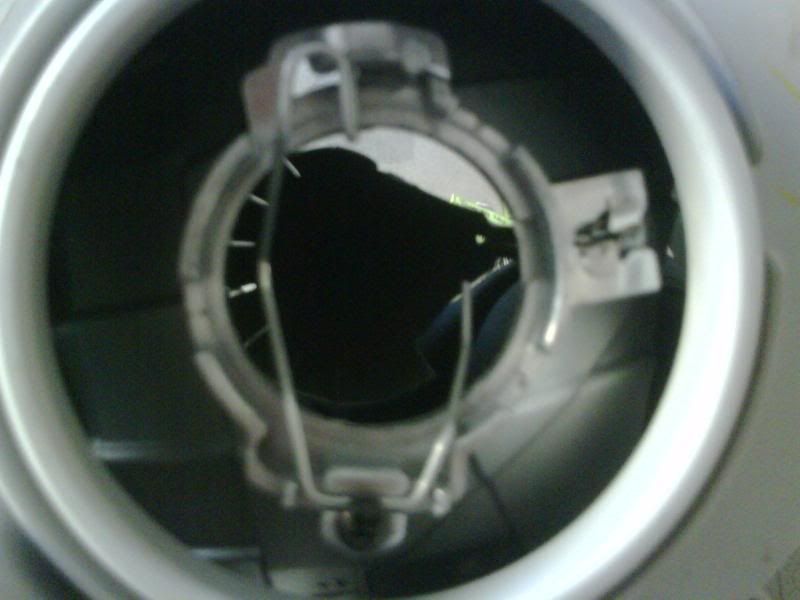 12.) Now its time to bake your headlights. Preheat oven to 215-225 degrees. Once the oven is heated place one headlight at a time on a cookie sheet with aluminum foil. Set oven rack so the headlight will be as close to the center of the oven as possible. Bake for about 10 minutes. 13.) Remove from oven. CAUTION HEADLIGHT WILL BE HOT. Use a pair of gloves to handle it. 14.) Starting at one corner use a flathead screwdriver or butter knife and pry the lens from the housing. Don't be affraid to use a little force if necessary. Once you get on corner separated you can pretty much just pull the lens from the housing by hand and a little strength. 15.) Once removed you should have this: 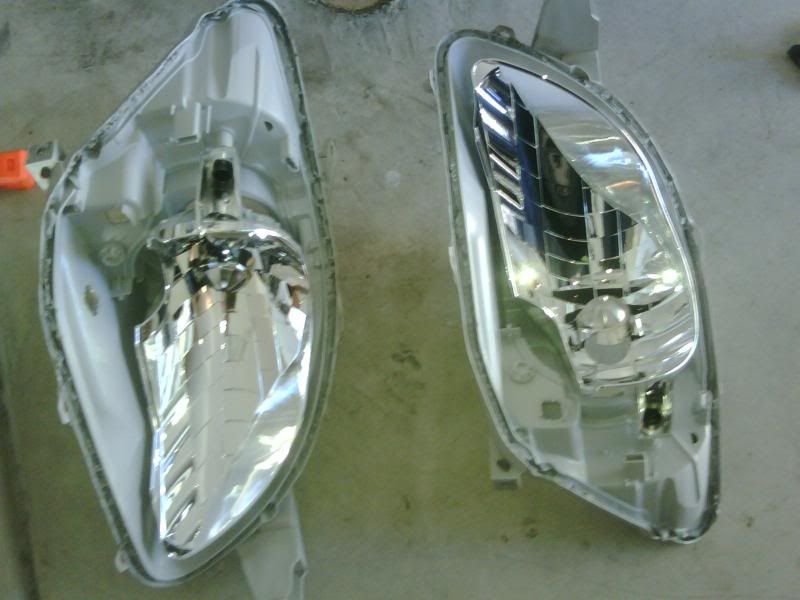 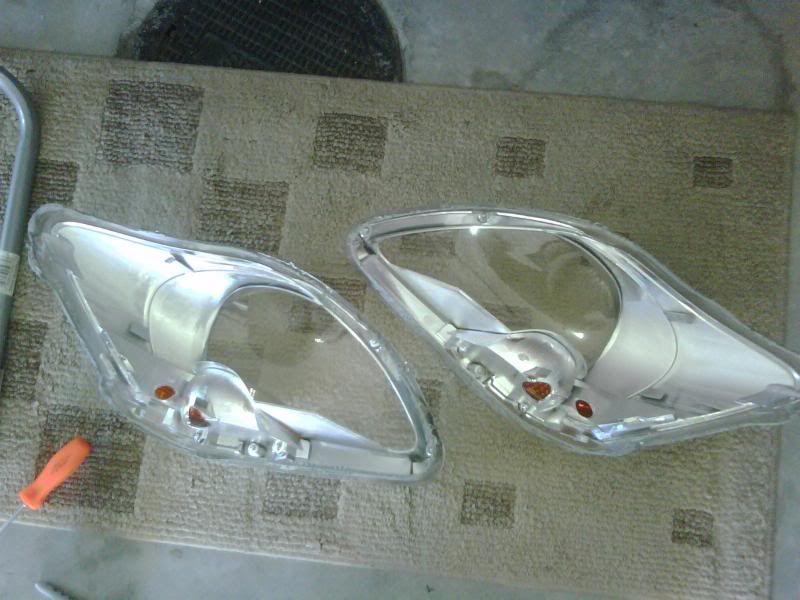 16.) There are 3 phillips screw holding the reflector housing to the lens. Remove these and be careful not to lose. They are small. 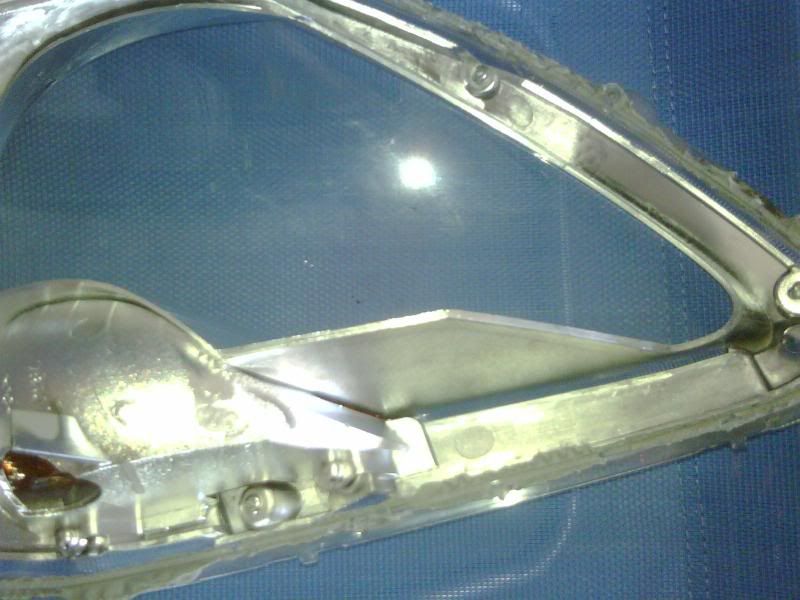 17.) Remove reflector housing from lens. Sorry no pics. 18.) I don't remember but I think there are 2 more small phillips screw hold the reflector housing together. Remove these and pop out the reflector. Remove the headlight bulb reflector from the housing by prying up the two tabs and pushing the reflector out. 19.) This next part is up to you. You can paint any color. I used SEM satin black. Does not need to be a high temp paint. 20.) Mask of all around the headlight housing to prevent dust from sanding and paint from contacting sealant. 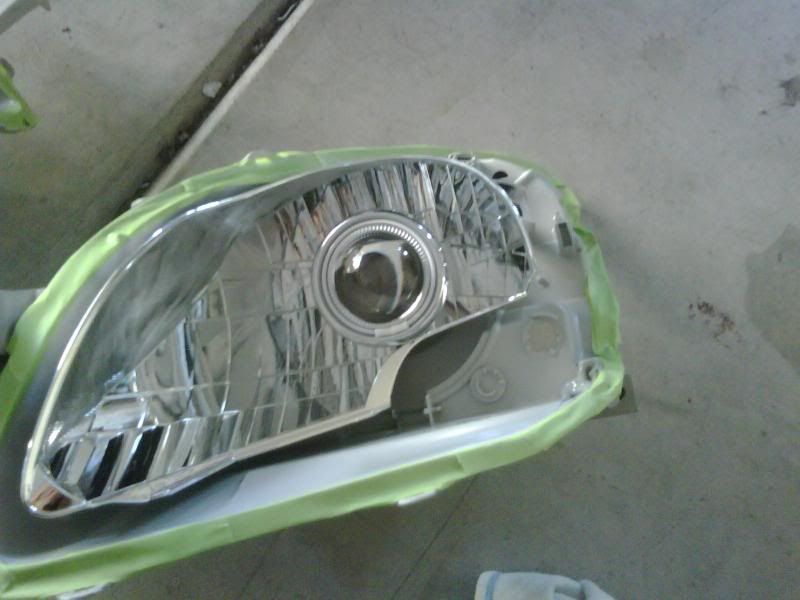 21.) Scuff sand all chrome parts of the headlight housing and reflector housing with 600 grit or higher sandpaper. 22.) Paint and allow to dry.  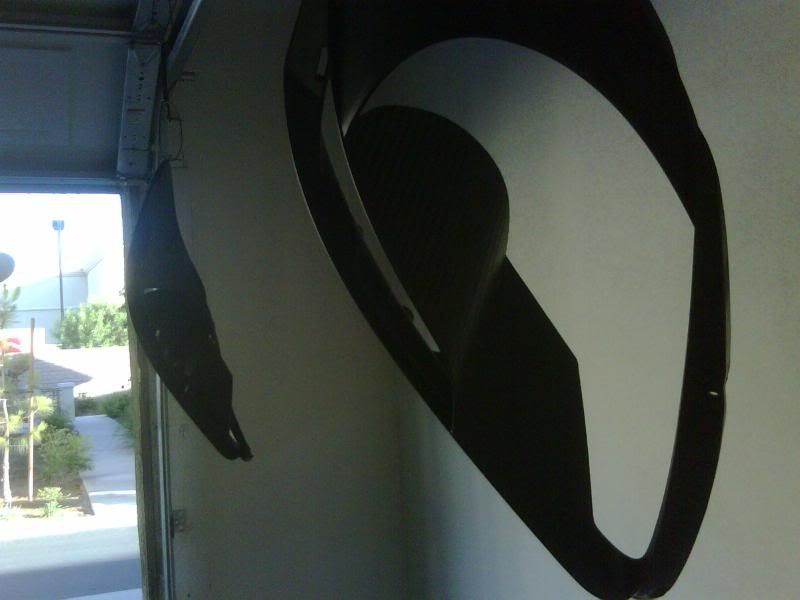 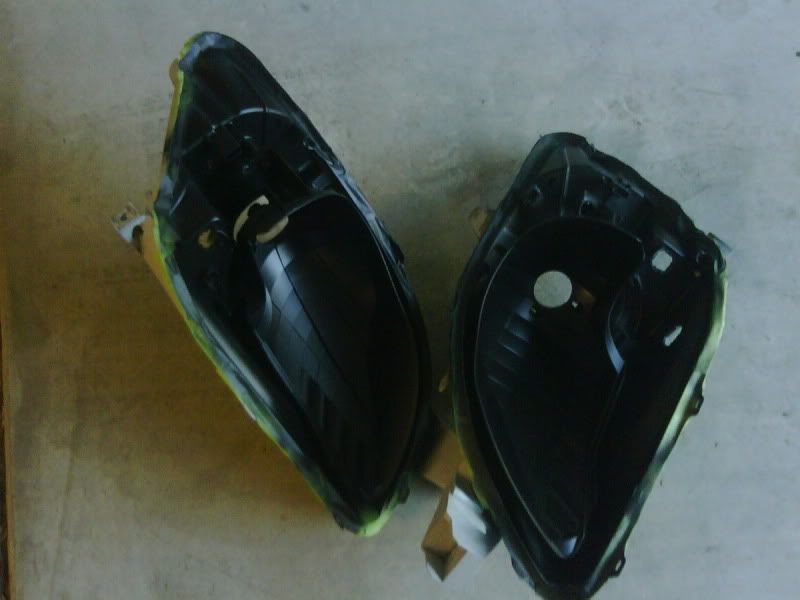 23.) Remove plastic from the projectors and unscrew and remove the 2 rings, washer, and H4 ring. 24.) Insert projector into headlight housing from the front and on the back install H4 ring, washer, threaded ring without the tabs (projector is labled top). Tighten all the way. 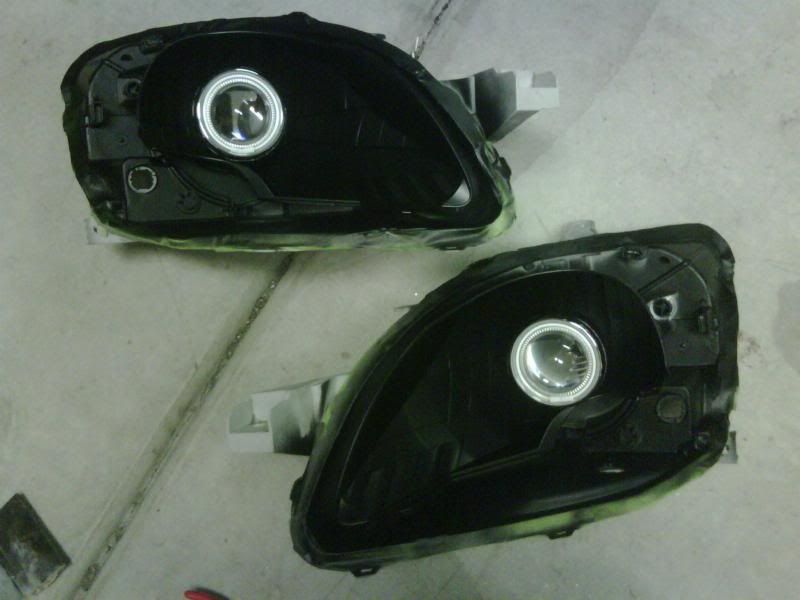 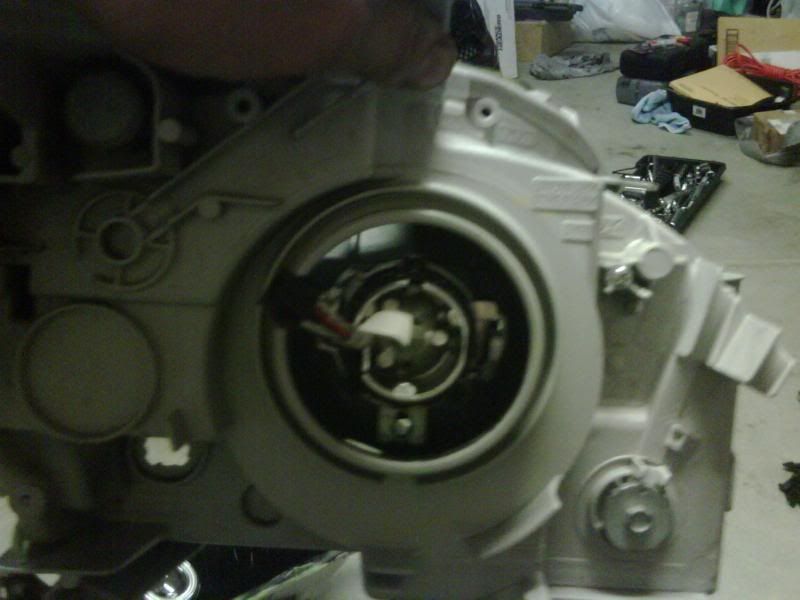 25.) Reassemble the reflector housing and lens assembly. 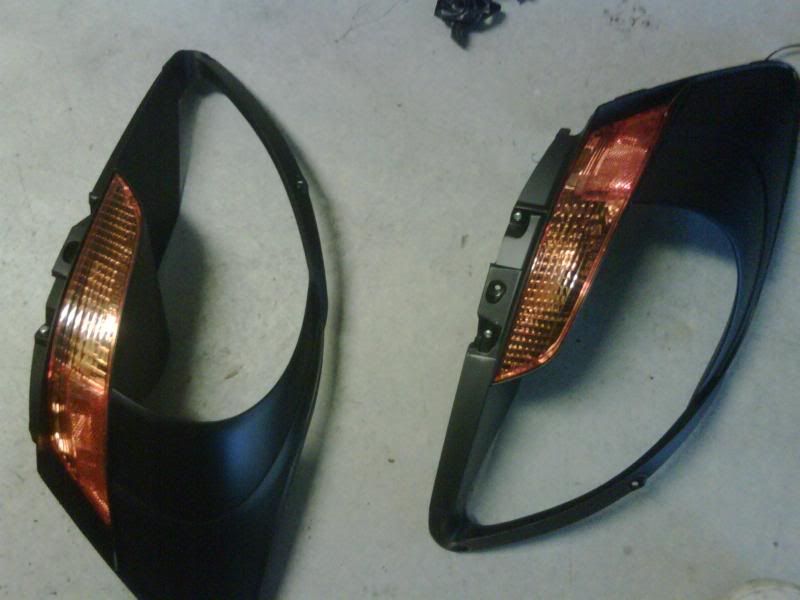  The reflector housing will have to be notched to accomodate the projector. No pics, but it you put the to parts together you will see. No big deal if you have a dremel. 26.) Remove masking tape from the headlight assembly. You can use and apply some of the sealant now or, like I did, wait until the headlights are assembled and run a bead around the outside. 27.) Back to baking. Put the headlights in the oven again at the same temperature for the same amount of time. 28.) Remove headlight from the oven and, while wearing some gloves, push the lens assembly into the headlight housing assembly while trying to line up the 3 screw holes and clips around the outside. Insert the screw and allow to cool. 29.) When finished it will look something like this: 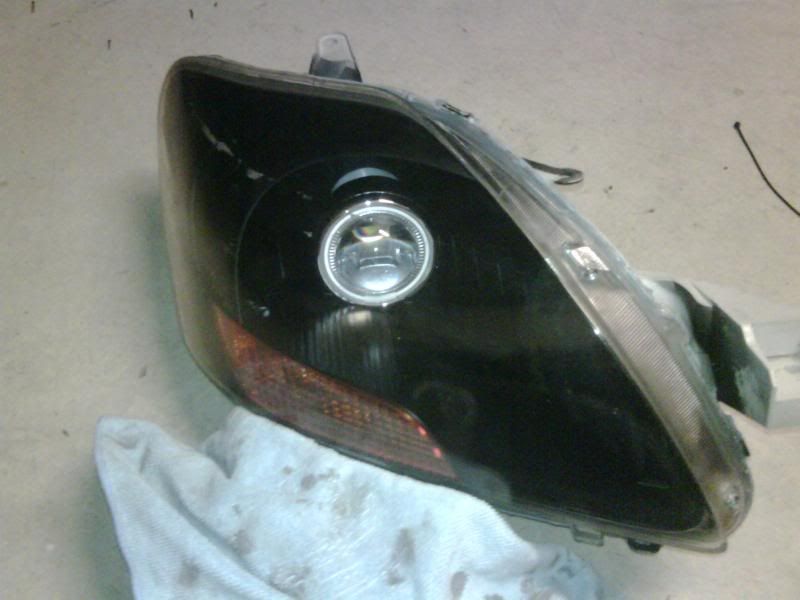 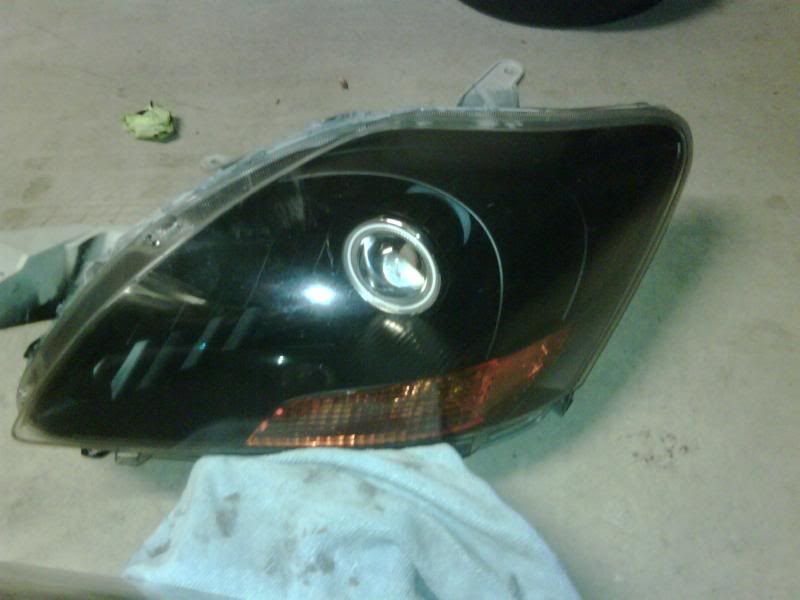 30.) Now for the wiring. Reinstall the factory harness into each headlight housing, don't forget the factory grommet, along with the HID bulb and screw ring with the tabs on it.  31.) The projector kit comes with a pack of phillips screws. Use one on each headlight to mount the ballast on the bottom. 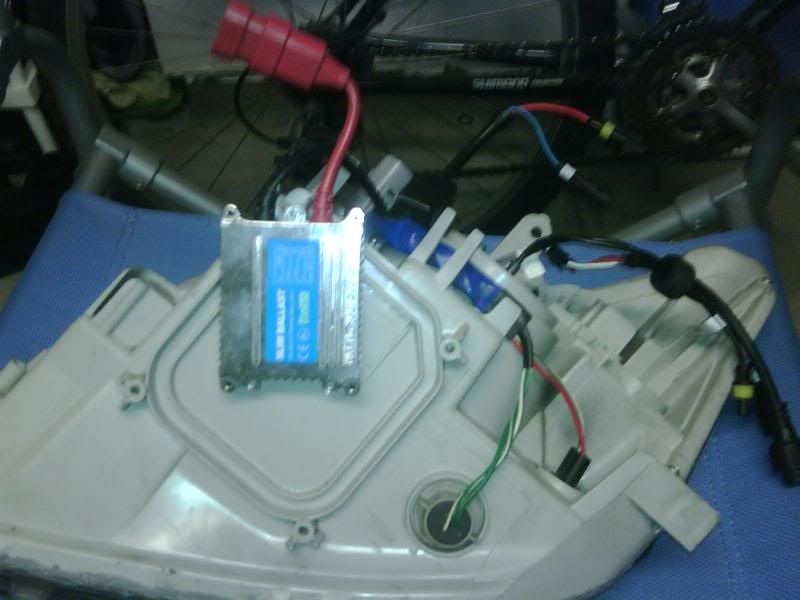 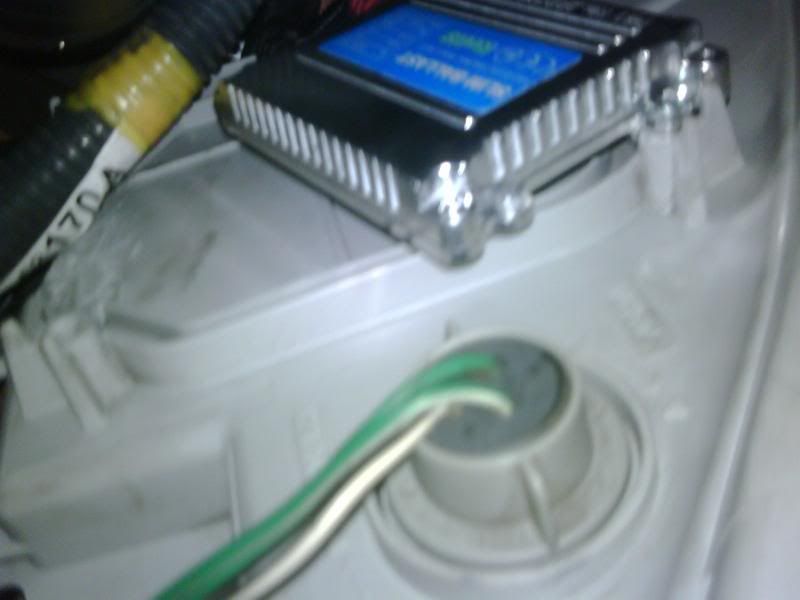 32.) The HID harness with the long power wire goes on the passenger side. 33.) Run the single red power wire to the battery and attached them to the positive (+) post. I ran the passenger side along the firewall and the drivers side behing the battery. 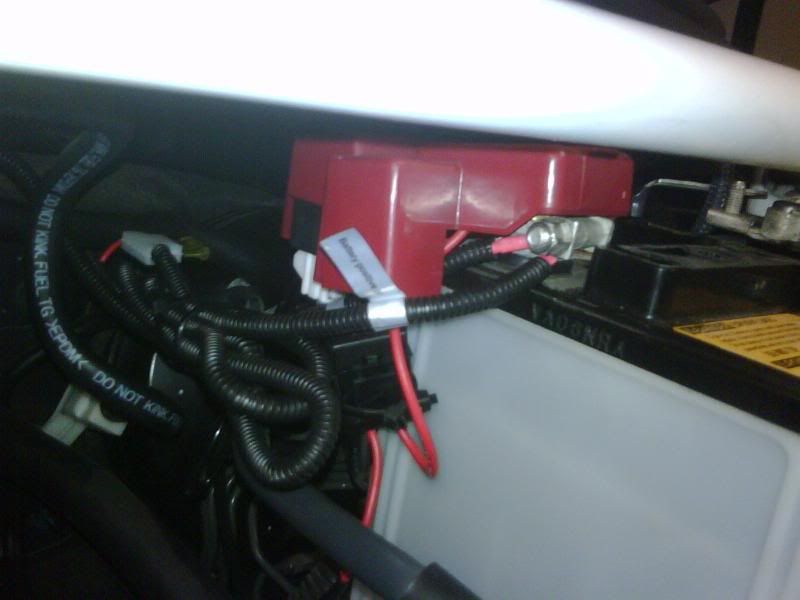 34.) Passenger side. Attach the single black ground wire to the strut tower (make sure to grind down to bare metal) and mount the black relay box on top of the ground wire utilizing the threaded hole already there. The bolts in the kit fit perfectly. 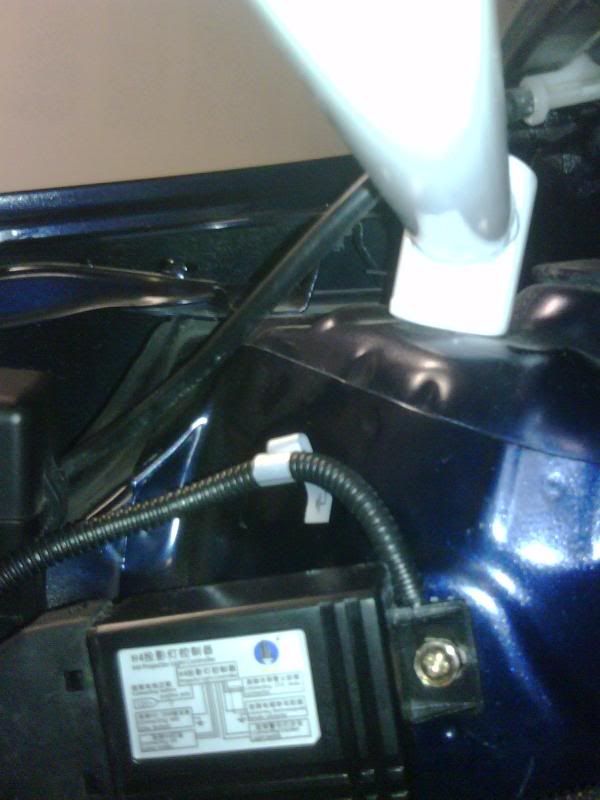 35.) Driver's side single black gound wire. There is already a ground wire, by I think its the airbag sensor, you can use. 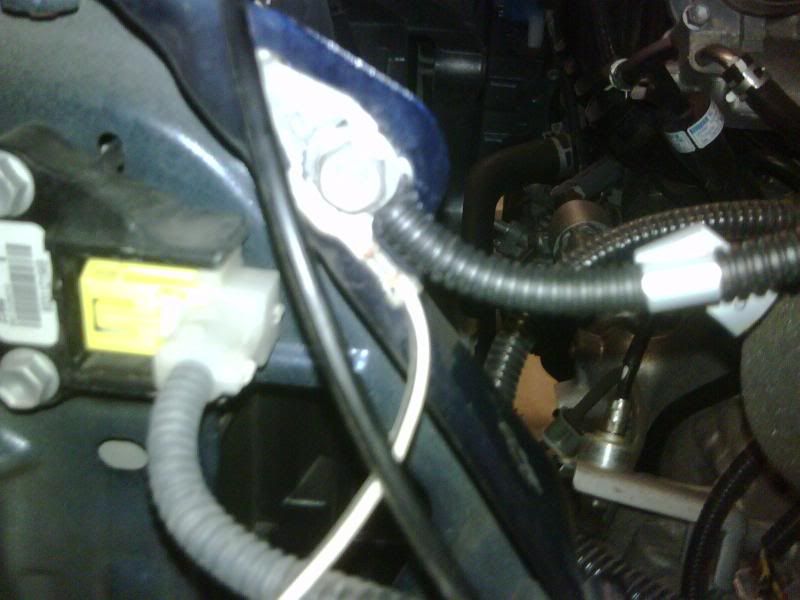 36.) Plug all the other wires together, except the single red and black wires with no terminal and bare wire showing. 37.) Now for the halos. The single red and black wires with no terminals. Use the provide wire splicers or you can solder. Attach the black wire to the white wire w/black strip (-) coming out of the connector for the signal lights and the red wire to the green wire (+) on the opposite corner of the connector. 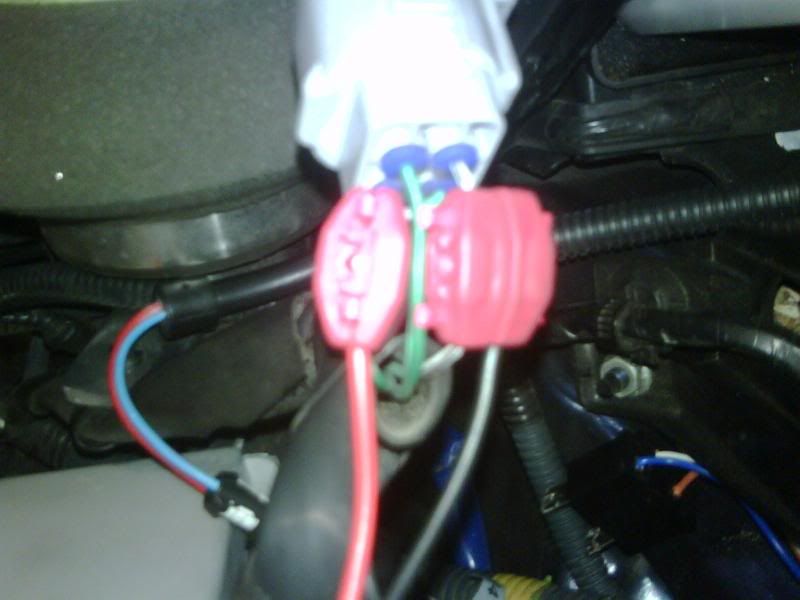 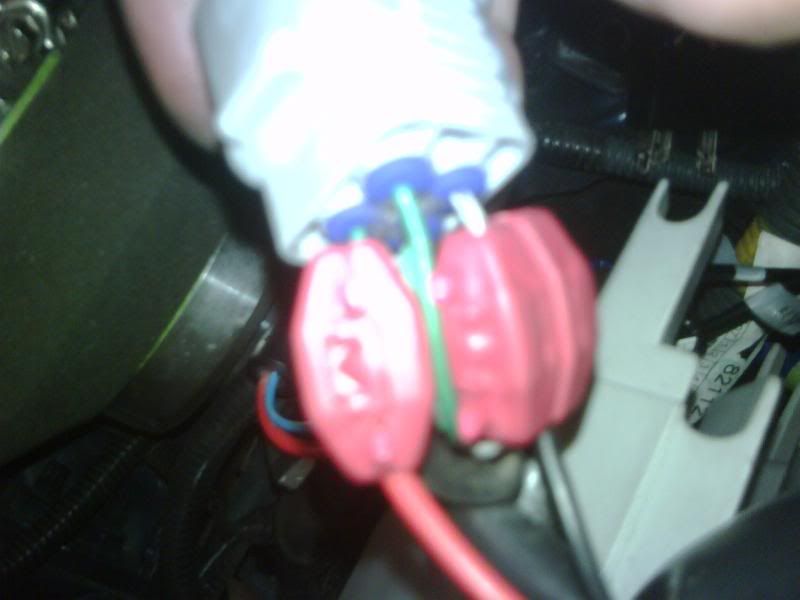 I zip tied the wire splicers then wrapped them in electrical tape to prevent them from coming undone. 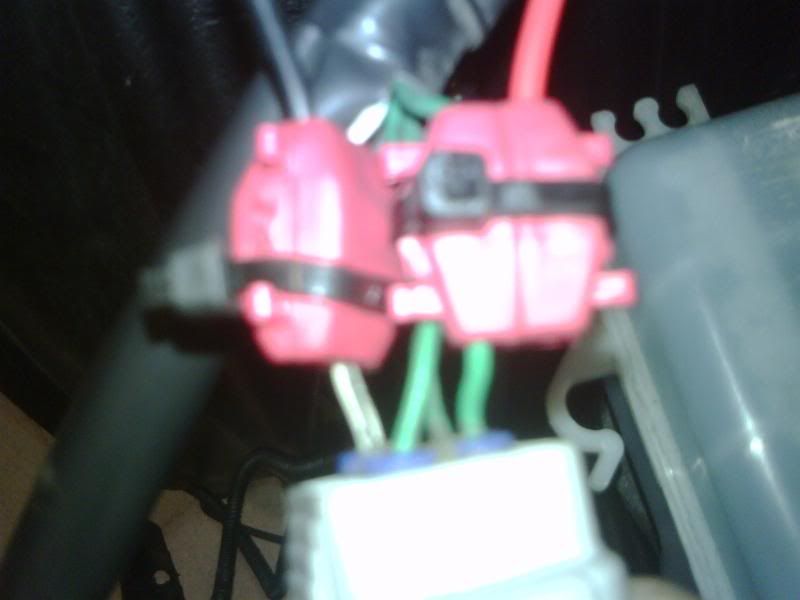 38.) Bolt the headlight assemblies back on with the 3 bolts each and reinstall the bumper. 39.) End result: 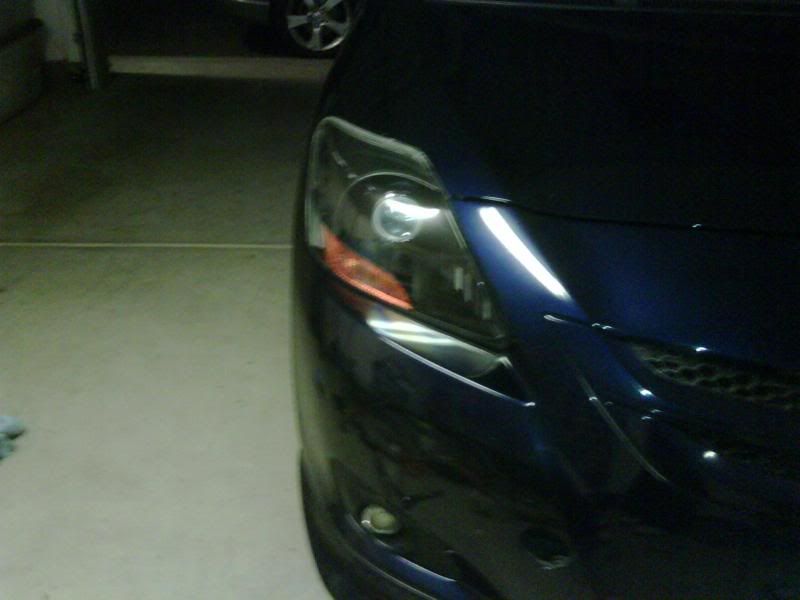 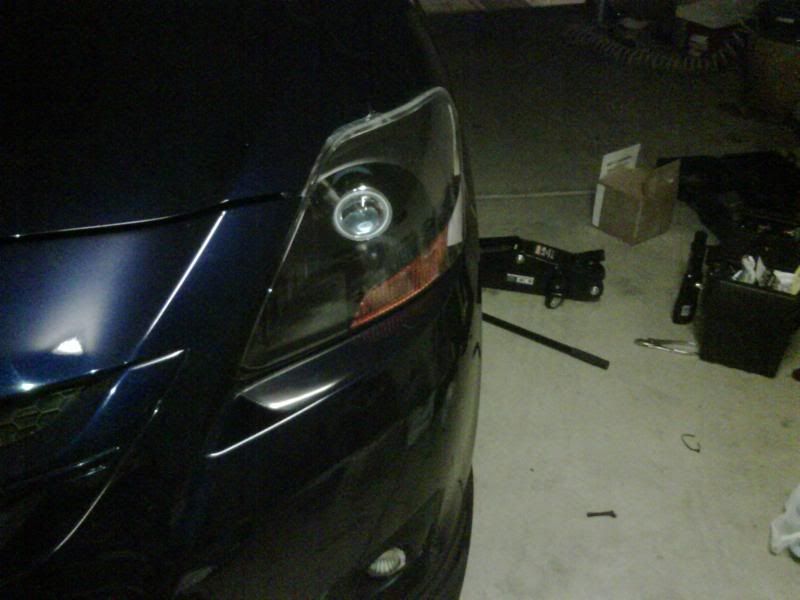 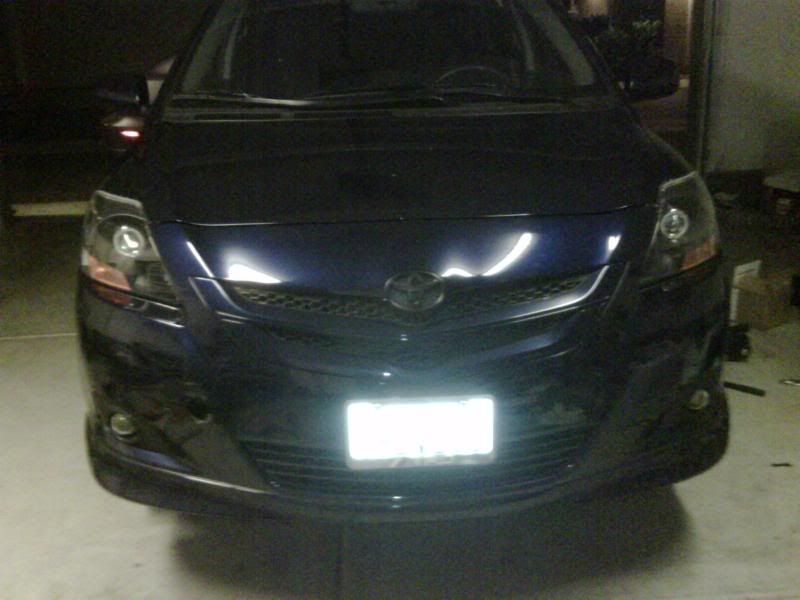  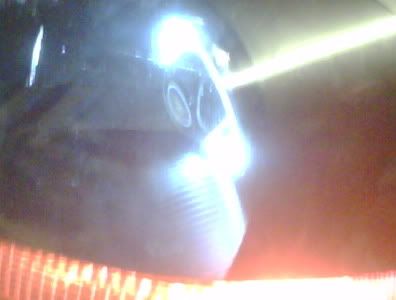  And the cut off. 
__________________
http://www.cardomain.com/ride/3875996 |

|

|
|
09-06-2009, 09:44 AM
|
#2 |
 Drives: Yaris YR Join Date: Oct 2008
Location: Perth, Australia
Posts: 515
|
That looks awesome. Well done on doing it yourself and making a DIY for other people to follow.
I think someone should start making pre-made ones with these kits for people to buy for people who aren't keen to DIY. Instead of those ones made in Taiwan.
__________________
 Mods: 17x7 ANZ Tazer Wheels with 215/40/17 Marangoni Tyres | AFE Air Intake System | NST Short Shifter Kit | NST Shifter Cable Bushing Kit | NST 10% Underdrive Crank Pulley | Pedders Sports Springs | Custom 2inch Cat-Back Walker Muffler with 2.5inch Xforce Twin Stainless Steel Tip | RS Side Skirts | RS Euro Spoiler | YRX Front Lip Spoiler | TRD Style Front Grill | 12mm Rear Hub Spacers | Ultra Racing 23mm Rear Sway Bar |
|
|
|
|
09-06-2009, 09:47 AM
|
#3 |
|
Where is Oahu?

|
Wow! Great work Brian! How long did that take you?
__________________
808_Yaris Air Runner Thread:http://www.yarisworld.com/forums/sho...655#post329655 808_Yaris Air Runner Video:http://www.youtube.com/watch?v=fUkqox5d5No 808_Yaris Retrofit Projector Pictures:http://www.yarisworld.com/forums/showthread.php?t=22461 |
|
|
|
|
09-06-2009, 09:50 AM
|
#4 |
|
Drives: '07 Yaris turbo, '11 Juke Join Date: Mar 2007
Location: Riverside, CA
Posts: 849
|
Took me about 6-7 hours. Taking my time and making sure everything was right. With the DIY it can probably be done in 3-4 hours
__________________
http://www.cardomain.com/ride/3875996 |
|
|
|
|
09-06-2009, 09:51 AM
|
#5 |

Drives: 09' Meteorite liftback Join Date: Jul 2009
Location: Jeff,Indiana
Posts: 1,374
 |
thanx a lot for posting this. my husband plans to do this next week sometime. im sure ill be helping him and that you will receive some pm's.
 
|
|
|
|
|
09-06-2009, 11:08 AM
|
#6 |
|
Drives: Yaris Sedan Black Join Date: Apr 2009
Location: Malaysia, Sabah-KK
Posts: 34
|
Congrats on successfully completed your DIY. Just a quick question, what does the color output of the 5000k bulb? is it Yellowish, White, or yellowish-white?
|
|
|
|
|
09-06-2009, 12:29 PM
|
#7 | |
|
USAF_SrA_E-4

|
I am screwd on the wire part

__________________
Quote:
|
|
|
|
|
|
09-06-2009, 03:33 PM
|
#8 | |
|
Drives: '07 Yaris turbo, '11 Juke Join Date: Mar 2007
Location: Riverside, CA
Posts: 849
|
Quote:
__________________
http://www.cardomain.com/ride/3875996 |
|
|
|
|
|
09-06-2009, 03:54 PM
|
#9 | |
|
USAF_SrA_E-4
|
Ok so this are HID as well?
__________________
Quote:
|
|
|
|
|
|
09-06-2009, 03:55 PM
|
#10 | |
|
Drives: '07 Yaris turbo, '11 Juke Join Date: Mar 2007
Location: Riverside, CA
Posts: 849
|
Quote:
__________________
http://www.cardomain.com/ride/3875996 |
|
|
|
|
|
09-06-2009, 03:56 PM
|
#11 | ||
|
USAF_SrA_E-4
|
Quote:

__________________
Quote:
|
||
|
|
|
|
09-06-2009, 04:00 PM
|
#12 | |
|
Drives: '07 Yaris turbo, '11 Juke Join Date: Mar 2007
Location: Riverside, CA
Posts: 849
|
Quote:
__________________
http://www.cardomain.com/ride/3875996 |
|
|
|
|
|
09-06-2009, 03:21 PM
|
#13 | |
|
Drives: '07 Yaris turbo, '11 Juke Join Date: Mar 2007
Location: Riverside, CA
Posts: 849
|
Quote:
__________________
http://www.cardomain.com/ride/3875996 |
|
|
|
|
|
09-06-2009, 09:32 PM
|
#14 | |
|
Drives: Yaris Sedan Black Join Date: Apr 2009
Location: Malaysia, Sabah-KK
Posts: 34
|
Quote:
 Appreciate your effort Brian Appreciate your effort Brian
|
|
|
|
|
|
09-06-2009, 11:17 PM
|
#15 | ||
|
Drives: '07 Yaris turbo, '11 Juke Join Date: Mar 2007
Location: Riverside, CA
Posts: 849
|
Quote:
Quote:
__________________
http://www.cardomain.com/ride/3875996 |
||
|
|
|
|
09-07-2009, 12:02 AM
|
#16 | |

|
Quote:
|
|
|
|
|
|
09-06-2009, 01:40 PM
|
#17 |
|
|
awesome job. thanks brian. ill pm you if i have any questions today during my install. thanks
|
|
|
|
|
09-06-2009, 01:50 PM
|
#18 | ||
|
USAF_SrA_E-4
|
Quote:
__________________
Quote:
|
||
|
|
|
 |
|
|
 Similar Threads
|
||||
| Thread | Thread Starter | Forum | Replies | Last Post |
| NEWS: TOYOTA REVEALS ALL-NEW YARIS SEDAN AT 2006 LOS ANGELES AUTO SHOW | VitzBoy | General Yaris / Vitz Discussion | 7 | 09-20-2023 07:50 AM |
| DIY Sedan Spoiler Install | Kaotic Lazagna | DIY / Maintenance / Service | 36 | 01-19-2020 11:35 PM |
| How To Smoked Sedan Headlight -DIY | zulhizainL902S | DIY / Maintenance / Service | 26 | 01-14-2011 02:12 AM |
| DIY needed for amplifier for sedan install | YarisSedan | In Car Entertainment + Electronics (audio / video / alarm) | 2 | 02-27-2009 10:07 PM |
| DIY Sedan Spoiler Install Interest? | Kaotic Lazagna | DIY / Maintenance / Service | 28 | 09-11-2007 11:02 PM |


 Hybrid Mode
