
 |
 |
|
|
|
|
 11-18-2012, 11:49 PM
|
#1 |
 ULTIMATE ULTIMATE
Drives: 09 5dr LB, 2x 08 3dr LB Join Date: Oct 2008
Location: USA, CT
Posts: 13,460
|
DIY: 60/40 Split Seat Install (some welding required)
I was fortunate enough to recently acquire a 60/40 split rear seat as a swap for the rear bench seat in one of my 2008 Yaris. In another thread (http://www.yarisworld.com/forums/showthread.php?t=42579), I described the process of installing my bench in AuxMike's Yaris. On his we had to drill two holes in the floor to expose threaded inserts, where the seatbelt buckles would mount.
When we did the swap, I was more concerned about my seat fitting in his car, so I just took a quick peek at the holes and thought that everything was there to install the split rear seat. Upon closer inspection I found that I would have to drill a total of 5 holes to expose threaded inserts. Three along the bottom of the front of the seat, and two at the front of center of the seat rails. After drilling the first of the seat rail holes, I realized that a threaded insert was not present under the floor. So, a simple bolt-in install turned into a remove the gas tank and weld in inserts job. The first step is to mark where the holes need to be drilled. Set the seat in place, insert bolts into the existing holes to align it, and then mark the missing holes: 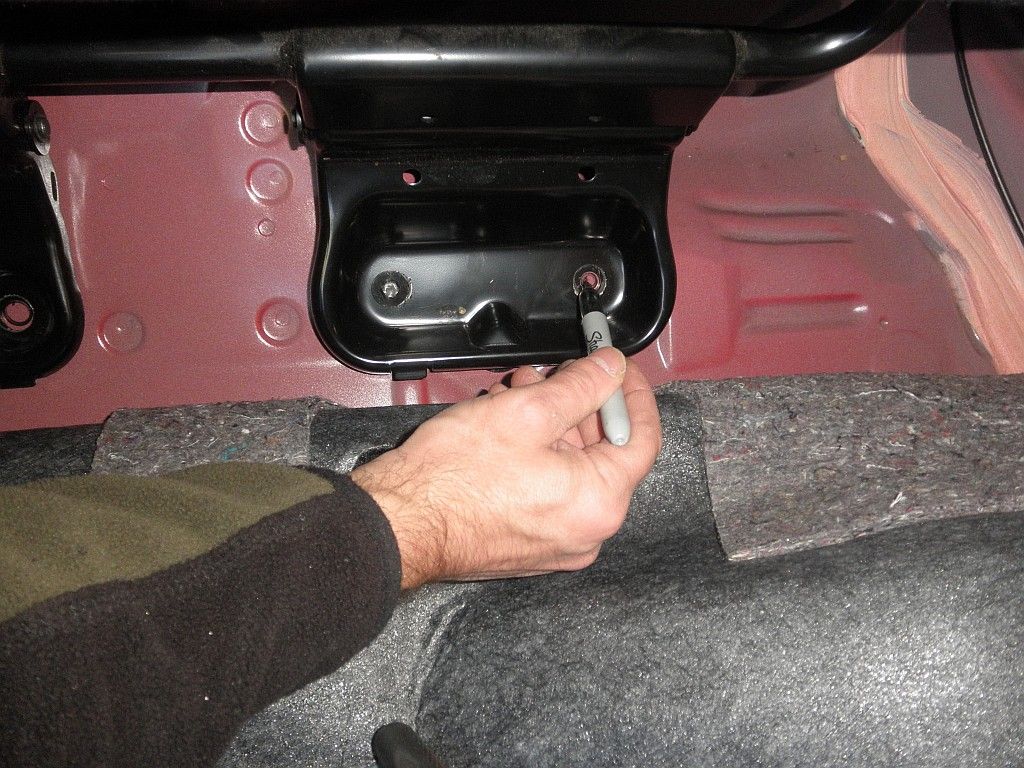 Drill the holes. I prefer to drill a small initial hole to verify centering on the insert, and then drill the hole a bit larger than the threads. I used a 5/8" drill bit. Because the threaded inserts are recessed below the floor, you can easily drill the holes without damaging the threads. 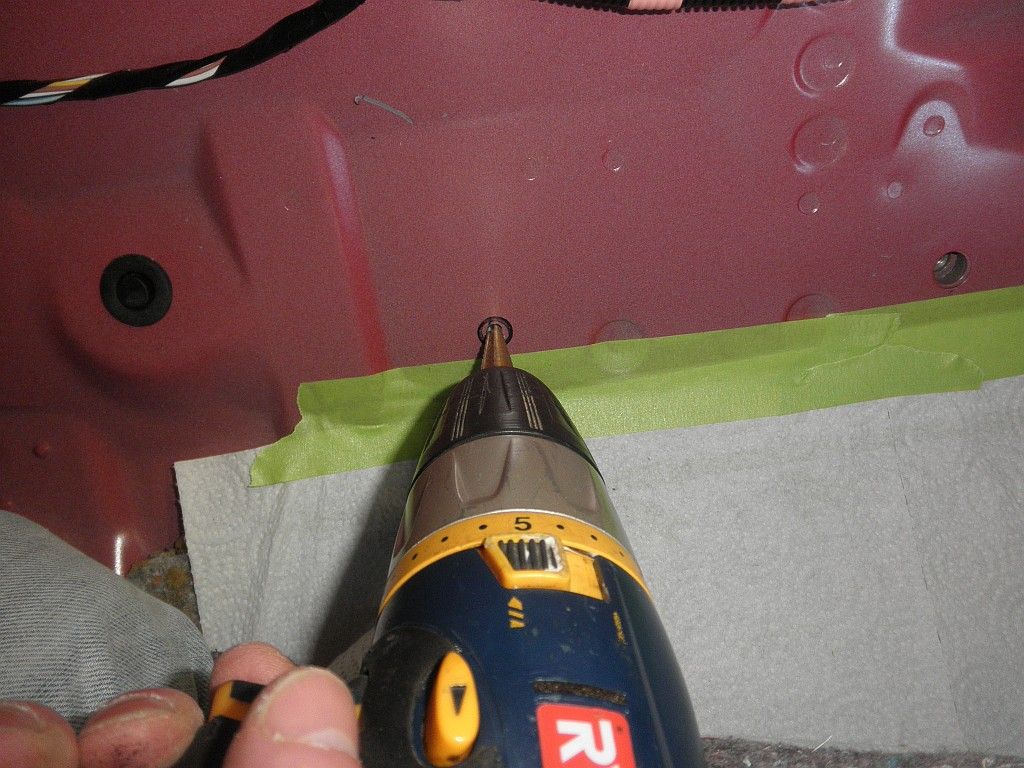 After drilling the first of the center seat rail holes, I noticed the lack of a threaded insert and a second layer of sheet metal about 1" below the floor layer. I decided to drop the gas tank to see if I could weld a M10 x 1.25 nut to the bottom of the floor. Dropping the tank requires removing the access panel above the tank, disconnecting the electrical connector (and then running the car until it dies to depressurize the fuel system), disconnecting the vent pipe, and disconnecting the fuel line. 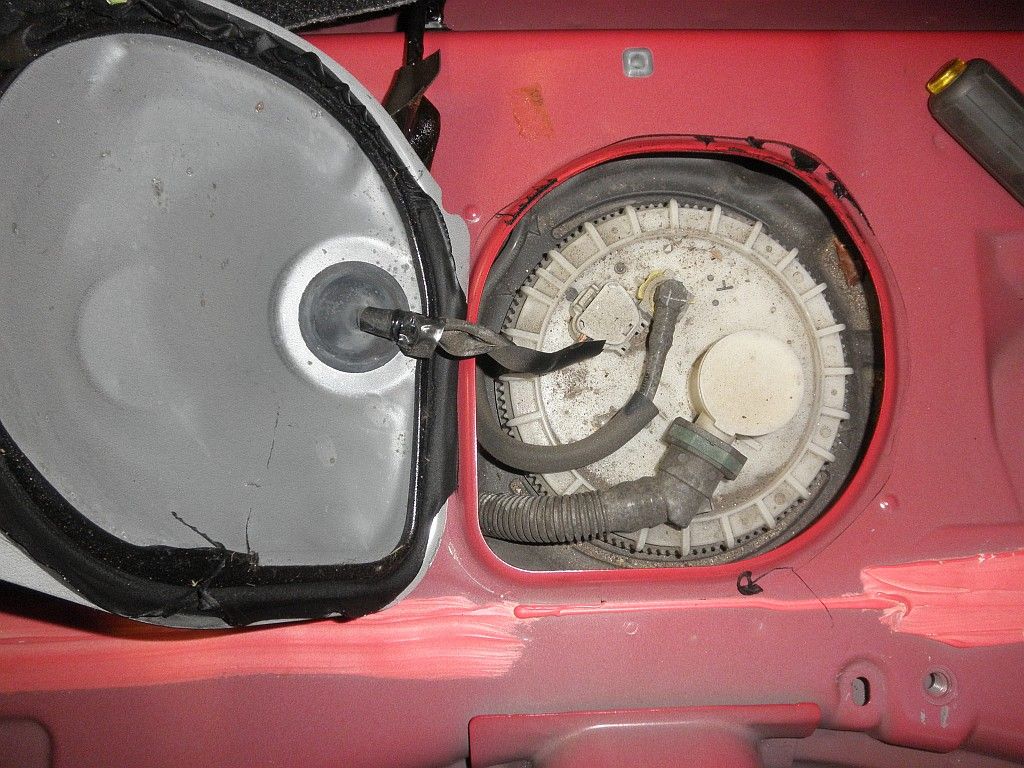 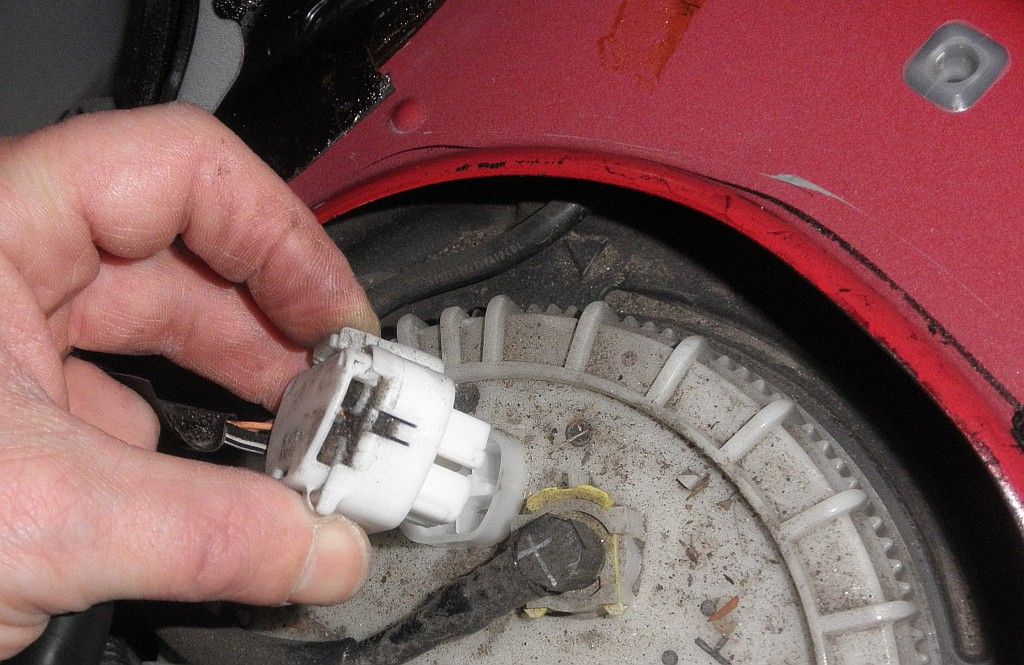  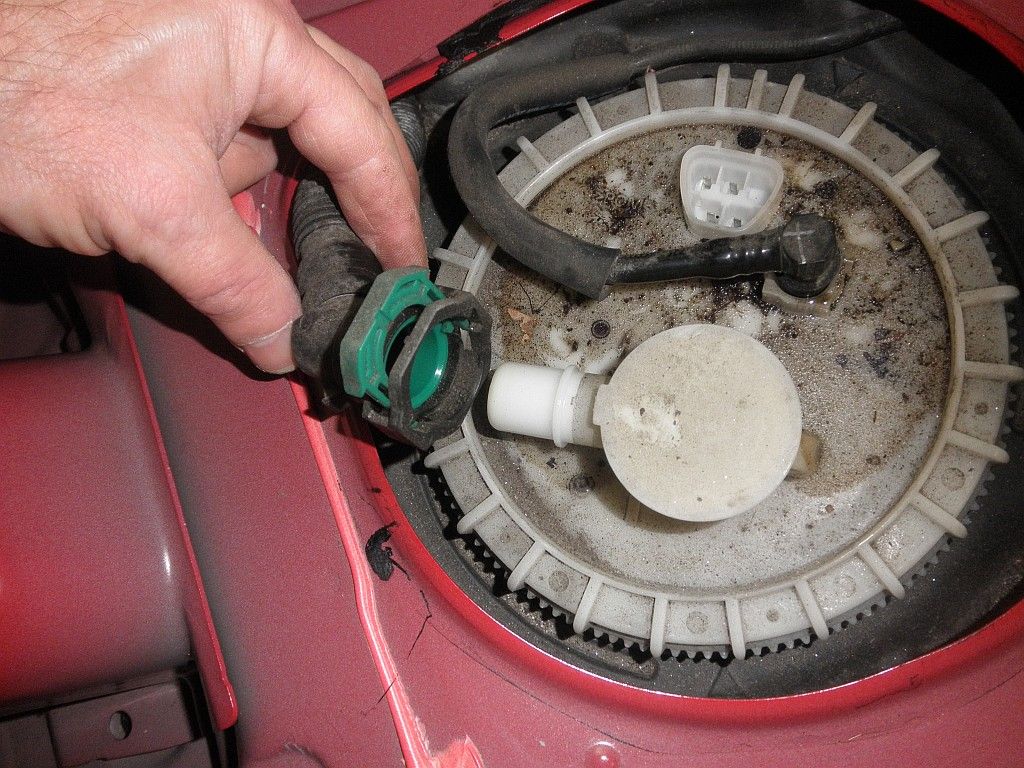 I find the tank easier to handle empty, so I remove the filler hose by loosening the hose clamp and pulling it off. Then, I siphon as much gas as possible from the tank. 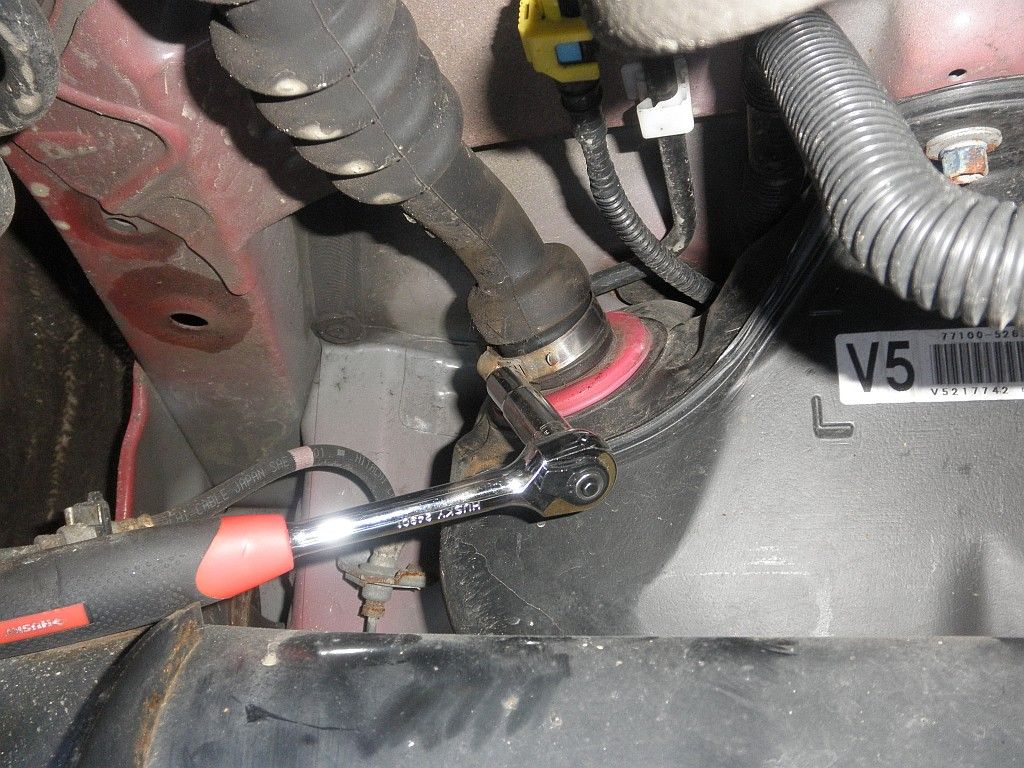 With the tank empty disconnect the small vent line via the yellow sleeved connector above the filler on the tank, and then remove the heat shield covering one corner of the tank, by removing the 10mm nut and bolt. 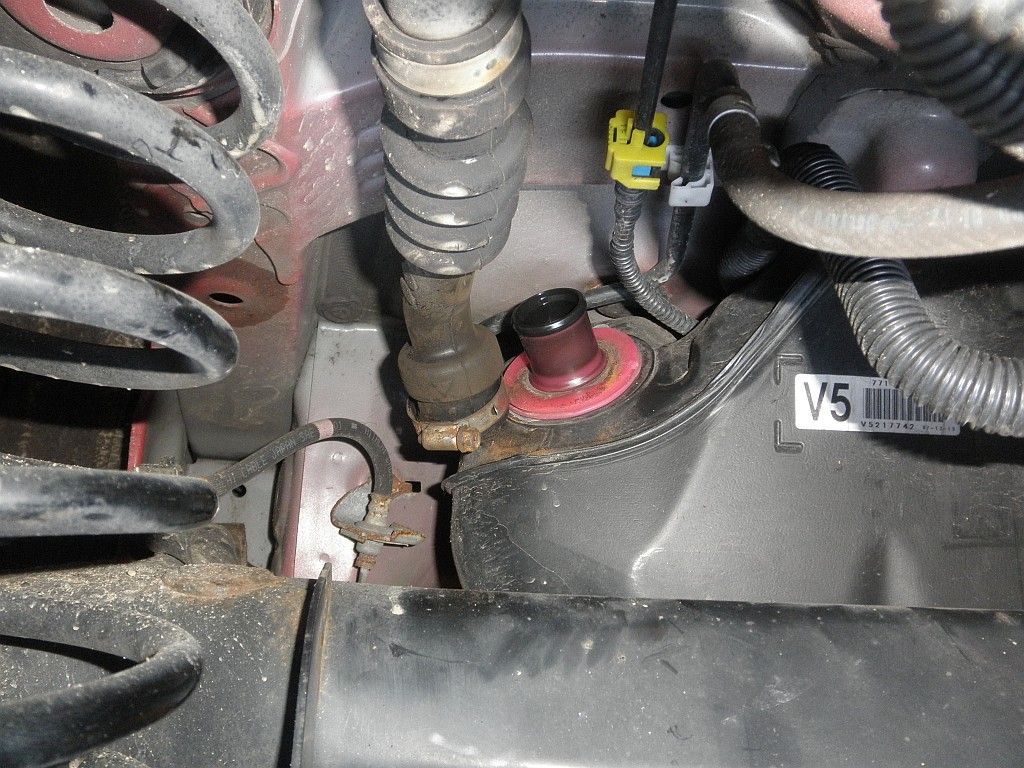 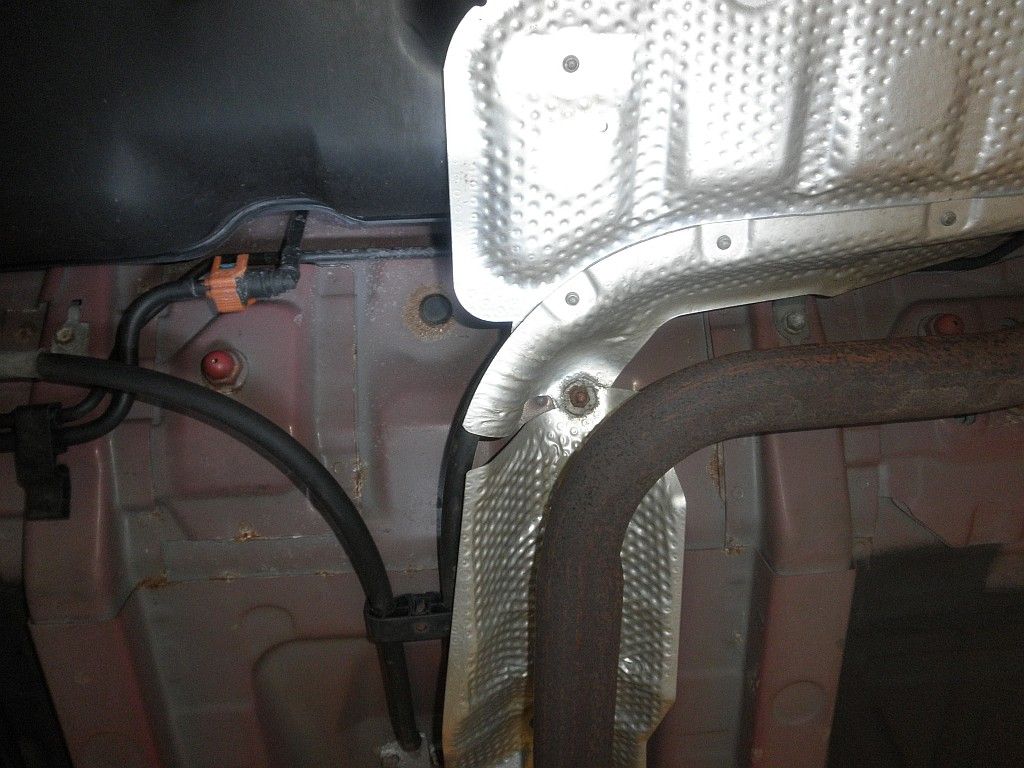  Next, the four 12mm bolts are removed from the four corners of the tank to free it. 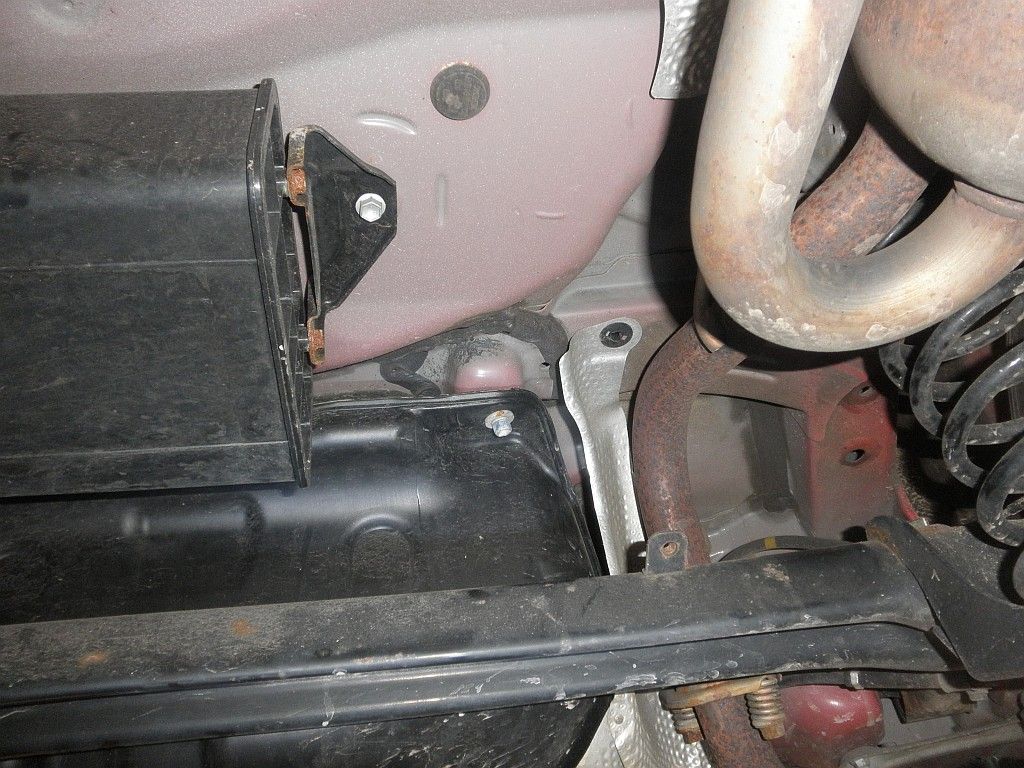 With the tank removed, I realized that I did not have access to weld a threaded insert to the bottom of the floor, due to the double walled structure.  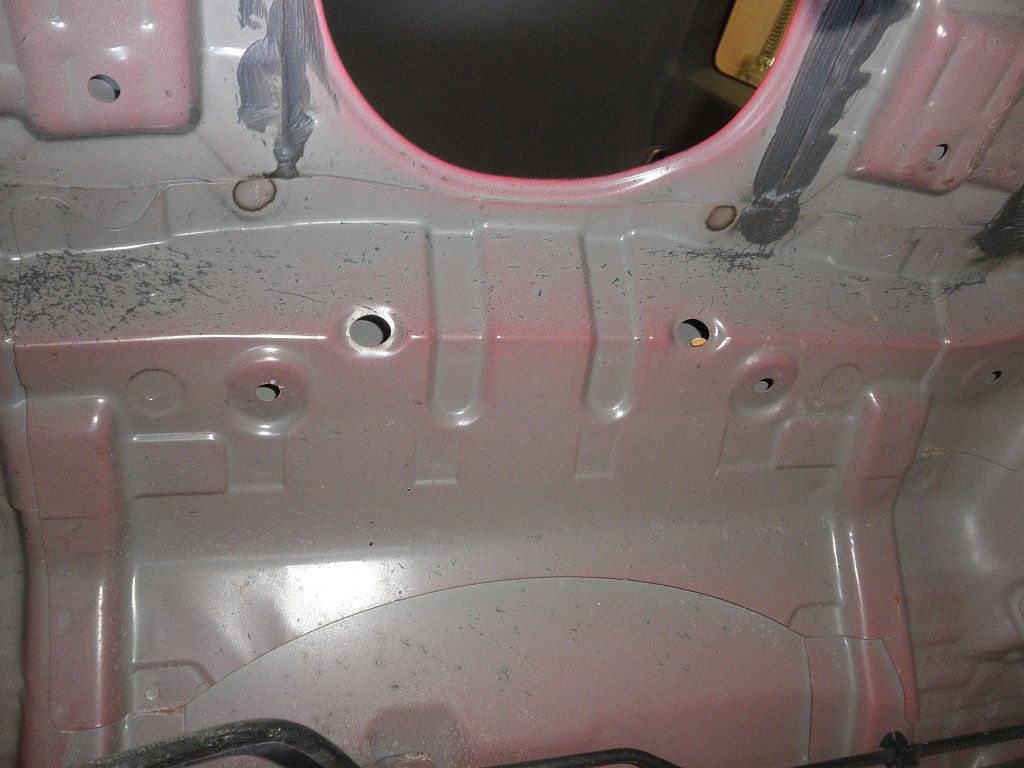 So, I decided to weld M10 x 1.25 bolts to thick washers and weld then to the top of the floor. I drilled the holes large enough to insert the nut, so only the washer would sit above the floor. 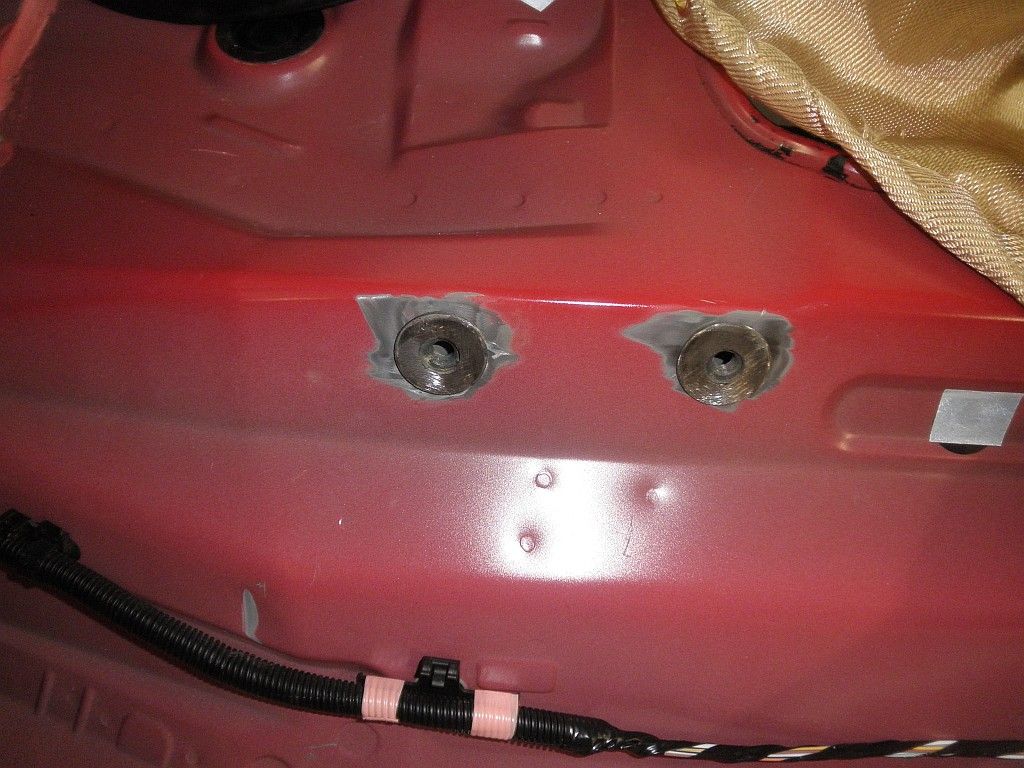 After welding, I primed the areas where I removed paint. With the tank removed, I decided that it would be a good time to rustproof the underside of the car with Herculiner and to sound dampen the floor with a layer of fatmat. I ended up also fatmatting the wheel wells and sides. 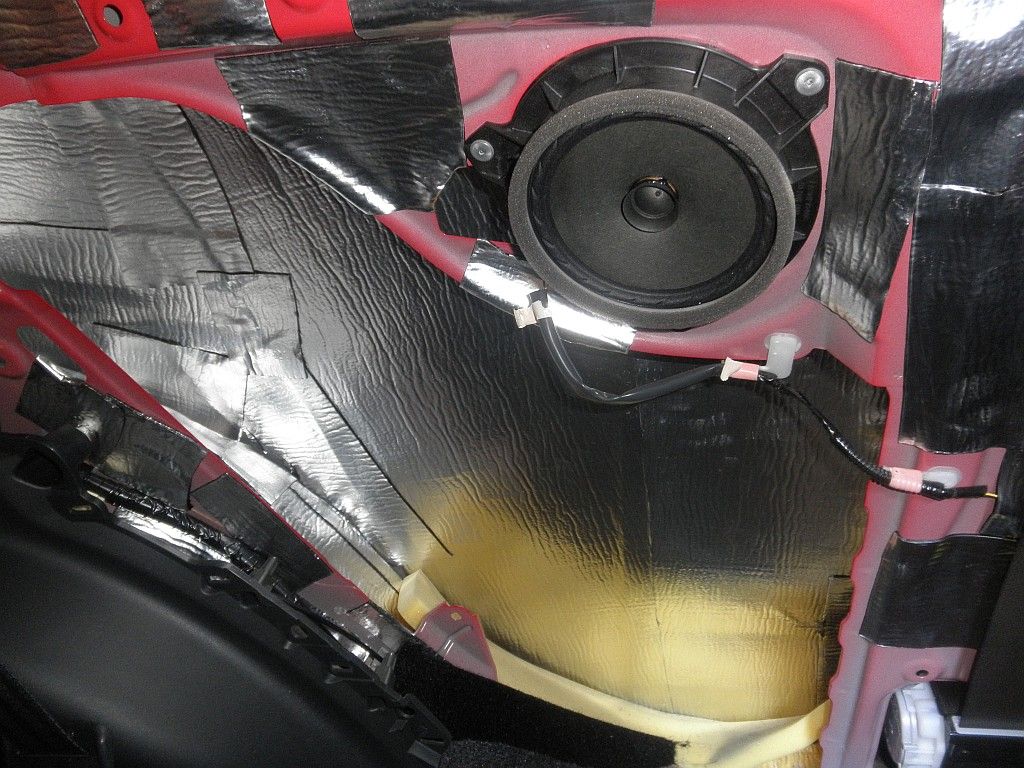 I also decided to add a layer of carpet to the spare tire well. I also had to punch holes in it and the existing carpet to expose the seat bolt holes. 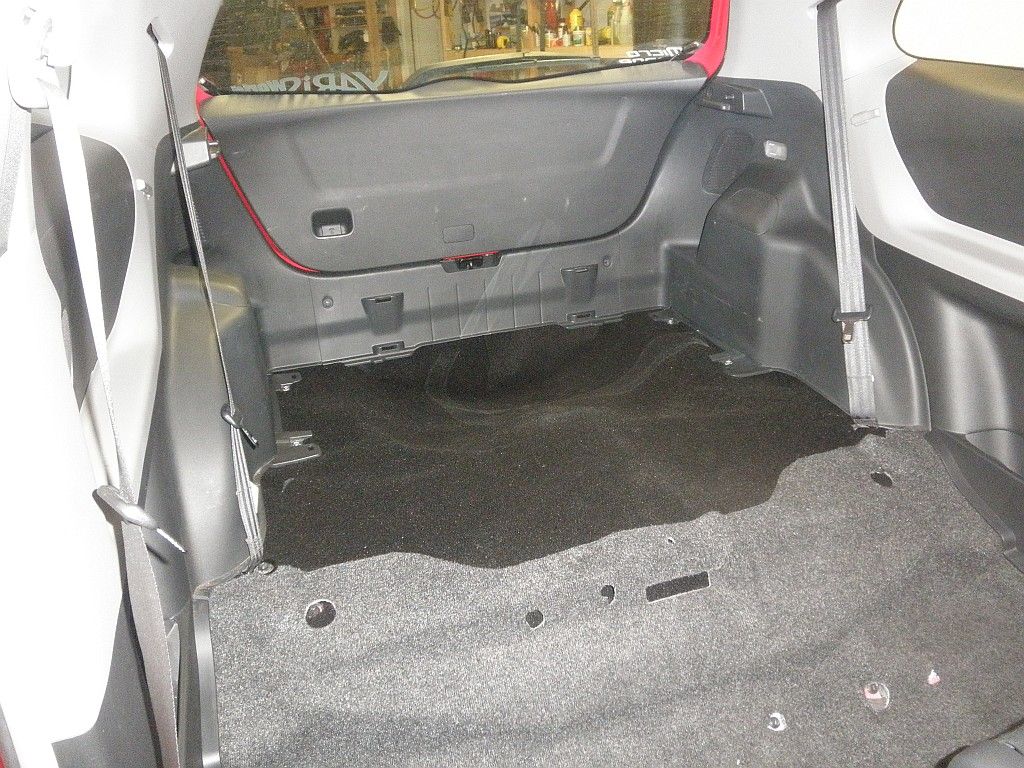 Finally, I was ready to set the two sections of the seat in place and to bolt them in. 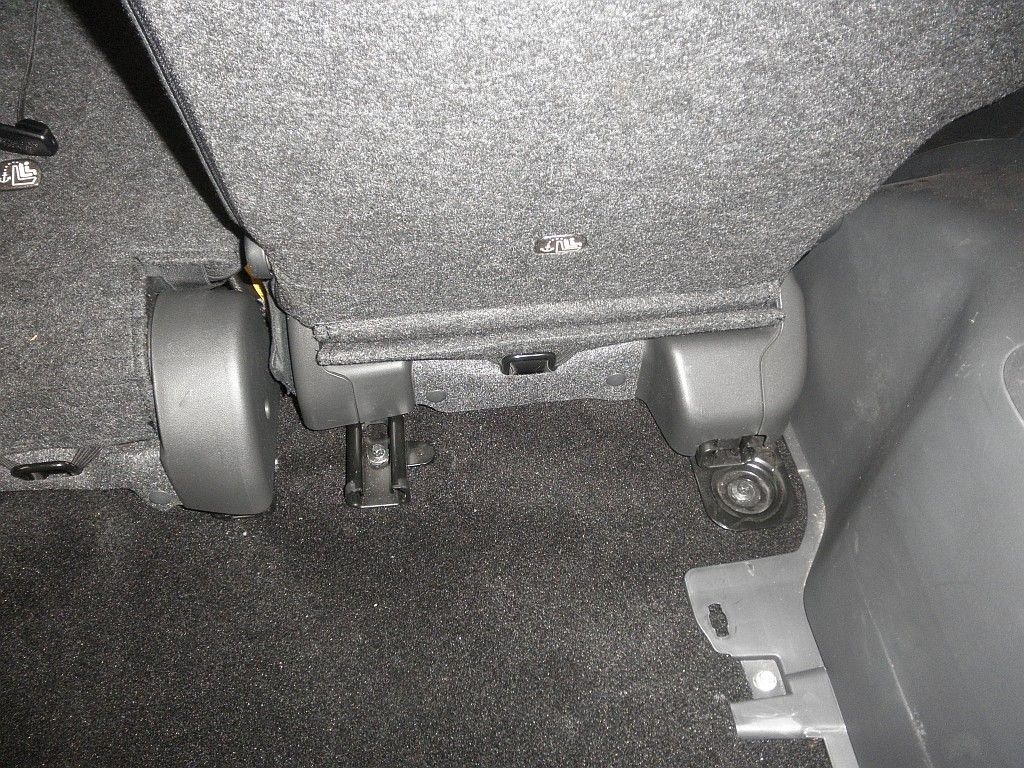 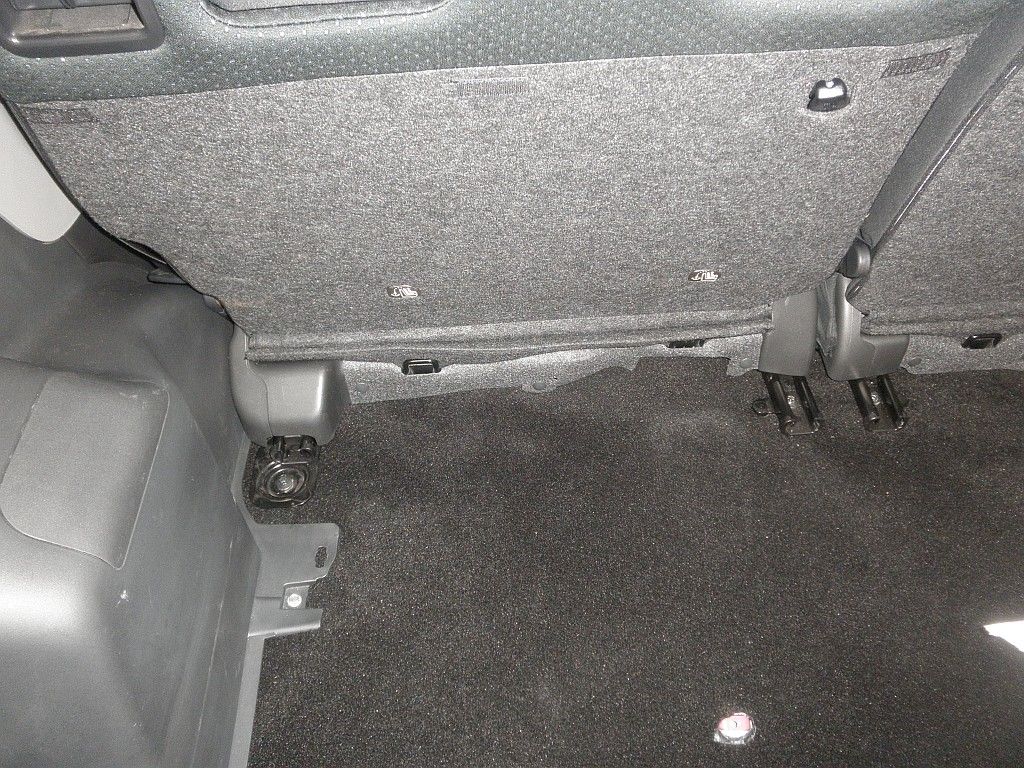 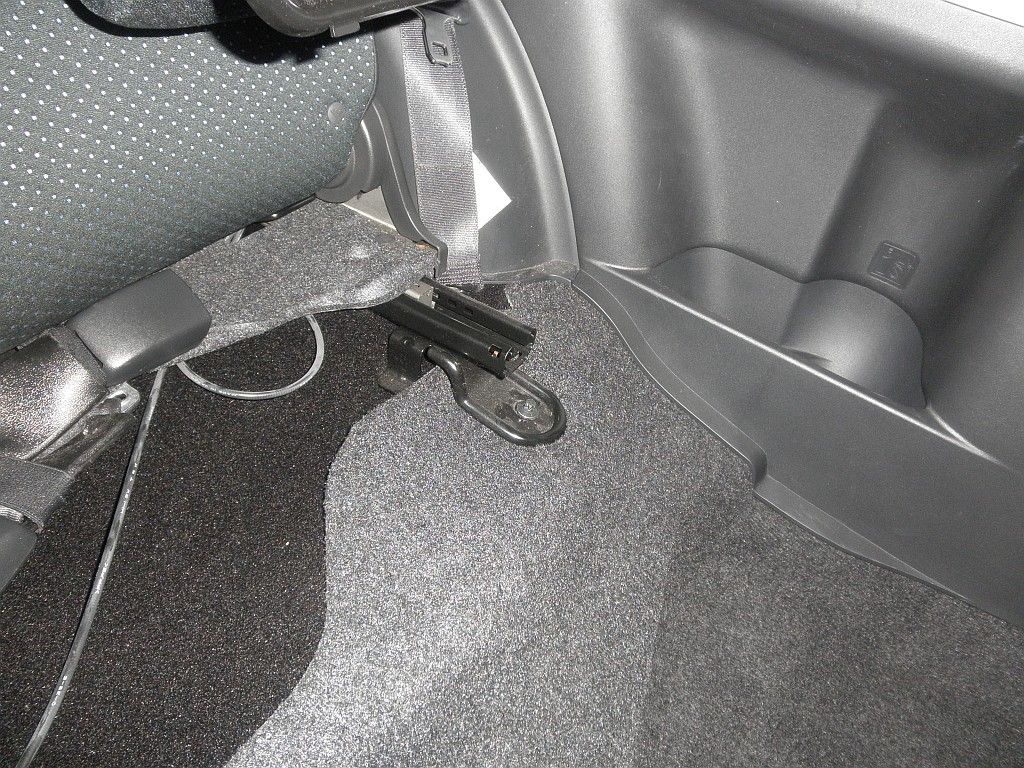 I damaged two of the bolts when I removed my bench seat, so I purchased two 10.9 grade bolts and used them at the front of the rails. 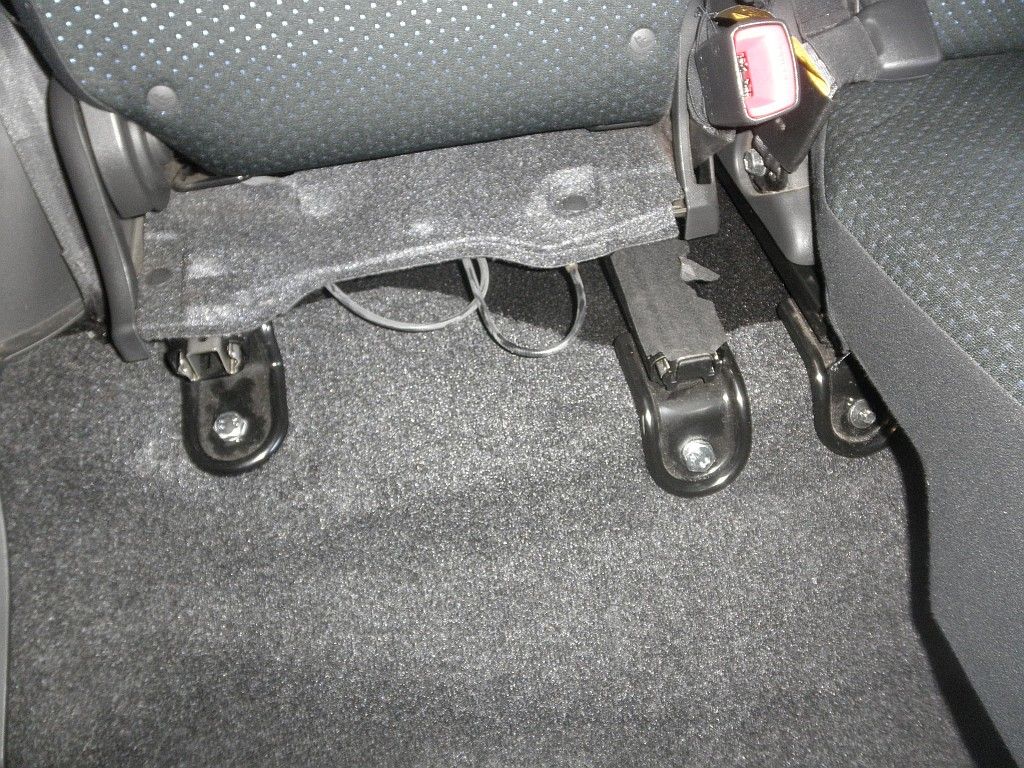 After tightening the final front bolts I snapped on the plastic covers and the seats were good to go: 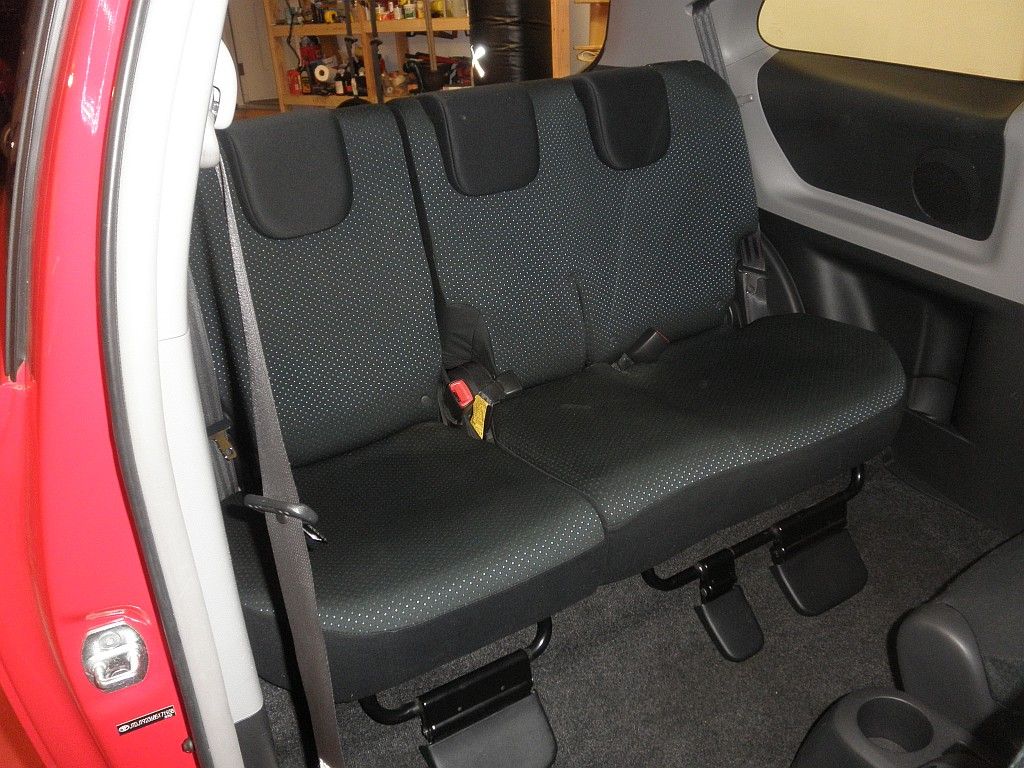 With the new carpet in the spare tire well, the back almost looks too nice to cover up: 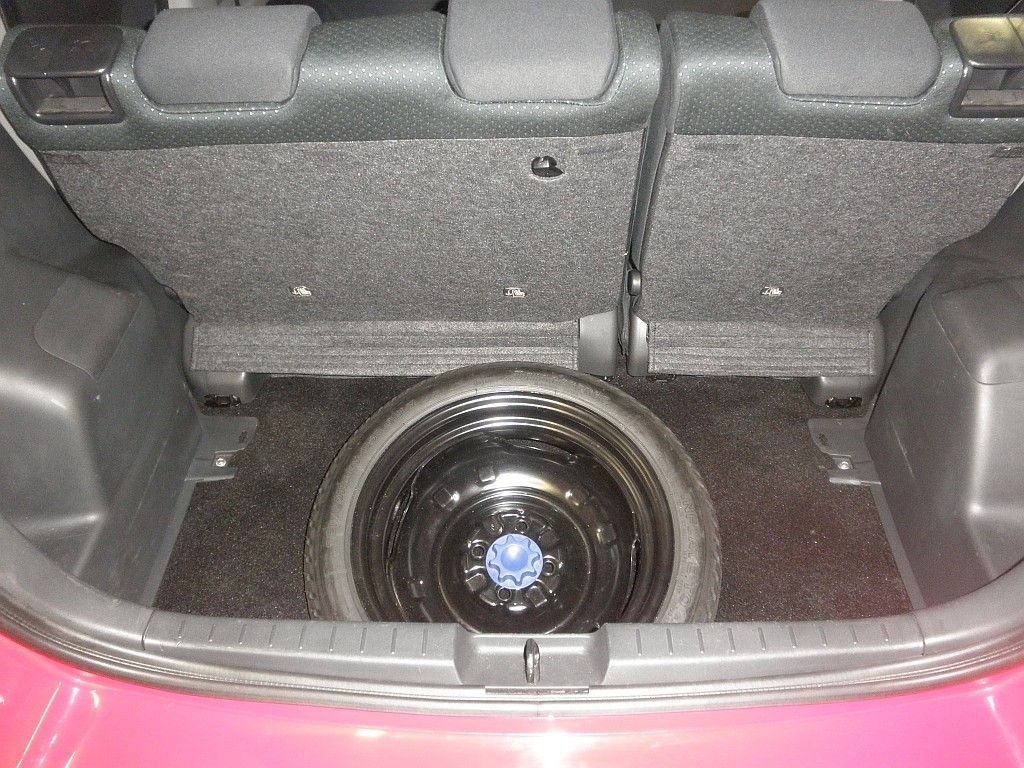
__________________
|

|

|
|
11-19-2012, 01:18 AM
|
#2 |
|
やりすぎだ~

|
BEAUTIFUL! Awesome work as usual CTScott!
Looks like a bit too much work for me but great write up for those considering this conversion. Because of the double wall which resulted in the washer/nut weld on the inside, for future purposes do you have to remove the gas tank at all? I know you removed it to see underneath but is it necessary for the conversion? Thanks for doing all the dirty work :) |
|
|
|
|
11-19-2012, 06:30 AM
|
#3 | |
|
ULTIMATE
Drives: 09 5dr LB, 2x 08 3dr LB Join Date: Oct 2008
Location: USA, CT
Posts: 13,460
|
Quote:
Because the gas tank is directly under the welding spot, and because there are two factory holes on the under side of the bottom wall, I would definitely recommend pulling the tank while welding the inserts.
__________________
|
|
|
|
|
|
11-20-2012, 02:11 AM
|
#4 |
 Drives: 2010 Liftback Join Date: Sep 2012
Location: New York
Posts: 52
|
Oh my god! What a PITA but how impressive your work was on both sides. You really are something! And now you get your Clazzios and AuxMike got to install his Katskins.
|
|
|
|
|
11-21-2012, 10:45 AM
|
#5 |
|
Drives: 2008 5-door hatchback Join Date: Oct 2008
Location: Ontario, Canada
Posts: 140
 |
Scott, it seems like you've got more steps than the DIY on micro image's forums. http://www.microimageonline.com/foru...r-Seat-Upgrade
Do you think that one is missing something? I had thought about doing this upgrade early last year but it is too much of a pain for me to bother. Not to mention the difficulty of finding the replacement seats since we Canucks only got it in the RS model up here. Just another reason I regret not getting an RS. |
|
|
|
|
11-21-2012, 11:34 AM
|
#6 | |
|
ULTIMATE
Drives: 09 5dr LB, 2x 08 3dr LB Join Date: Oct 2008
Location: USA, CT
Posts: 13,460
|
Quote:
__________________
|
|
|
|
|
|
11-21-2012, 12:20 PM
|
#7 |
|
Drives: 3-door hatch Join Date: Oct 2010
Location: Los Angeles
Posts: 519
|
I too would like to thank you for the time and effort you took to detail the work required. Mine came with the 60/40 seat so I won't have to perform this upgrade but I still used to compare pictures of the bench seat frame and the mounting feet in my car and wonder if going from bench to 60/40 was truly a simple P&P.
Someday (soon, I hope), when I have time and space, I want to go the other way, to a bench seat frame. So, thanks for the other write up as well. Since I plan to make it just a parcel shelf or possibly a locking box to make it a "trunk", I won't have to drill and weld the extra holes or seatbelts. |
|
|
|
|
11-21-2012, 01:33 PM
|
#8 | |
|
ULTIMATE
Drives: 09 5dr LB, 2x 08 3dr LB Join Date: Oct 2008
Location: USA, CT
Posts: 13,460
|
Quote:
__________________
|
|
|
|
|
|
11-21-2012, 06:45 PM
|
#9 | |
|
Drives: 3-door hatch Join Date: Oct 2010
Location: Los Angeles
Posts: 519
|
Quote:
 )... )...
|
|
|
|
|
|
11-26-2012, 12:04 PM
|
#10 |

Drives: 2008 HB, A/T, Power W/L/M Join Date: Oct 2008
Location: LI, New Yawk
Posts: 2,063
|
Wow, and I was worried about drilling two lousy holes! Who would have thought there would be such a huge difference in the two options...
__________________
Never take eyes off opponent - Bruce Lee |
|
|
|
|
11-26-2012, 05:01 PM
|
#11 |

Drives: 2008 Yaris Liftback (Sprocket) Join Date: Oct 2008
Location: San Antonio, Texas!
Posts: 2,799
|
Scott, thanks for the great write-up but you have basically killed any desire I once might have had of swapping my bench out for a 60/40!
No biggie, in over four years of ownership I've never once needed it. Mind you, I've also got a long-wheelbase Jeep Wrangler Unlimited and a Honda minivan, so Sprocket doesn't see any heavy-hauling! Cheers! M2
__________________

|
|
|
|
|
02-14-2016, 02:27 PM
|
#12 |
|
Drives: 08 5dr HB Join Date: Aug 2013
Location: Canada
Posts: 28
|
hate to revive an old thread, but could it be possible that the mounting points and different for the 4 door hatch? I was just poking around my car and there were 2 plastic plugs which covered threaded holes on the passenger side close to where I would imagine the 60/40 tracks to be...
|
|
|
|
|
02-14-2016, 05:29 PM
|
#13 | |
|
ULTIMATE
Drives: 09 5dr LB, 2x 08 3dr LB Join Date: Oct 2008
Location: USA, CT
Posts: 13,460
|
Quote:
__________________
|
|
|
|
|
|
03-05-2017, 04:12 PM
|
#14 |

Drives: 2007 Yaris Hatch is sold Join Date: Mar 2017
Location: Chilliwack, BC
Posts: 45
|
nice!

|
|
|
|
 |
|
|
 Similar Threads
|
||||
| Thread | Thread Starter | Forum | Replies | Last Post |
| 60/40 Rear Seat | Smokey159 | Items for Sale by private party | 28 | 01-03-2009 08:05 PM |
| Anyone in our area want a 60/40 rear seat? | Smokey159 | Southeast | 0 | 10-30-2008 09:48 AM |
| WTB or trade I need a 60/40 split backseat | contraband831 | Items for Sale by private party | 4 | 09-10-2007 12:25 PM |
| Golf clubs - non 60/40 seat? | golferagw | General Yaris / Vitz Discussion | 13 | 02-02-2007 06:43 PM |
| 60/40 rear seat in LB - anyone install one? | wilco | Cosmetic Modifications (Exterior/Interior) | 0 | 08-20-2006 06:42 PM |


 Hybrid Mode
