
 |
 |
|
|
 11-20-2011, 01:03 AM
|
#181 |
 
Drives: 2008 Yaris HB Join Date: Oct 2008
Location: University Place,WA
Posts: 828
|
Here is a picture of the parts......I am going to take them of a step by step as I do the install.
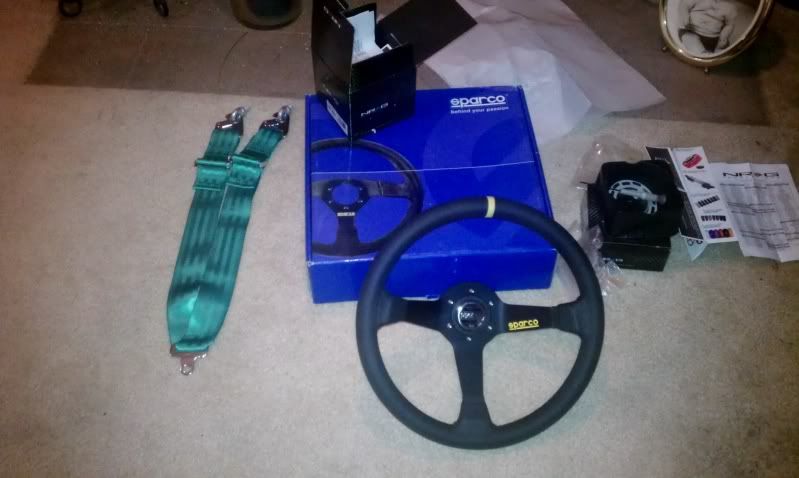 I figured out how to make quick release and horn work and what parts to get. CTScott helped me make sure what resistors to get for airbag....thankyou bro.... I also found a great local store that was like a crackhouse for anyone who likes electricity......OMG I drove there 42 miles to get $3 in resistors and walked out $50 poorer....but got lots of great stuff for my amp and found a lot of nice stuff to buy later on....parking lot was hell to get in and out as there was a huge sloped entrance and I had to slowly get back into fast trafic.....but what a great store.... So tomorrow I jsut gota find a paperclip and some epoxy and I am ready to install nd will post all pictures...I figure everyone can use the help should they cahnge wheels.... |

|

|
|
11-20-2011, 03:28 AM
|
#182 |
 
|
Weww ... at least your Journey and the 50 bucks was worth it. Can't wait to see the update on Your Ride. I must Be great once those items have been installed ...
|
|
|
|
|
11-20-2011, 01:42 PM
|
#183 |
|
Modded Moderator

Drives: 07 Toyota Yaris, 71 Galaxie Join Date: Mar 2007
Location: Wenatchee, WA
Posts: 3,670
|
Please do a write up on your steering wheel install and airbag light reisistor mod. My steering wheel after 106k miles is starting to get smooth and shiny where I usually have my hands, and also my airbag light is stuck on because the first shop that fixed my car botched the airbag install. I would rather just go with an aftermarket wheel because 1. My original wheel is wore down 2. The airbag doesn't work anyway 3. The shop is 120 miles away that needs to fix it and they won't back their work up
 . .So I want to know. Must know.... 
|
|
|
|
|
11-20-2011, 01:45 PM
|
#184 |
|
Drives: 2008 Yaris HB Join Date: Oct 2008
Location: University Place,WA
Posts: 828
|
Sure see it will come in handy already......lol
Now I just gotta find a paperclip and some epoxy that is how I will be isolating the power lead for the horn trigger and mounting to the turn and wiper cases....you'll see. |
|
|
|
|
11-20-2011, 07:43 PM
|
#185 |
|
Drives: 2008 Yaris HB Join Date: Oct 2008
Location: University Place,WA
Posts: 828
|
Ok so here is a step by step of the things needed to do a clean install of a steering wheel,horn works with no twisty wires,airbag light goes off as it should.Took me 2 hours to do the install.
Over all to do it I would say it took me about 4 hours on Youtube,Google,and some prep work to get materials and such.Difficulty level I would say 2-3 out of 10 tops. So first picture is of the Beginning of the install. 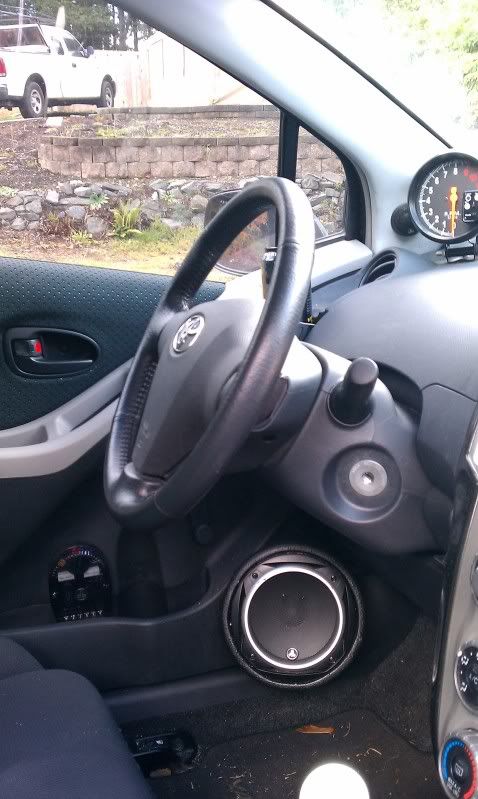 Next remove the Negative cable from battery and leave door open to discharge the airbag.Then remove the Positive cable from battery.Total time before I started to remove Airbag was about 3 minutes to make sure it was discharged. 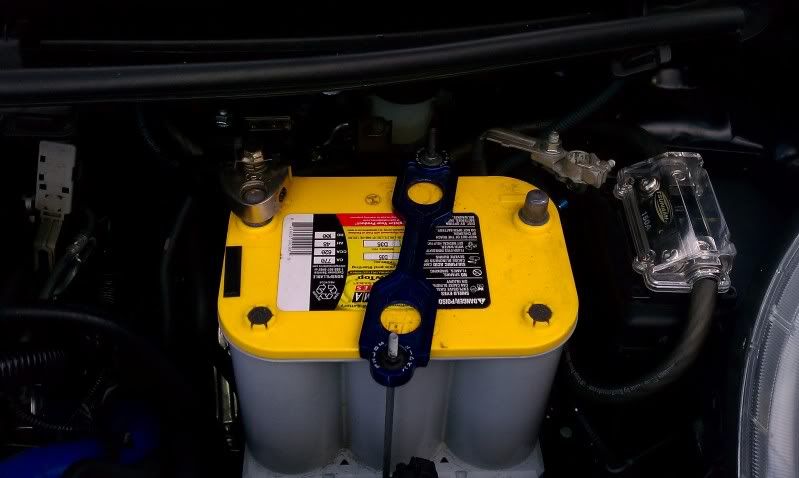 Undid the two Tork screws T27 is the size. 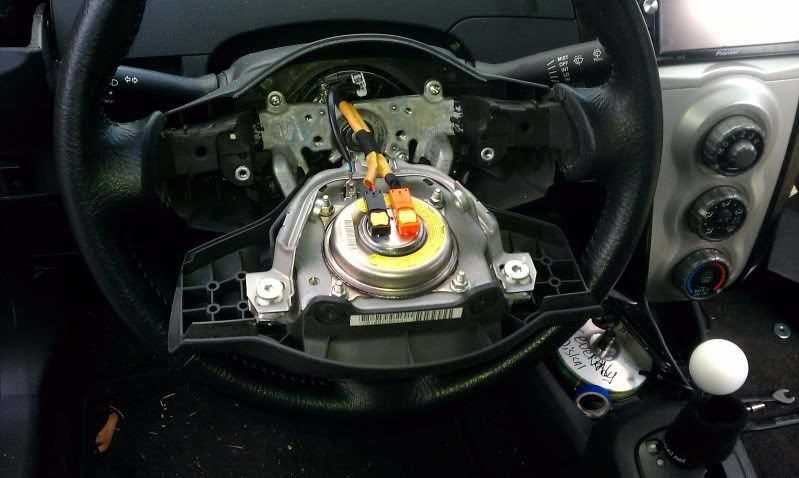 Pop the two clips up and remove the two cable s from the airbag. 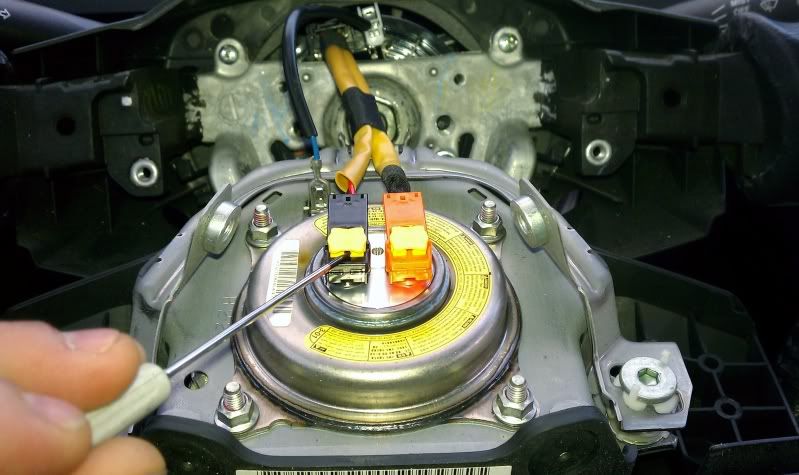 Airbag removed 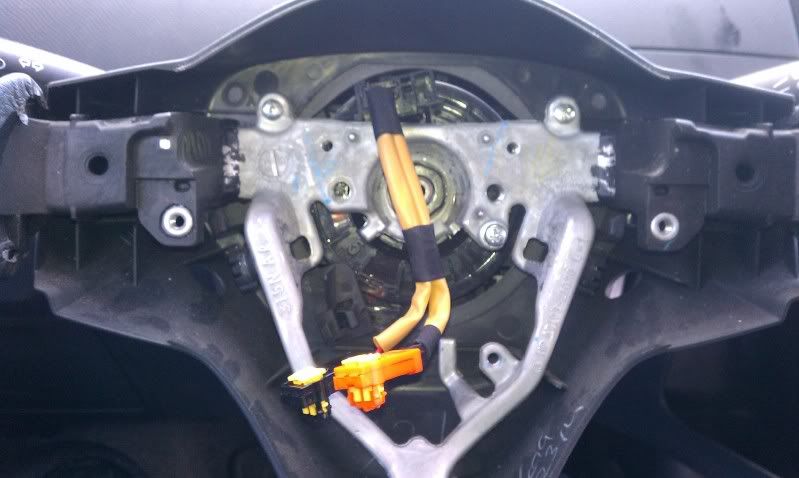 Airbag and Horn clips......clockspring still installed to the harness. 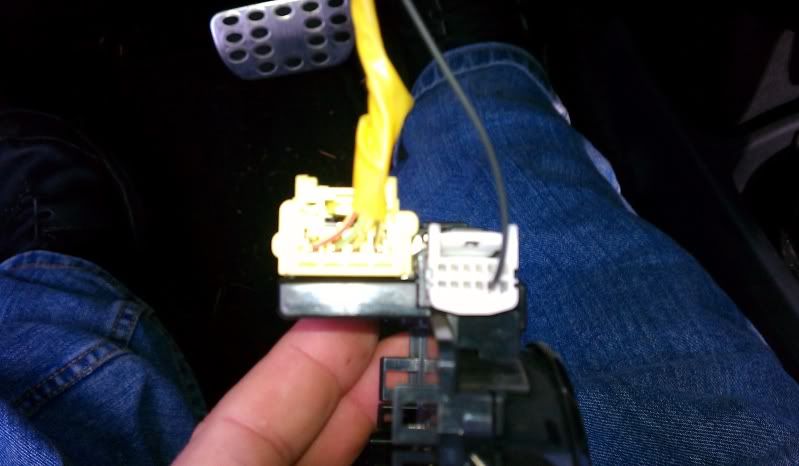 Clockspring removed.  Next you need a paperclip and a lighter.On the blinker and on the wiper handles where the clock spring attaches you are going to heat the paperclip up and work it through the sides of each clip,melting a path through it.Take your time and do a neat job of it. This is where the paperclip sits once melted through. 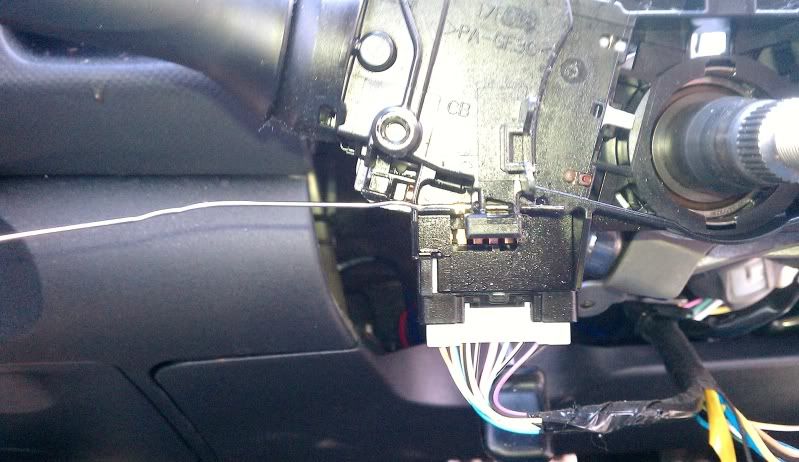 The wiper stalk side. 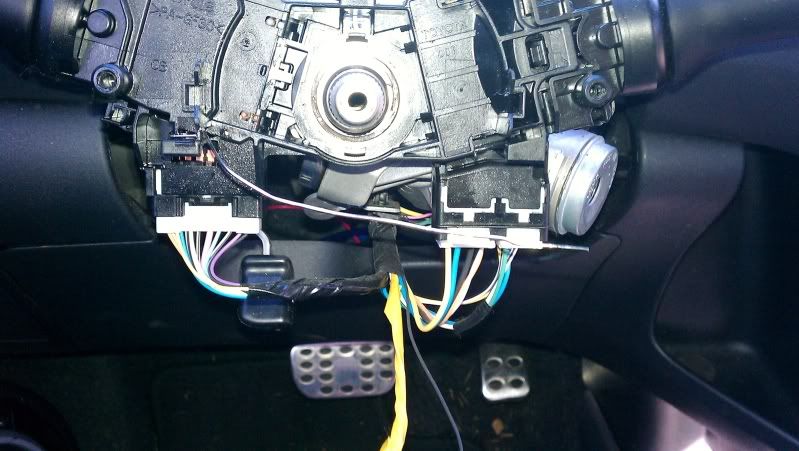 Now that you have a path through both you need a crimp and a short wire.I cut the stock horn wire and made my own new junction and then the wire goes to the paperclip with the crush sleeve on it and gets crushed together.Then plug in the wire to the horn wire. 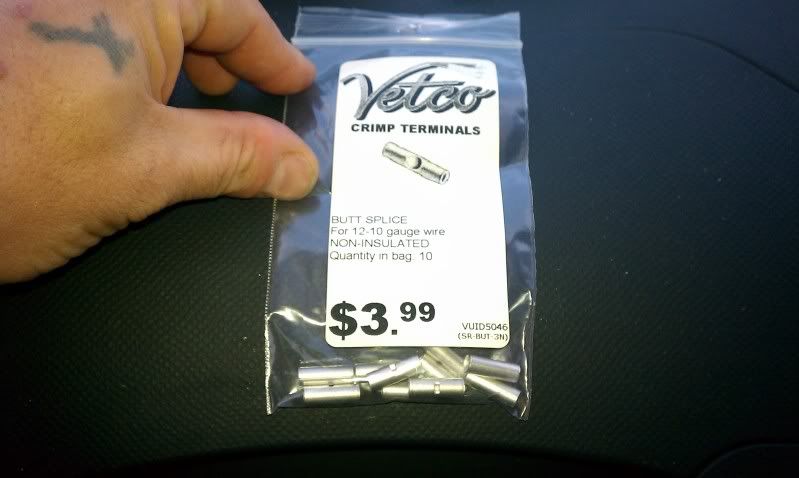 Clip in place,wrap left side around the plastic clip where the old clockspring clipped and then on the other side is a channel and you bend the paperclip up in tot he channel and that puts good tension on the paperclip.This makes it so it does not move and has a good bow to it. 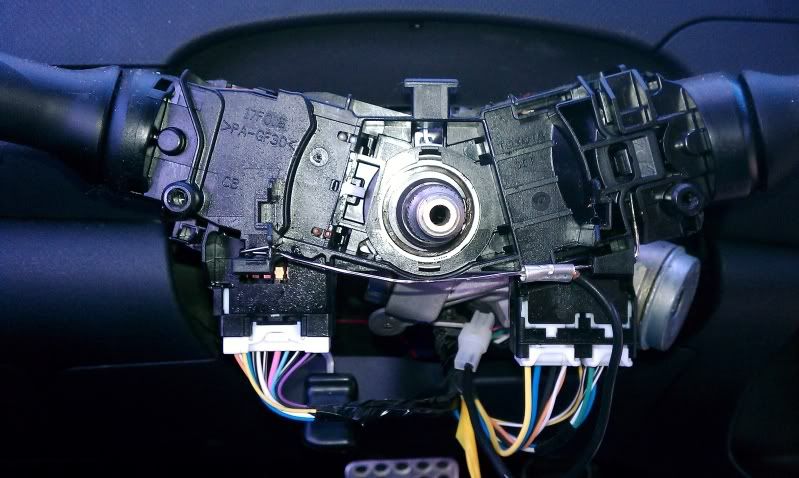 Now for the airbag harness and the resistors.On the yellow plug topside is a white clip that takes a small screwdriver and pops straight up and off.Then take resistor and put in the first two holes on the left,do not use the larger holes where the copper terminal is,I tried tat and never got a good connection,slide the resistor in the small er hole so you can see the resistor wires touching the pins,line them up nice and straight,repait this to the Right side of the terminal with the other resistor,make sure they do not touch each other and put the white plug back in and if it is all lined up cleanly it will close right up,if not line up wires from resistor better. 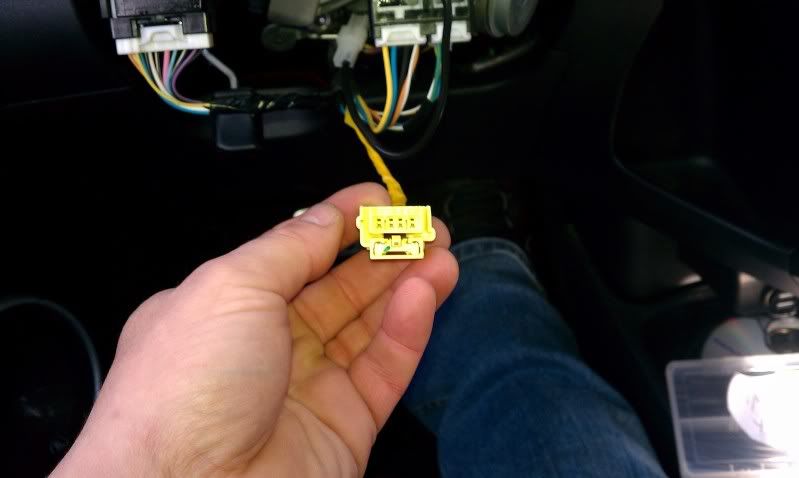 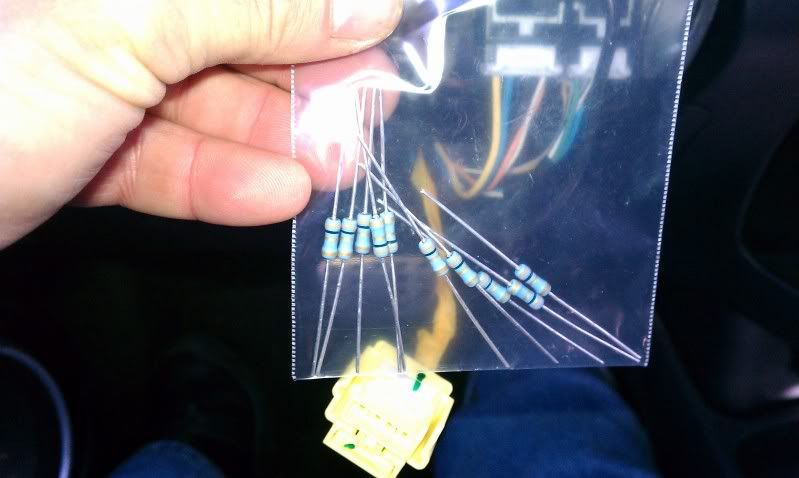 LIne up hub with the top of it at the top,there is a small dot on the NRG hub,probably the same on most.Hook the wire from the back side copper surface on the hub to the yellow wire on the quick release and the black wire to the black wire,they are male female so it is hard to screw it up.Bolt on the quick release hub. 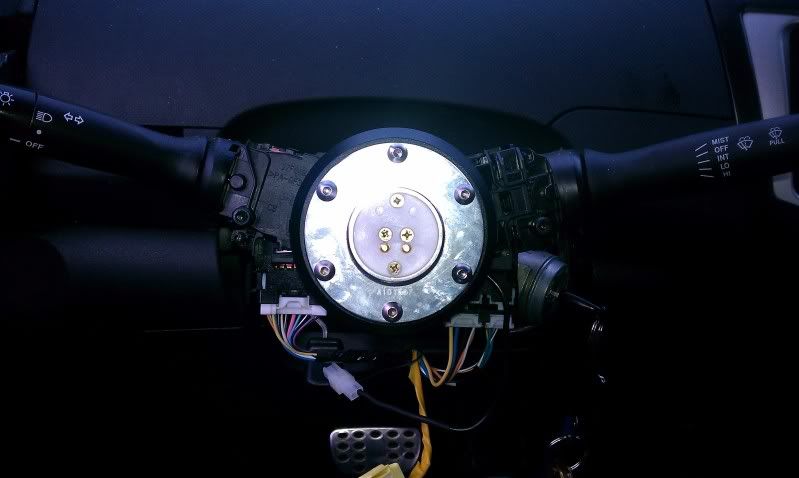 On the horn button the negative is the outside one and the center post is the Positive side that goes to the yellow wire in the other side of the quick release,I had to cut off my end as the horn button and the hub wire were both male to I corrected and hooked up.Make sure to heatshrink it all well. 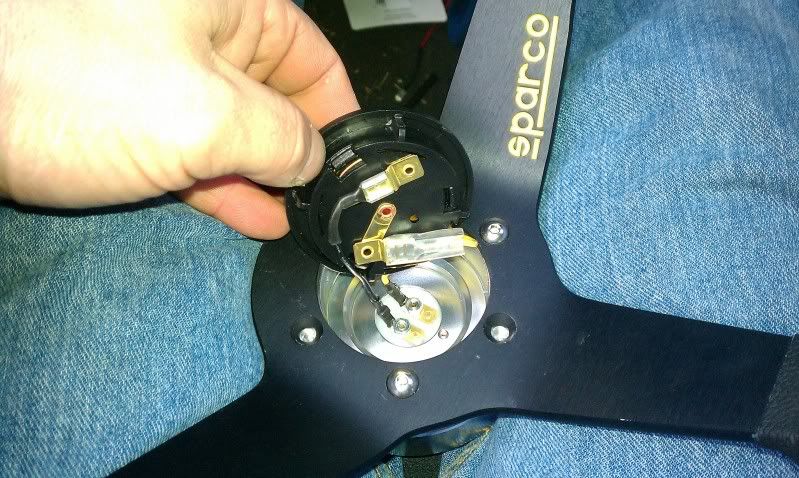 Wheel installed to quick release and everything in place. 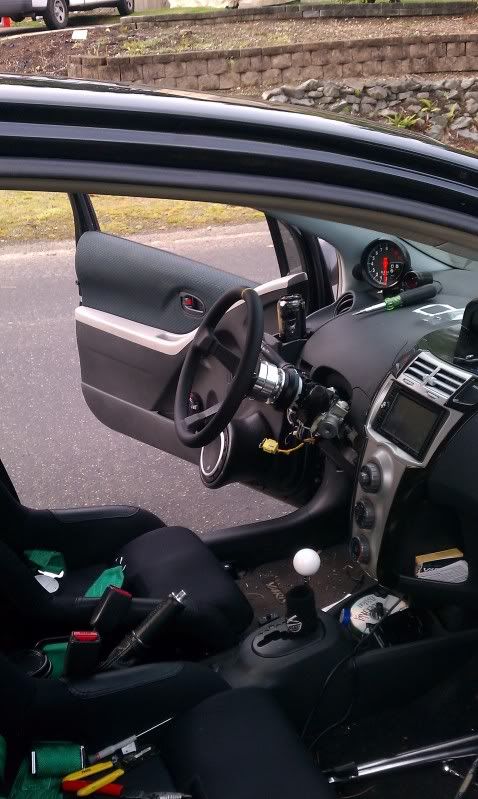 Wires neatly tucked away and zip tied. 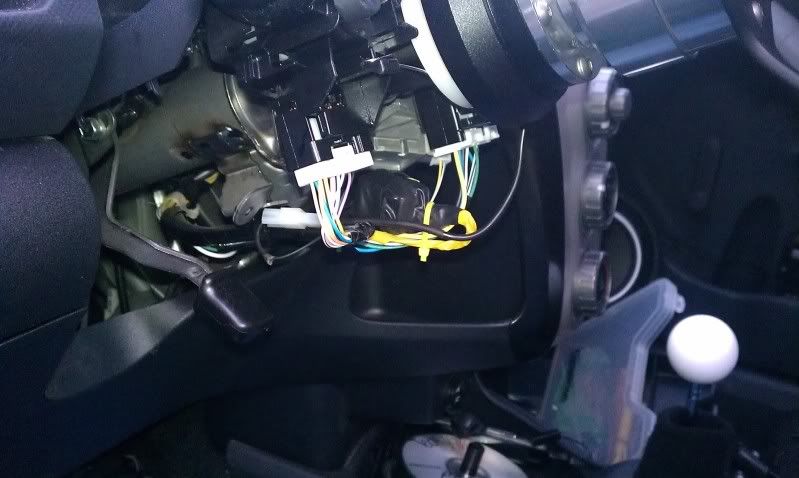 No airbag light,the light comes on when you start car just like normal and then goes off just like normal.My first attempt I got a airbag light on dash that stayed on and then I discovered the resistor needed put together like I said to do and then it worked fine. 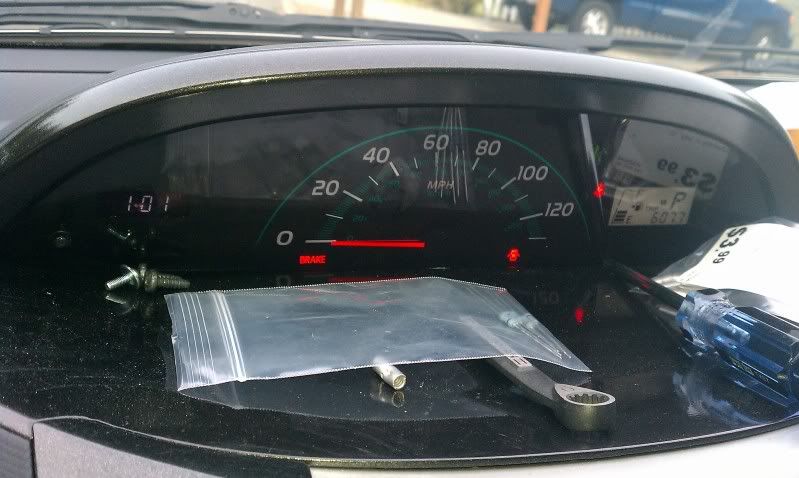 Everything back together and ready to go. 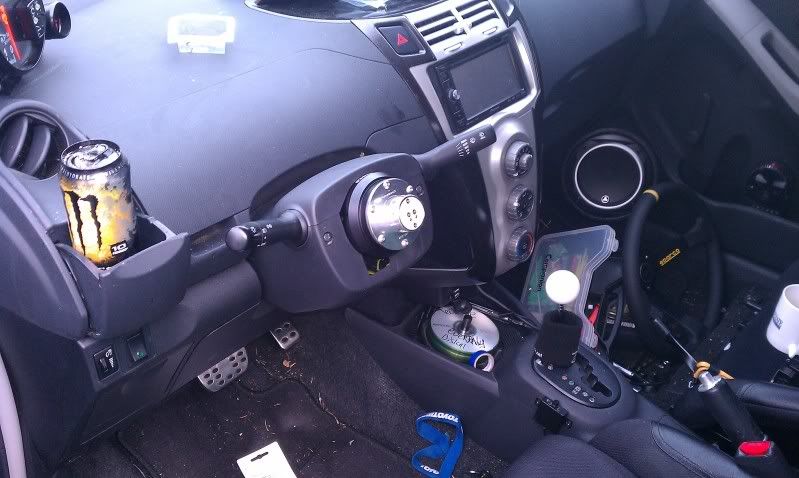 Wheel installed.... 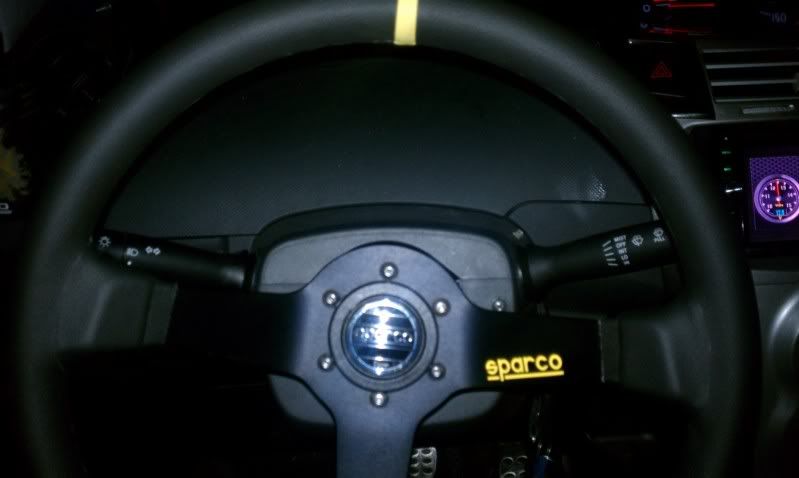 Hope this helps anyone who wondered how to do this. Big thanks to MicroImage and CTScott for the great products and help with how to do the resistor trick..... Last edited by bzinn 1; 11-20-2011 at 11:01 PM. |
|
|
|
|
11-21-2011, 05:09 AM
|
#186 |
|
Drives: 2013 Yaris Join Date: Oct 2011
Location: Portland, OR
Posts: 914
|
great write up! you should make a separate thread for that and sticky it! :O
|
|
|
|
|
11-21-2011, 01:59 PM
|
#187 |
|
RS

Drives: Toyota vitz rs 2006 Join Date: Jan 2011
Location: Malta
Posts: 23
|
Fantastic job mate. Well done!
|
|
|
|
|
11-21-2011, 08:58 PM
|
#188 |
|
Drives: 2008 Yaris HB Join Date: Oct 2008
Location: University Place,WA
Posts: 828
|
Thanks guys.....I made sure that if you use the SEarch and put in airbag resistor it comes up,also will with airbag removal and steerign wheel install.....I can make a separate write up if needed.
Only thing I dont like about this install is my steering wheel is not centered,guess once I get the bags installed I will have to take it in to get aligned and find out what is bent...lol.....think it is from the pothole I hit in the spring on the old wheels that is still haunting me,......it has been like this for a while but the yellow stripe really lets you know its off....lol |
|
|
|
|
11-21-2011, 11:07 PM
|
#189 |
|
Drives: 2013 Yaris Join Date: Oct 2011
Location: Portland, OR
Posts: 914
|
cant you just re-align the steering wheel to be straight when the wheels point straight? my steering wheel is crooked also, but i know it's been pulled before so i just assumed it was re-attached a little off kilter.
|
|
|
|
|
11-28-2011, 02:52 PM
|
#190 |
|
Fiebrú
Drives: Yaris Sedan '07 Join Date: Nov 2011
Location: Puerto Rico
Posts: 10
|
Last pic, mega like!! lol
|
|
|
|
|
11-28-2011, 07:03 PM
|
#191 | |
|
Drives: 2008 Yaris HB Join Date: Oct 2008
Location: University Place,WA
Posts: 828
|
Quote:
It is an easy fix,when gettign car aligned they are supposed to put the wheel straight and put the lock brace on it and then do the alignment.I never did this,I just replaced the parts that got bent and measured from the passenger side and tightened up it all. since I am gonna do bags and camber in the spring I figured to wait till then to do it,tires are wearing fairly well,and since they are differant sized front and back and directional I plan on them maybe lasting 20000 miles tops since I cant rotate...lol....the cost of a nice stance. |
|
|
|
|
|
11-29-2011, 03:54 AM
|
#192 |
|
Drives: 2013 Yaris Join Date: Oct 2011
Location: Portland, OR
Posts: 914
|
I used to periodically set my friends RX7 steering wheel sideways when i had the tools handy just to mess with him :D lol.
I try not to buy directional tires if i can, i hated not being able to rotate the wheels on my FB :( |
|
|
|
|
12-13-2011, 01:20 AM
|
#193 |
|
Drives: 2008 Yaris HB Join Date: Oct 2008
Location: University Place,WA
Posts: 828
|
Gonna see if a set of '11 STI front bumper side vents will fit.......will keep you posted,who knows how long it could take to get here from NY at Xmas....lol
|
|
|
|
|
12-19-2011, 12:47 AM
|
#194 |
|
Drives: 2008 Yaris HB Join Date: Oct 2008
Location: University Place,WA
Posts: 828
|
HKS filter installed on the Injen intake.....big improvement,but the stock Injen filter was like 2 years old and had been cleaned at lesat 4 times so it was probably pretty much crap.
Motor sound changed,exhaust sound changed,bit more snap and pop in the midpipe when letting off gas....but it is not louder just sounds meaner.Intake has growl now too. STI bumper vents should be here thursday....hope they fit,may have to relocate filter with some duct to give me space,will know more thursday. Also thinking about installing the STI roof vent,the little pop up one Last edited by bzinn 1; 12-19-2011 at 01:11 AM. |
|
|
|
|
12-26-2011, 09:32 PM
|
#195 |
|
Drives: 2008 Yaris HB Join Date: Oct 2008
Location: University Place,WA
Posts: 828
|
Finally got the DC header installed,was a pain to get the two nuts off....be sure if you are removing he stock one use a deep 12mm 6 side socket and that is about the only way to get a grip to get them off,the other three bolts come right off.
The mid pipe was a pain to line up but no leaks and it is on,O2 sensor went right out old one and right in the new header. Power is much improved,from about 3200-6500 it pulls like it should.....motor seems to wind up effortlessly now. Volume of Header,midpipe,and can is a lot louder if I put it to the floor,sound like a Toyota should now. |
|
|
|
|
12-27-2011, 06:59 PM
|
#196 |

|
video mayhaps? :P Id love to hear it! what was the diameter of your midpipe you put in?
__________________
 My yaris build! http://www.yarisworld.com/forums/showthread.php?t=36908 Please feel free to leave your oppinions! I would love to have them to see what I can improve on! 
|
|
|
|
|
12-27-2011, 09:11 PM
|
#197 |

|
Mighty stuff! :)
|
|
|
|
|
12-29-2011, 12:06 AM
|
#198 |
|
Drives: 2008 Yaris HB Join Date: Oct 2008
Location: University Place,WA
Posts: 828
|
yeah I need to make a video.......it is honestly pretty loud,like ticket getter loud if a cop was right next to you in traffic and he wanted to be a dick loud....
Mid Pipe is the Nitto,pretty sure it is 2",it is well made,so far it is holding up really good wehn I was under there looking around. I think I may invest in a magna flow or some other type can....also was thinking of doing a boso exhaust out the back for fun It rains here a lot and we get pretty cooped up and bored....lol The car has a pretty shift sound now....hard to explaine I just need to catch it on video....gonna get a gopro soon I think in the spring so I can takea few decent videos. |
|
|
|
 |
|
|
 Similar Threads
|
||||
| Thread | Thread Starter | Forum | Replies | Last Post |
| NEWS: TOYOTA REVEALS ALL-NEW YARIS SEDAN AT 2006 LOS ANGELES AUTO SHOW | VitzBoy | General Yaris / Vitz Discussion | 7 | 09-20-2023 07:50 AM |
| Natural Gas Yaris | MadMax | General Yaris / Vitz Discussion | 13 | 06-03-2017 06:10 AM |
| 2007 Yaris Pricing Info ! | YarisBueller | New YARIS Purchase Forum | 104 | 06-24-2009 04:54 PM |
| Florida Yaris Meet! 6/23/2007! | Sabretooth | Southeast | 13 | 06-05-2007 06:46 PM |


 Linear Mode

