
 |
 |
|
|
 05-19-2009, 06:32 PM
|
#1 |
 
Drives: vitz rs 1500 2001 Join Date: Dec 2008
Location: Suriname South America
Posts: 28
|
Hi guys,
I tought I would like to post this, because I think there are many who would like to do this also. I installed 1.5" oil pressure, voltage and water temperature gauges and made my own holder from polyester resin...It's the cheapest and smallest one I could get... It's the first time I've ever worked with any kind of resin, so bare with me....  My dashboard before I've installed the gauges, just a bit boring, so i thought I'd pretty the thing a bit....  So I've bought some gauges on the net...they actually came with a holder that looked straight from the dashboard, but to keep the theme of the car's gauges, I thought why not make one that's tilted so the gauges looked at the driver. You can see they're mechanical gauges so installing them will be a lot of fun....  So i uninstalled the middle dashboard and basically uninstalled the tray that was in the middle, right above the temperature control buttons. Sorry have no pics  ... ...I then taped the inside where the tray would have been and made a template of the inside.Sorry also have no pics ...Got the tape of and stuck it on a thin sheet metal, the thinnest i could find, and with metal cutters started to cut the template out... 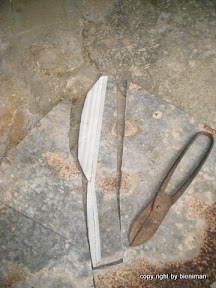 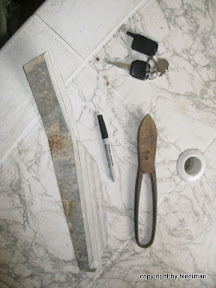 Then I started to make the base of the holder from the cut metal and glued the ends with epoxy cement .. I held the ends together with laundry pins...they should hold...hahahaha all i coul find...  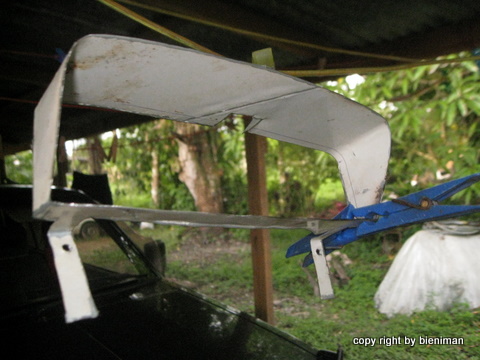 I then cut round shapes from hard plastic, the size of the gauges. And sawed a small piece of cardboard, about the size of the base of the holder. Also I sawed 3small pieces of a broomstick, which will hold the plastic circles and let them keeping looking at an angle...Sorry also have no pics ...Put everything together(wood,plastic metal) and covered the whole thing with some cloth or stretchy material, so you'll get natural curves...I've put the whole thing together with pins, I know it's confusing but you'll get the point after seeing the pics.... 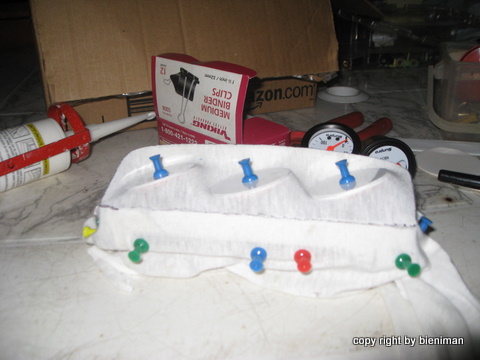 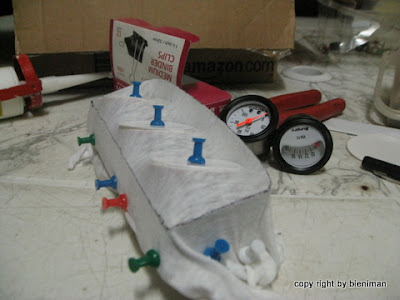 O, almost forgot, I've cut 2 sets of plastic round thingys. They should hold on both sides of the cloth, inside and outside... Mix up your resin. Careful!!!! these fumes are harmful and be sure to take safety precautions. I've tried a bunch of times to get the right mixture, mind you it's my first time working with resin. After mixing it up quickly apply resin to cloth with a small brush... then apply fiberglass in small pieces, just rip them off the larger piece...Use a lot of powder before handling fyberglass, these things are very itchy...WORK FAST,THE RESIN IS WAITING ON NO ONE>>IT HARDENS FAST AS HELL>>>> Now you'll get one sticky mess...  , let it dry and harden.. , let it dry and harden..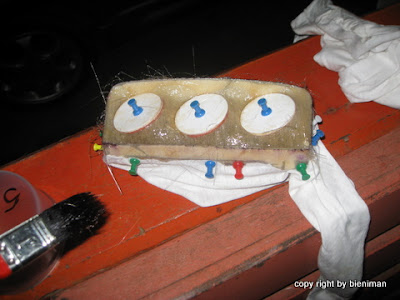 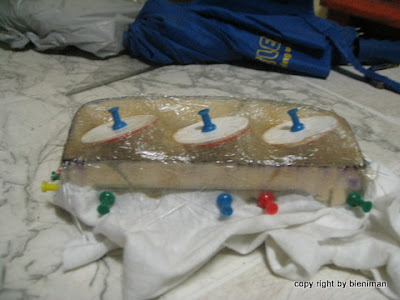 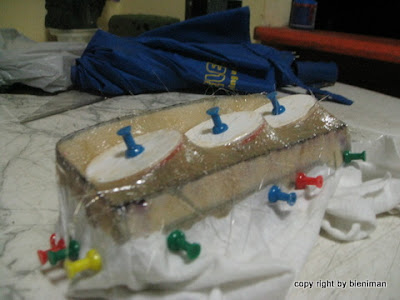 That's the stuff!! 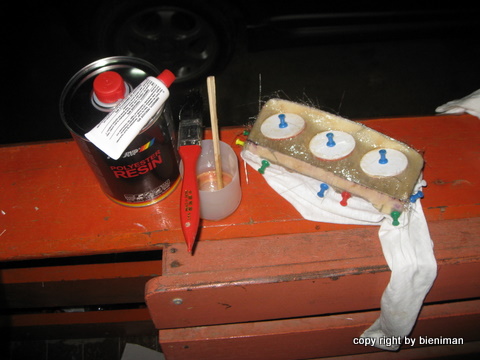 let it harden overnight.. Now comes the fun part .sanding down...If you can, use power tools, I used a Dremel tool to sand the thing..its easer.. 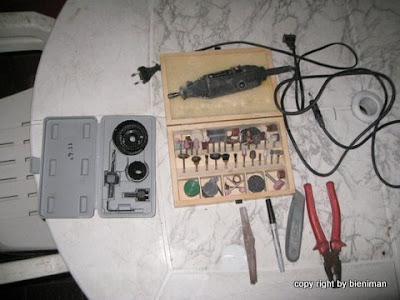 the results 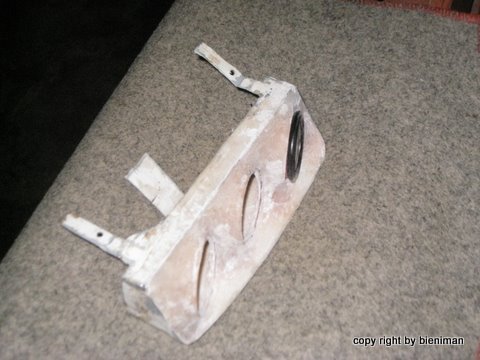 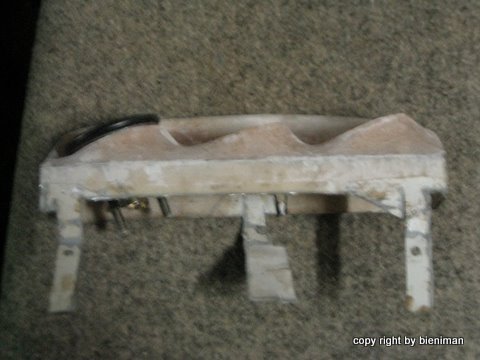  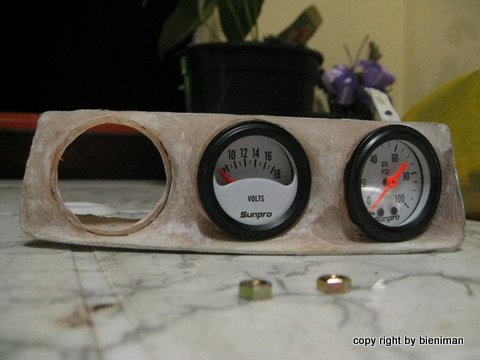 Now, get some paint on it, I sent mine to a paintshop, they did it for freee  .... ....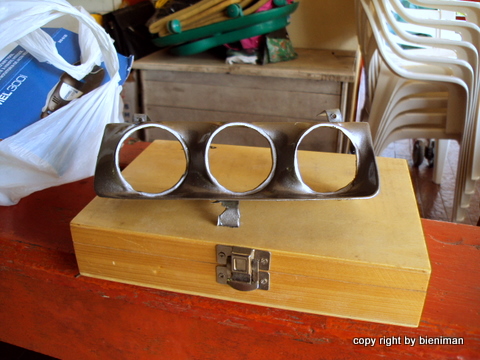 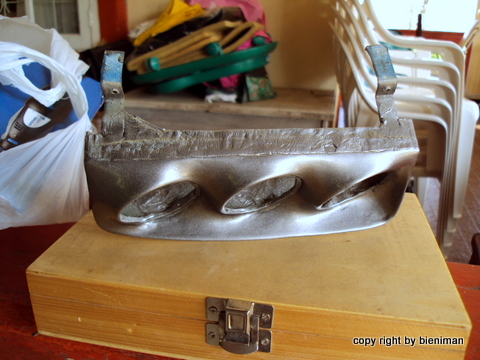 See if it fits and voilla!!! Just as if it came from the manufacturer!!!  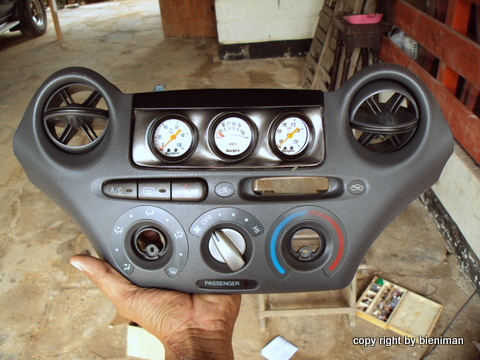 install in the car and looks pretty ..I'm so proud...sniff... 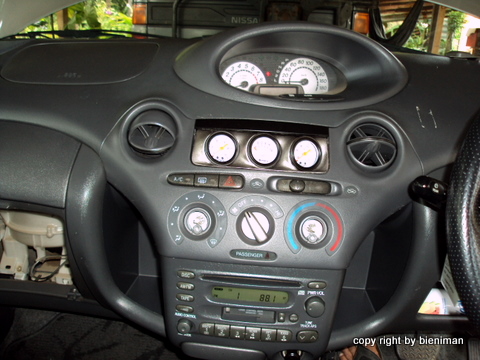 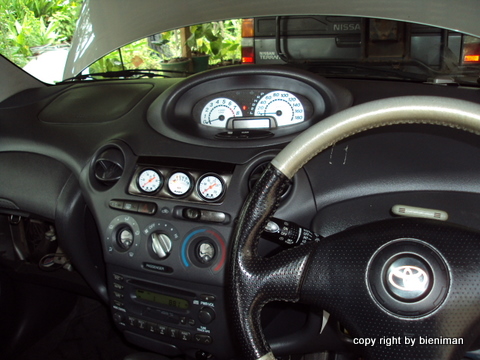 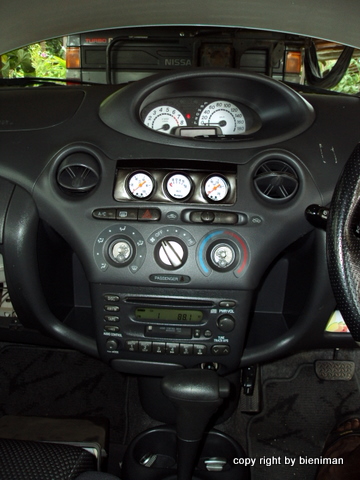  Notice its looking at the driver... Here you go guys, I hope it helps, have fun..... |

|

|
|
05-19-2009, 07:30 PM
|
#2 | |
|
Start another Oil Thread!

|
a work of art sir.
anyone who goes out and buys gauge pillar pods should be ashamed. yes, any one of you can do what he's done, it will take a little time, a lot of patience, and about $20 in materials.
__________________
Quote:
you nailed it sir.
|
|
|
|
|
|
05-19-2009, 07:40 PM
|
#3 |
 
|
Wow
that is amazing  , congrates and thanks for sharing , congrates and thanks for sharing 
|
|
|
|
|
05-19-2009, 11:32 PM
|
#4 |
|
Where is Oahu?

|
great diy! i plan on working with resin also
|
|
|
|
|
05-19-2009, 11:40 PM
|
#5 |

|
good job looks clean
__________________
08 junction produce belta almost done and ready for paint 06 junction produce tc 604 bhp 445tq ddriven still trying for 700+hp 90 crx sir ls vtec turbo 755 hp mecp masters certified
|
|
|
|
 |
| Tags |
| cheap, guages, pressure, temperature, voltage |
|
|


 Linear Mode

