
 |
 |
|
|
 04-16-2018, 07:16 PM
|
#19 |
 |
Sorry for lack of posting, went to Tenn to help my parents move into their new place, ended up getting pneumonia! of all things, and almost died
(thank the good lawd for strong immune systems, mom's home cooking and sleep.... sweet 6 lbs 7 ounce baby jesus-sleep..) Anways! while I was gone! New Swag for the unnamed nugged. NRG not FIA rated, this is more to get me into a good seat see what i like with fitment, and blah blah for 160 bucks its a cheap way to get into the aftermarket seat world, and I can really check fitment with my head, and butt and whatnot   So on that note, literally a 3-4 inch drop on seating position, my shorter roomates cannot see over the dash now.. it feels weird to me for now but Im sure Ill get used to it. And yes my butt fits well. Its actually... almost too big, Im losing weight this year and right now I fill it well but... i's getting smaller.  Position is good the angle on the belts was another concern since Im also tall in the butt to shoulders section (literally theres only like one thing small on me)  Quality stuff, and yes they make a direct bolt in affair for the Yaris!  Wheel isnt exactly centered but it's weird, it falls between two of the splines, so for now I have it close enough, and really it doesnt matter so much. I have a quick release lock for it but no quick release but im contemplating if i need it or not. the wheel sits so much closer that the wheel doesnt inferear with my knees, and i can even drop the wheel down which is way nice. never had to do that before.    My Roomate's Nugget as well, the Mazda 2, he just put the tires and suspension on, more of a daily status compared to my track rat status, but since we are both stock engines, itll be fun to fling them both around. The driver interface with the 2 is so much better than the yaris, but for me the yaris sits better more headroom and i prefer the shifter location even if the shifter length is stupid long.. the mazda 2 shifter is in the console and way forward.     Small win on the humidor! Mom bought this for like 5 bucks and its worth quite a bit more... Need to fill it up some soon here!  
|

|

|
|
04-17-2018, 01:44 PM
|
#20 |

|
Man, glad to hear you got well. Pneumonia is no joke.
Interested in your seat mod. I want to get new seats for mine and was going back and forth between NRG and Sparco. As you pointed out, NRG is the more cost effective route, but I've heard things about NRG quality. I won't be taking my car to the track, but I also don't want the seat compromising me in an accident. |
|
|
|
|
04-17-2018, 01:53 PM
|
#21 | |
|
|
Quote:
1) don't get into an accident #ferrarianswer 2) NRG makes good cheap stuff that has markedly gone up in quality as the years go by, other seats I would look into are Corbeau and Cobra, price marketed goes up with perceived quality 3) NRG makes a cheap bucket style fiberglass shell, similar to other "cheap designs" sparco uses a tube frame and it feels way different. 4) if you arent doing FIA regulated stuff then it would be fine assuming you have the rollbar/cage to go along with it. 5) I chose NRG for a few reasons, one it was a cheap seat to test fit my butt, the local shop was able to get it to me for stupid cheap, and if it breaks can buy something else, if it doesnt it worked ( sun fade is real though) 6) I already had the cage, crow harnesses so the stock seat and airbag became a harzard. |
|
|
|
|
|
04-17-2018, 06:15 PM
|
#22 |
|
|
New short shift kit installed from Micro Image. Holy moly! I did both the in cabin pivot change and the under hood angle change and alum bushings all around and it is short and notchy and quick. I'm over revving on up shifts hahaha best worth while mod outside the Pegasus pedal kit.
|
|
|
|
|
04-24-2018, 10:09 PM
|
#23 |
|
|
   So easy to rotate with braking.  Fastest in the current household, two time champ (or chump)   Definately Chump... |
|
|
|
|
04-25-2018, 11:18 AM
|
#24 |
|
|
That's awesome

|
|
|
|
|
04-28-2018, 12:06 AM
|
#25 |
|
|
Why thank you! My roomate called us even after today's go kart race. Hes a little more aggressive than I am, which can go two ways. faster initial lap times, but more likely to hit cones and stuff (in pro solo)
I've decided to nix the 2zr swap idea for now, I am converting my car back down to STS spec so I spent the rest of this week in the junkyard pulling plastic pieces and the headliner, now gets to the fun part of trimming it all for the rollbars I have installed. Also along with me keeping the 1nz for now ( I will keep saying that) I am going to move ahead with an aftermarket header, cat section and axle back (I'm thinking 2 inch all the way through) For now the next list of to do's involve reinstalling the interior, stripping down the rear seat to just the shell ( rules dont state the rear seats have to maintain function..) and moving the battery to passenger rear in It's own box, and then installing a coolant temp gauge and A/F Ratio gauge Things on Order: Air Dragon pressurizer for track days magnetic numbers in a swanky custom livery! Two new front tires.... I would also want to try my hand at getting some Ultra Racing braces as the rules state I can mess with some subframe connnectors. Cheers yall! Bonus content.... My redskin went brown to flaking white chips. Apparently, I tan out stupid fast and didnt moisturize enough.. oh well. New skin will get all the sun again |
|
|
|
|
05-04-2018, 12:52 PM
|
#26 |
|
|
Well mates, this is why you wash yourself and your hands many times after trips from the junkyard.. I got sick again. I think it was a 1-2 combo of late nights, cool weather, sleeping cold, being in the junkyard, and in general stress ( took and passed a huge test earlier this week)
BUT as a result two days before Sunday's prosolo championship My car is back down to STS class... aka Stock-Enough  And Check the new tires! woot. I need to get them mounted tomorrow... LKQ down the road has a totaled front end impacted 08 Yaris, It was a higher trim level which would cause some headaches such as the split folding rear seats, but for the price I Yanked all I could.. Everything I put in got weighed and I had to cut stuff to make it fit around the cage. Will people bawk? only if Im actually competative ( I wont be)      It was a real trick to get each panel in and shave only enough to allow it to still snap into the factory holes, and surprisingly I only had to use 1 ziptie and two self tapping screws the rest where used with OEM plastic clips. Super happy about that Nevermind the creaking when going over non-smooth surfaces... I Lucked out with the carpet only being semi shitting, hosed it down with carpet cleaner and 409 then pressure washed it and sent it through the dryer at low heat. Still not super clean but it looks 100 times better than it did, and I took out that taco stain....  Now comes the interesting bit.. The rear seats wont be usable, the cage is in the way, they have to be in the car per the rules, but we are "allowed to cut the plastic interior to fit safety equipement as long as thats the only reason" I say that in quotes because You have to sort of read between the lines in a few areas as it's not specific, what is specific is that you have to put the seats in.. No one said anything about them maintaining function so..      out comes the weight! In total I put in about 75 lbs worth of interior bits and the two rear seats. I did shave about 10-12 lbs off each seat so Im guessing I saved 20 lbs of interior bits. Not a whole lot but  they'll never know..  Now this side barely fits but thankfully there are rear seat sliders... Mates, there are Rear seat sliders.... Not even my luxo barge has rear seat sliders, that is way cool! I like it Toyota, I really do! Anyways Per Rules you are allowed to remove the spare tire and tools and whatnot as well as any plastics not permanetly held in place. The factory yaris rear has two plastic bins that hold a fabric and plastic coverpanel in place, those of which are allowed to be removed under that provision, I have them if anyone bawks but they wont go in. however that tire mount is still usefull and will be used to the fullest extent!   So there you have it. my Bump down to STS class from SMF, Hopefully i can start re-tweaking stuff on the car, and I have a transmission in mind for taking this stock powerplant to the next level. Bonus Footage:  I realized I never got a photo of both my current cars together so here they are. the "Mom-mobile" As another member here called it... and the nameless seat time project. Goals next is to get an aftermarket 1nz exhaust, weld up an o2 sensor for my A/FR gauge, wire up the coolant temp gauge when the exhaust is out, cat delete and put on an actual muffler, I also got a few Pro-solo stickers to apply and need to go over where to put them exactly. Relocating the Battery to the Rear and wiring up a killswitch inside the hatch area for safety Then combing through the Section 14 Street Touring rulebook to look at other altercations I can make I want to try to hit up a time trial on the 25th of this month we will see how the schedule unfolds for that. till next time TAKE! CARE! |
|
|
|
|
05-04-2018, 01:08 PM
|
#27 |
|
|
So enjoying following this build. You are moving and shaking with it, bro!
|
|
|
|
|
05-04-2018, 02:37 PM
|
#28 |
 
Drives: '08 2zr swapped Vios M/T Join Date: Oct 2012
Location: Caledonia Ont.
Posts: 2,938
|
Love the update. Why the change in class? You may have mentioned why but I don't remember the reason
__________________
No one ever wants to give a Yaris the point by... 
|
|
|
|
|
05-04-2018, 05:30 PM
|
#29 |
|
|
A few reasons that are rather wordy
Story Short: it more outlines the goals for this car, which is seat time and experience. keeps costs down and maximizes fun time Long Answer: 1) With the interior stripped I was forced into either Street Mod or Street Prepared F, which puts me out there with hyper modified cars on Hoosiers and not only does that suck, but it ruins my overall PAX time since the modifier is crap. (if those terms are alien to anyone reading this. DM me) So going down a class to Street Touring S class makes me more competitive with a 200 UTQG tire, as well as having a stock engine with minor bolt ons. I only make 106 hp... 2) Being in a higher class made me realize that if I wanted an actual car that was Street Modified, I wouldn't want to modify the Yaris. Id choose a better chassis or something a little more fun to drive and whip around (smiles per dollar the yaris is awesome, but being jerked off by the lovely sound of a 9000 rpm Rotary at full tilt leaves me needing new shorts and wishing I had bigger go-nads) 3) the amount of money to potentially spend, akin to Armstrong racing, is outside what I want to spend for my fun self pleasing toy. by keeping the class lower, the sort of modification I can run will be more limited and therefore overall less money to spend (I'm already like 70% there) 4) Resell, it in my mind would be easier to sell a yaris that has a full interior than a stripped out unit sans the fact the rear seats are unusable in anyway, but the interior bits are there and it seems more "dailyable" even though nothing mechanically has changed. |
|
|
|
|
05-08-2018, 11:28 PM
|
#30 |
|
|
Short update here on a long project.
I don't need Scion XD brake calipers on the car I dont Need upgraded pads on the car I don't need larger slotted rotors on the car I don't need them But I have them...  From the junkyard I didnt bother on pricing them out seperately and Im sure for the work it would be easier in everyone else's cases to buy the 37 dollar reman unit from "you name it" place but I like keeping my hands busy. and bdsm. So there you have it  Disassembled for cleaning and inspection and paint and new seals. Unknown mileage on the poor parts car, and being one of the more important mods for safety! I figured id learn me some caliper stuff  Before and after comparo, there was alot of brake dust on these calipers and boy oh boy it tooks a while Few things I figured out. Dawn Dish Soap is fine, but it wont work more than just a normal solution, vs something like brake cleaner which is a dissolvent. Second thing, these brakes are super easy to work with Finally, wire wheels fucking hurt.   Awaiting on a rebuild kit to come in from newegg of all places, cost 9.95 including the shipping. But man oh man do they look good.. so the question now is... What color BONUS CONTENT  Ran the wirewheel up my latex glove into my arm and man oh man I havent seen these many wrist scars since a 2006 Tim Burton's Nightmare before Halloween viewing. . Leave me a comment on what color! Knowing I am using federal tires and am rocking a castrol style side banner for racing which is white red and green.. Im leaning towards a burnt bronze look, something deeper than brembo gold. TAKE! CARE! |
|
|
|
|
05-10-2018, 11:32 PM
|
#31 |
|
|
Good Evening gents!
The past few days I wanted to slow down on spending as that brake project will consume a bit of time and money and I have a lot of things out on order... Literally waiting for paint... So in the meantime, a quick run to Walmart and I had a great Idea. and by great I mean. odd  I was never set on how this looked on the car so a 3 dollar roll of duct tape and boom! Not quick there yet though  better, Much better. I ran like this for a day and it got a lot of looks. It's drastic how much it changes the front look with just three bucks... So I decided Hell, I got some leftover paints. I got some time. We are young, its night out and I am wearing glasses.. time to hit it for those of that wondered  This is what it looks like. 5 pop rivets along the top. a few screws along the bottom and the fender to bumper pop rivets. which I broke and used zip ties. because racecart.  the longest part of the whole process minute wait time was getting the two sides to match up MOSTLY... I'm not perfect and neither is the front bumper, but I got it close  First coat goes on lightly..... right?  Wrong, if you wait the prerequisite time between coats which is 30 min it dries too fast! meaning when you peel up the tape without using a knife first (I'm a moron) it peels back the edges... what a catastrophe... thankfully.... if I'm not smart, I can be handy  Little straight razor to clean up the line by hand. Then respray on the new line and now the lines will be less perfect but my lines are good...  looks decent hit it was some spare glosserizer. I'm not sure I'm a fan but it will prevent fade and eh if you are going to half-ass something, might as well whole ass it.    Squint your eyes, shake your head and think about better things and it almost looks decent! But I am glad enough without how it turned out. I want to order some TRD badges for the grill now and maybe something for the hood... We will see. But that is it for today! Stay tuned for a battery relocate and finally mounting new tires on my rims... Bonus: 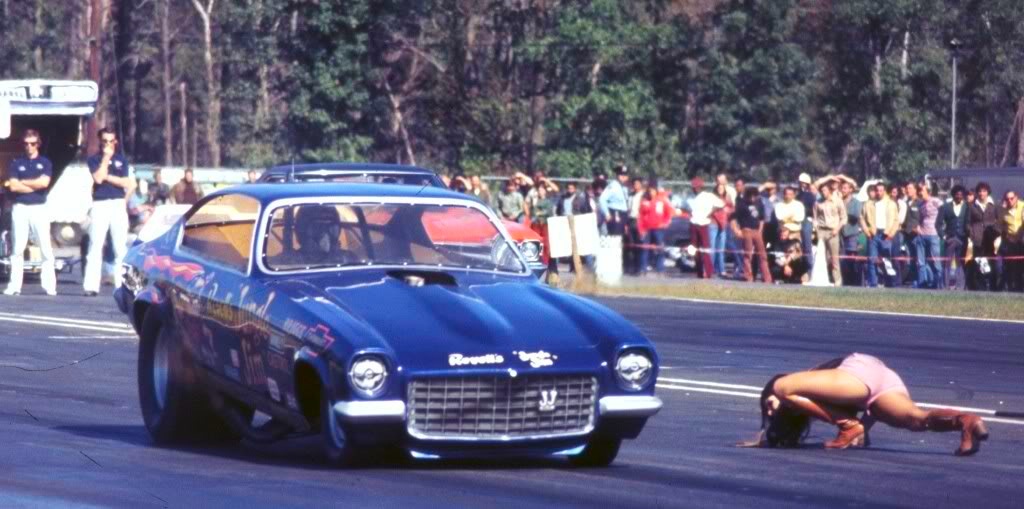 Jim Liberman and his boxum and rather useful and flexible ( apparently) Line-up woman. In the early 70s these two put on quite a show with a wheelstanding nova and later on a vega. Jungle Pam for those of you who are interested... Zone-tan is watching you fap.... Anways TAKE! CARE! |
|
|
|
|
05-11-2018, 01:30 AM
|
#32 | |
|
Drives: 2011 Yaris Sedan Join Date: Mar 2017
Location: GA
Posts: 73
|
Quote:
|
|
|
|
|
|
05-19-2018, 06:27 PM
|
#33 |
|
|
Been a solid while But I have progress Made!
Remember those brakes? Stuff happened.   I used the VHT engine enamel primer. Ill let everyone know how well it holds up over time  This gold looked promising  there are almost no good ways of making sure the piston area is blocked off so i just stuffed a paper towel in there and went ham. did well for 90% of the spray painting. Female friend of mine rolled her eyes when I told her I was baking today  Little Flair. I wish they where a tiny bit narrower but Ill make it work   Little Heat gun and I made it work well  now for the hard bit. Making sure its all dry enough to work with, installing the new rebuild kit For anyone who has had questions on how to rebuild calipers it's insanely easy if you took them apart. If you did like me and took em apart but forgot how they go together its pretty simple to google some youtube vids Essentially theres a rubber square surface ring that needs to soak in Brake fluid  Autozone stuff is fine. Also be sure to grab specific brake assembly lube. NORMAL GREASE WILL DEGRADE AND WEAR OUT RUBBER PARTS There's your disclaimer  9 bucks from New egg... of all places right?  Opps guess I didnt need/need the lube. I used this on all boots and surfaces touching the outside. the black grease got the tighter stuff I took wet 800 grit sand paper then finished with 1000 and polished with 2000  Left is post polish, right is pre polish, these dont require too much work honestly. But It kept the hands busy   Some friends said they looked professional or asked if they are actually TRD. I dont believe they where serious but they look seriously good, the gold is a bit more orange than pure yellow gold, but with a few heat cycles im sure itll bronze out more. and maybe with dirt Before I assembled the brake calipers I forgot to mention: I had sprayed it all down with 3 coats of clear VHT. Same material went on well and I hit it with a heat gun for a while.  remember when installing these, buy Corolla/matrix xrs pads but use the yaris SE rotors. youll know its them if they are 4 lug and 10.8 in measurement. Autozone has some good duralast ones I might pick up ( no reason to go stupid pricey on such a lightweight car. As far as pads Im contemplating EBC yellowstuff... cause we go hard.. Shifting gears. My decals and numbers came in!   Scott at spnywoosh made them at my request and the castrol throwback is my design purely.  starting to get into these JDm style slaps. Need more.. especially bad luck /no luck club  these stickers answers alot of questions people might have on.... why?  Heritage going on here!  Gotta point to where the tow point is. I guess. I got bored and had extra navy stuff sitting around This morning we ended up going for a cruise to really show off the nuggets      So green.. had to catch some photos.... itll burn nicely later on,....    really to capture how small these cars are Saw a weird bunch of Miata's up at Julian wonder if they are the new 2019s   Quick Tire temp and pressure check made me realize I need to run 34 lbs cold to reach about 40 warm, in the back I run 40 and got to about 42.. they arent being used as much That said. Tire wear tells the tale! I got a little flat spotting on some overzealous super-ultra-mega-late braking.. (non ABS car) Bonus Content:  Battery Relocate Kit from Jegs. this box is MASSIVE! but It's NHRA legal which most the times is more restrictive than most tracks, and Ill shove this all behind the rear seats and box it off. Thinking about modifying it to fit some small tools and my Air Dragon tire pressure gun Till next time TAKE! CARE! |
|
|
|
|
05-19-2018, 08:15 PM
|
#34 |
|
Drives: '08 2zr swapped Vios M/T Join Date: Oct 2012
Location: Caledonia Ont.
Posts: 2,938
|
Awesome stuff dude. Can you take pics and write about your battery box install and relocation? I plan to do this down the road and wouldn't mind seeing how your install went
__________________
No one ever wants to give a Yaris the point by...
|
|
|
|
|
05-21-2018, 11:57 AM
|
#35 |
|
|
New Egg! lol
Love these write-up's and the great pics that come along with them. |
|
|
|
|
05-21-2018, 02:47 PM
|
#36 | |
|
|
Quote:
Have done, read on! This is what happens when you get antsy, instead of this happening later this week. I got up at 7 on a Sunday and started hammering and grinding it out. In fact, it took me till almost 6 to get it all in after an hour break for lunch. That said there's a lot more fab work involved cause I cant measure batteries before buying relocating kits. So this is the kit I bought and ended up using most of it.. eventually. so right away there was an issue  now you can tell her... yeah, it's that big   The hell was I gonna do? I had contemplated sending the kit back and whatnot, but the length of the positive was decent and everything was already in hand and I really like the covered boxes vs just a battery brace thats exposed.  Gathering a semi Idea. So for those of you who are reading this and wondering why move the battery to the rear. in short: Moving weight even as small as 15 lbs to particular locations on the chassis will change the balance of the car, how much weight on each suspension component. By removing 15 lbs over the front wheels (namely on the driver side, where my fat ass sits) to the passenger side rear strut. In effect, it would mathematically change the balance by 1% which doesn't seem like much, but it would be the equivalent of moving the entire engine back 3 inches. Now I could have bought the lightweight Braille AGM battery, and I wanted it... oh I wants it so bad. But I cannot afford one, (i could but its not really pertinent) and I'd rather not turn a 200 dollar project into a 500 dollar project. Anyways To tmontague: I chose this spot for three reasons. Class rules/Safety says box has to be outside of the passenger area It is behind the fuel tank over the exhaust which gives me the most access to it underneath, and This location and hight allows me to still run the yaris style shelf in the back if needed But more importantly and this is a big one I can retain the rear spare tire So without further. time to cut, measure, rivet and repeat yes... thats backwards. I'm a terrible engineer.  or not. I figure if I cut the panel out to about 9 inches and move the one side closer and rivet it in place Ill have basically the same thing. I dont want to weld this thin of alum, and no way was I using an epoxy.. they never set right for me  Now mind you, all batteries are different, and this measurement was still off by about 1/8th of an inch so where the battery is wedged in the box. So if you are doing this. give yourself an extra 1/4 to 1/2 inch of extra room.  That Rivet job though...    With the base in mind I drilled the bottom holes to get the distance I wanted for the battery box. from here... We go to the car.  This is where I decided it would be best. Its resting against the rear strut and forward enough to give me tire clearance and its a straight shot down through the metal and it's thicker here than near the tire well. unfortunately its about 2 inchs off the frame rail in the back but that's all under the plastic on the car, which I cannot trim.. for the most part ;)    Yes the mounts are off centered. I did that for a reason. I shimmed the box up on the left side so naturally itll sit with an angle towards the strut. and also... I didnt want to drill in an un even patch of metal The kit calls for a 3/8th inch hole for the rods so, that was easy now for the harder-er parts    Notice the reliefs in the side plate for running the positive and negative wires... Well They dont match up with the battery anyways. so Ignore them   It actually looks decent but the fitment is kinda... mediocre at best if you look too closely From here I goofed and primered the box before making the final two holes for the rods... getting antsy, (major fault of mine)   All mocked up  Took a cut off wheel to the excess rod length. There's still about 2 inches top and bottom combined of extra length. Also make sure you follow the threads with a tap or clean up the threads with more grinding ( i rounded the top of them to make bolting them on easier) This is important because of you misthread the bolt you have a chance for rounding it  Sitting pretty While it was like this We took the time to run the Positive wire. Now here is where I didnt take too many photos but basically We ran the cable under the carpet into the trim panel by the passenger door. then up the footwell into the passenger side fender over the top of the passenger side front strut. From there it follows the other electrical stuff (over the ecu) to the positive terminal on the stock location, here we mated it all together with the factory bolt we removed from the OEM connector and I cut the oem plastic cover to fit and zip tied it to the post that held the battery previously. The Negative we used the rear seat mounting point and slid the rear seat back so it covered it. nice and neat Painted it the duralast bed liner for the speckled black look. if you do this. dont touch it for at least 3 hours... it says dry time is sooner but its a lie... it peels like plastidip unless fully cured.   This side shows you the reliefs I had to make. From this photo I took it off and made the gaps bigger. Make sure to use the supplied grommets Also breather..  And how it all sits from the back view  Now if you take two shots of vodka squint your eyes and look sideways it actually looks like a decent job. we could have cut down the positive cable some more, but I just tucked the excess in the rear passenger area since who cares about it.  Bam, I can take more photos of the engine bay if that intersts anyone but for now I have to make my car learn how to idle again, a few hot minutes of running and itll be back to fine and crackling and popping like the performance motor I want it to be! I have no bonus footage today as It's been super slow and Ive basically installed everything I have for the car right now... Till next time TAKE! CARE! |
|
|
|
|
 |
|
|
 Similar Threads
|
||||
| Thread | Thread Starter | Forum | Replies | Last Post |
| DIY - Sparco Race Seat Install | Idjiit | DIY / Maintenance / Service | 16 | 08-14-2017 09:15 PM |
| Back Seat Removal... | Idjiit | DIY / Maintenance / Service | 87 | 02-08-2015 12:07 PM |
| 60/40 to Bench Seat Swap Issue | CTScott | Cosmetic Modifications (Exterior/Interior) | 24 | 11-26-2012 02:45 PM |
| I NEED to Figure a Way to Get More Front Seat Leg Room | msmitka | General Yaris / Vitz Discussion | 25 | 09-08-2010 07:29 PM |


 Linear Mode

