
 |
 |
|
|
|
|
 06-22-2010, 03:41 PM
|
#1 | |
|
Canadetroiter

|
Quote:
Just get your Goo Gone and some paper towel. Take 1 sheet and fold it up a few times to make a small square. Apply some Goo Gone to the paper towel. Wipe it generously across the foam/tape that's left on the car. Coat it well and let it sink in for a minute or two. Pick an edge to start from, and just use your fingers to start peeling the foam off. Feel free to re-apply the Goo Gone periodically as you go. It does work better if you give it time to sink in and loosen the adhesive. Also you may want to do this step at a car wash, like I did. If you're anything like me, your car will end up with WD-40 and Goo Gone all over the place. After I was done I just gave it a car wash, and it was all nice and clean and debadged.
__________________
 K&N Air Filter . Rear Debadge K&N Air Filter . Rear Debadge
|
|

|

|
|
07-14-2010, 09:41 AM
|
#2 | |
|
Crazy Girl (Kasey)

Drives: 09 Yaris 3D; 05 R6; 00civic si Join Date: Mar 2009
Location: Orange County, CA
Posts: 383
|
Quote:
Simply squirt some on a paper towel, rub it on the foam that was stubborn and let it soak in. I was able to rub it off with the pad of my fingers and fingernails. Then I wiped down the area with water after to make sure any goo gone residue was gone. A recent pic: |
|
|
|
|
|
07-24-2010, 03:05 AM
|
#3 | |
  
|
Quote:

|
|
|
|
|
|
08-10-2010, 09:08 AM
|
#4 |

Drives: '08 SEDAN 5 SPD. Join Date: Aug 2009
Location: NE. OHIO
Posts: 125
|
I have used a generic version of this 3m Pinstriping Remover wheel that I got from my local auto body paint store, I think I paid less than $20.00 for it and have removed countless emblems and even pinstiping on my '91 Caprice with little effort. Well worth it and no paint damage or marring at all. This is what professional people in autobody use to get the residual from emblems/moldings/striping off. This reminds me of a giant eraser [the good kind] that you used back in school. Put it in you cordless drill and your emblem [residual] will be gone in seconds. Take the actual emblem off with fishline first!
Link to a quick Google search. http://www.yotatech.com/f2/how-pinst...ics-56k-70756/ 
__________________

|
|
|
|
|
03-20-2009, 06:08 AM
|
#5 |
|
I ♥ Yaris

Drives: Black 08 LB MT & red 97 Miata Join Date: Oct 2008
Location: Indianapolis IN
Posts: 1,313
|
I want to paint my badges "black chrome" but I'm not quite sure where to get the paint from...
__________________
The trouble with the world is that the stupid are cocksure and the intelligent are full of doubt. - Bertrand Russell |
|
|
|
|
03-20-2009, 08:13 AM
|
#6 | |
|
Drives: '08 Yaris Join Date: Oct 2008
Location: Dover, Ohio
Posts: 7,606
|
Quote:

|
|
|
|
|
|
03-20-2009, 09:54 AM
|
#7 |
|
'09 Yaris
|
RyanK,
Did you take the badges off to paint them or leave them on and mask around them? Thanks, S.R.
__________________
2009 Yaris 3-Door Liftback MT Black Sand Pearl 
|
|
|
|
|
03-20-2009, 12:49 PM
|
#8 | |
|
I ♥ Yaris
Drives: Black 08 LB MT & red 97 Miata Join Date: Oct 2008
Location: Indianapolis IN
Posts: 1,313
|
Quote:
__________________
The trouble with the world is that the stupid are cocksure and the intelligent are full of doubt. - Bertrand Russell |
|
|
|
|
|
03-20-2009, 01:24 PM
|
#9 | |
|
Drives: '08 Yaris Join Date: Oct 2008
Location: Dover, Ohio
Posts: 7,606
|
Quote:
I cleaned them really well, but I guess that's no good. 
|
|
|
|
|
|
03-21-2009, 02:16 AM
|
#10 | ||
|
I ♥ Yaris
Drives: Black 08 LB MT & red 97 Miata Join Date: Oct 2008
Location: Indianapolis IN
Posts: 1,313
|
Quote:
Quote:
__________________
The trouble with the world is that the stupid are cocksure and the intelligent are full of doubt. - Bertrand Russell |
||
|
|
|
|
03-21-2009, 02:30 AM
|
#11 | |
|
I ♥ Yaris
Drives: Black 08 LB MT & red 97 Miata Join Date: Oct 2008
Location: Indianapolis IN
Posts: 1,313
|
Quote:
__________________
The trouble with the world is that the stupid are cocksure and the intelligent are full of doubt. - Bertrand Russell |
|
|
|
|
|
04-18-2009, 06:44 PM
|
#12 |

Drives: Yaris Sedan Join Date: Sep 2006
Location: MayaWest, Puerto Rico
Posts: 1,574
|
I've always wanted to do this cause I hate the chrome detailing in the car. I did it and it was pretty simple and I like it
I've began Proyect Anti-Chrome  Front 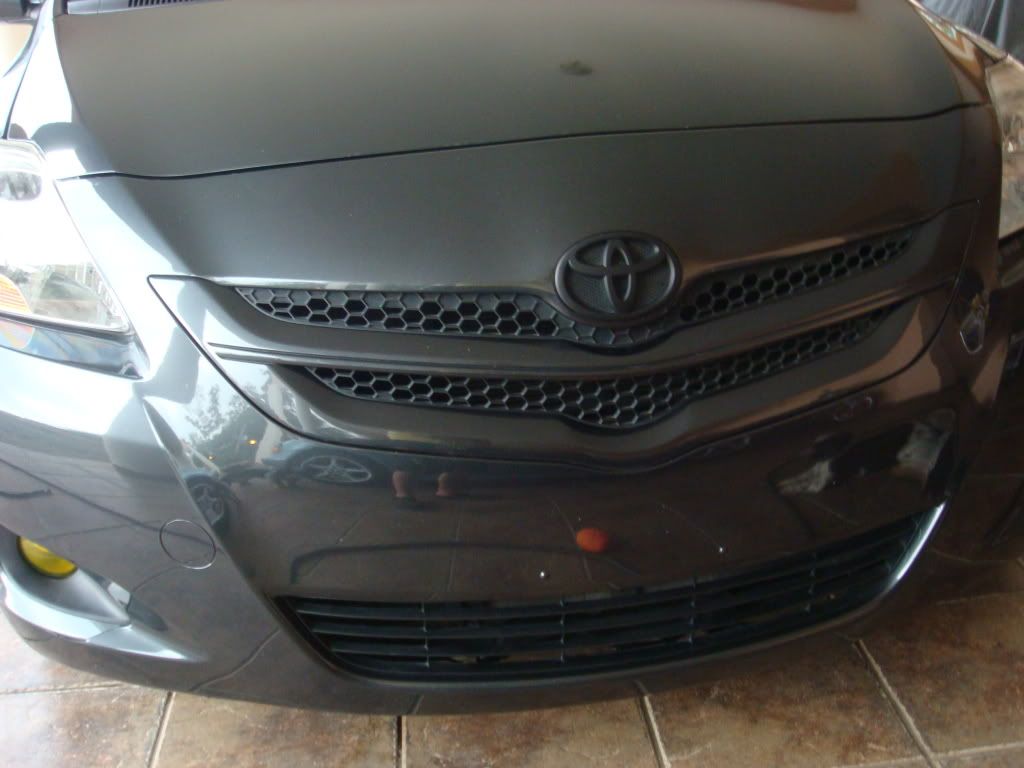 Back Logo and trunk chrome thingy (don't even know whats called) 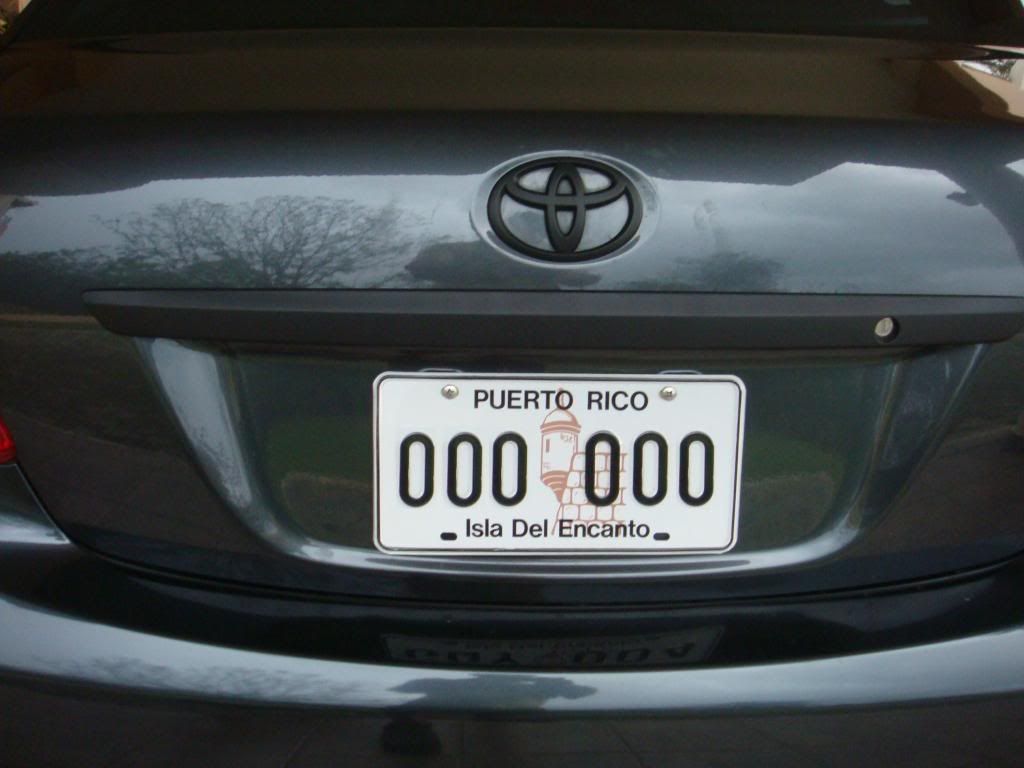 I've circle (in yellow) the next thing I'm painting black. 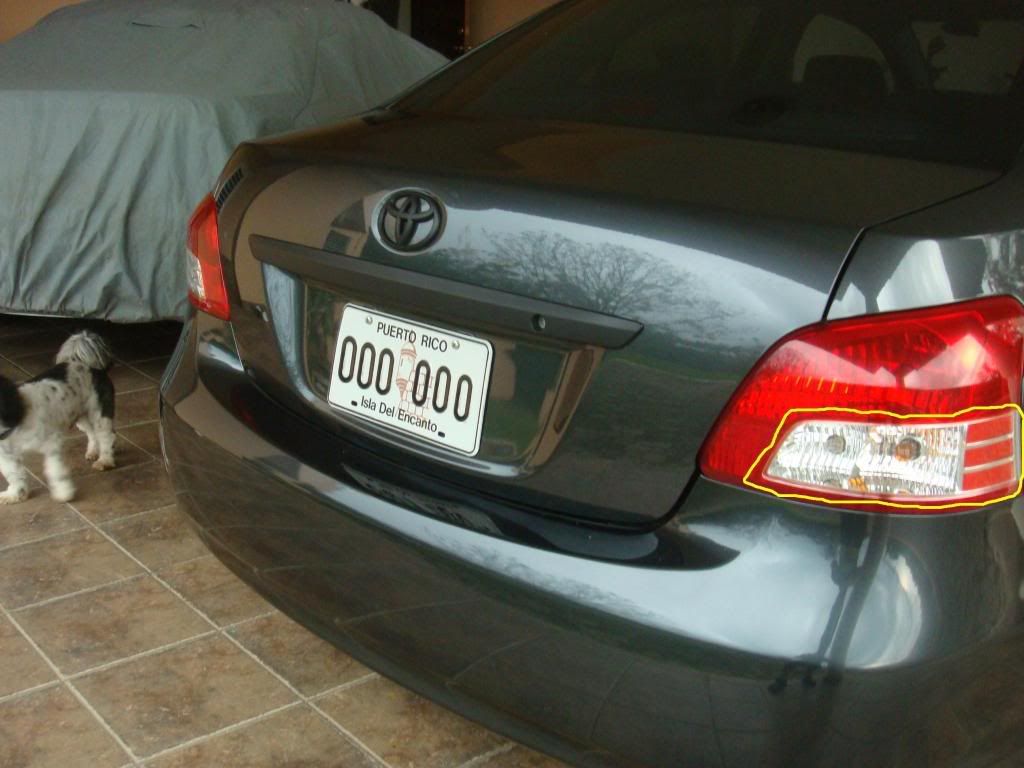 And thaks guys for the DIY 
__________________
I Drive a 129whp Yaris ;) |
|
|
|
|
03-20-2009, 10:09 AM
|
#13 |
|
Drives: '08 Yaris Join Date: Oct 2008
Location: Dover, Ohio
Posts: 7,606
|
Took them off.
|
|
|
|
|
03-20-2009, 12:52 PM
|
#14 |
|
Tiny Giant Clothing

Drives: 2008 Blazing Blue Yaris 3D LB Join Date: Oct 2008
Location: Rochester, NH
Posts: 3,394
|
i sanded, adhesion promotered, and primed and did 4 coats of the top coat and still no match for highway sand
__________________
Sold the yaris... rocking an 89 vw cabriolet now :) |
|
|
|
|
03-21-2009, 02:30 AM
|
#15 |
|
Tiny Giant Clothing
Drives: 2008 Blazing Blue Yaris 3D LB Join Date: Oct 2008
Location: Rochester, NH
Posts: 3,394
|
do it.. its easy to touch up.. i just sprayed on a cue tip now that the winter season is done and dabbed the spots.. looks sweet still.
__________________
Sold the yaris... rocking an 89 vw cabriolet now :) |
|
|
|
|
04-04-2009, 08:17 PM
|
#16 |
|
Bear Traffic Controller

Drives: 2007 Yaris Liftback Join Date: Feb 2009
Location: Pittsburgh, PA
Posts: 1,833
|
Here's the front emblem DIY, for those with "Husky fingers"
http://picasaweb.google.com/lh/photo...eat=directlink The Emblem!  My husky fingers won't fit, and my pinkies aren't long enough...  First, we want to remove these 5 pins.  They will start like this.  Just push down the center.  Pull them out. Don't lose these.  Pull up the bumper cover, and look in front of the radiator, we want to pop these clips, one on each side, at 5 and 7 o'clock.  The old emblem will literally pop out and land on the ground after you pop the second clip, you'll have this nice hole for your new emblem.  Line up the top.  And the bottom, and push in on either side, it will snap in place.  Take your pins, and pop the center up through the middle.  Realign your cover with the 5 holes again, and insert your pins, remember all 5.  Push down the center so it's flush. Tada! Your emblem is installed!  Only minor battle wounds were sustained, it's a tight fit under the bumper cover. 
__________________
Darryl  Kids Playing Chase On Freeways Get Smashed. Last edited by Darb; 04-06-2009 at 10:28 AM. |
|
|
|
|
04-06-2009, 10:10 AM
|
#17 |
|
Bear Traffic Controller
Drives: 2007 Yaris Liftback Join Date: Feb 2009
Location: Pittsburgh, PA
Posts: 1,833
|
Huh, I can't see the pictures, do they work for anyone else?
__________________
Darryl Kids Playing Chase On Freeways Get Smashed. |
|
|
|
|
04-06-2009, 11:04 AM
|
#18 |
|
Drives: '08 Yaris Join Date: Oct 2008
Location: Dover, Ohio
Posts: 7,606
|
And yes Darryl, I see the pics.
|
|
|
|
 |
|
|
 Similar Threads
|
||||
| Thread | Thread Starter | Forum | Replies | Last Post |
| DIY Cruise Control FAQ (2006-2010 Yaris) | CTScott | DIY / Maintenance / Service | 467 | 10-18-2022 10:20 AM |
| DIY (08' USDM LB): Interior Light Color Change | revnull | DIY / Maintenance / Service | 37 | 05-21-2016 12:59 PM |
| DIY Change Your Interior Light Grey Panels to Black | KCALB SIRAY | DIY / Maintenance / Service | 64 | 01-22-2015 01:25 PM |
| DIY: LED side mirror installation | eTiMaGo | DIY / Maintenance / Service | 85 | 06-24-2011 11:48 AM |
| revamping the DIY section | supmet | Suggestions - Feedback - Questions | 7 | 03-23-2009 02:01 AM |


 Hybrid Mode
