
 |
 |
|
|
 07-06-2007, 03:25 AM
|
#1 | |
|
Q(','Q)

|
Quote:
Tools Phillip head screwdriver Zip ties (provided in the package) Step 1a: Removing the 3 screws. There are two located behind the steering wheel and one below. Just turn your wheel and you'll be able to see the two up top. The one below will be located near the steering wheel height adjuster. (pictured with screws removed. Left side  Right side 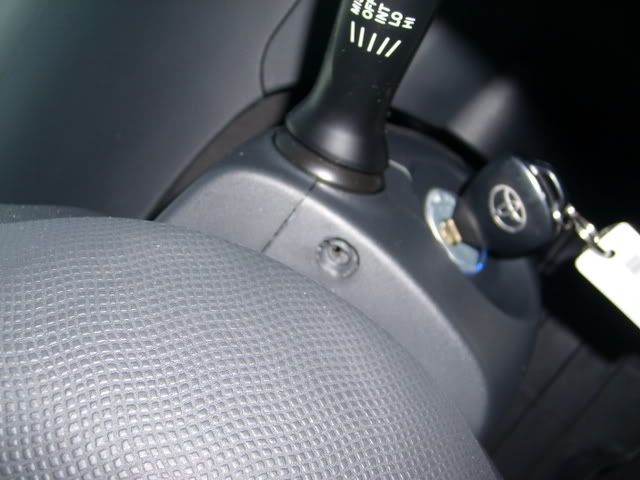 Underneath 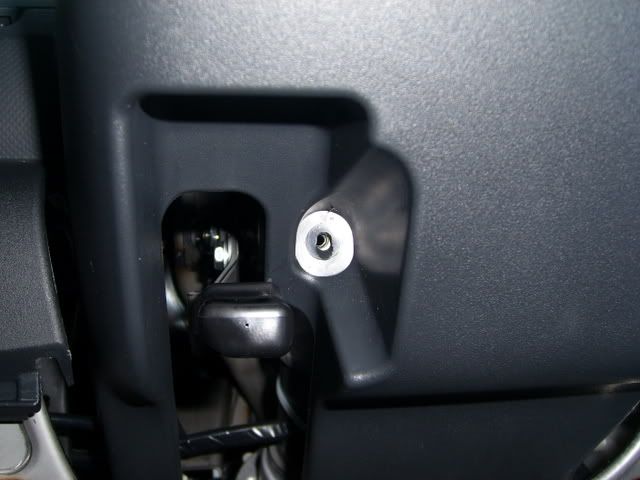 Step 1b: Pull this panel towards you and down. It's a fold down type and pops out when the right amount of force. Too much and you may bend/break it. Closed/Opened 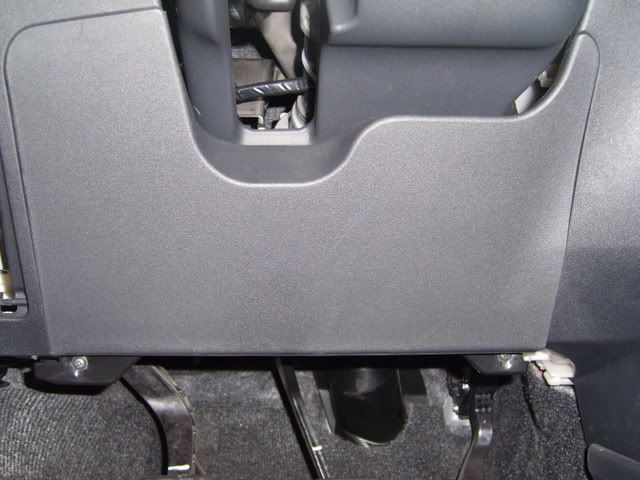 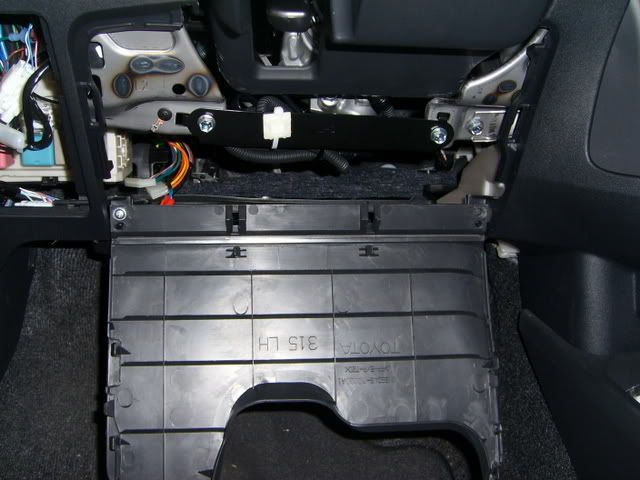 Step 1c: Remove the (not so)secret compartment by first lifting the bottom two corners first to unlatch them and then slide the compartment down where then it lines up to two opening holes so you can pull out the whole secret compartment. To put back in reverse this step. Close up of the bottom corners of the secret compartment. The side with the handle is facing the ground in this picture. 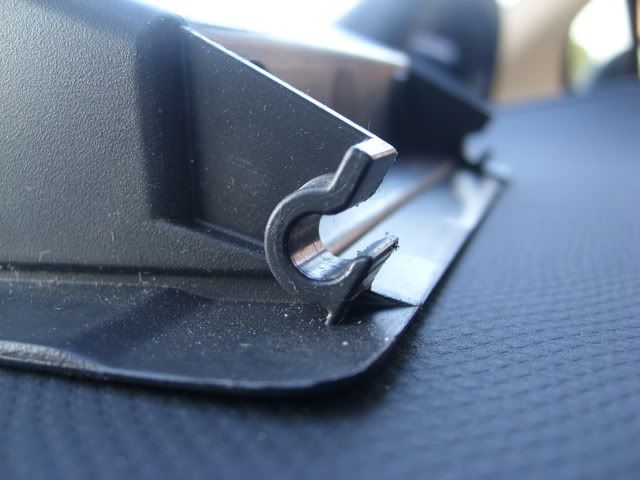 Close up on the top left side opening. Mirror image on the right side. 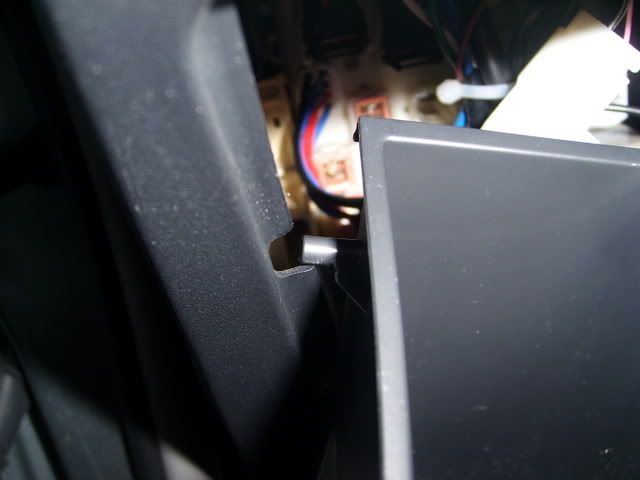
Last edited by eijikikimaru; 07-06-2007 at 04:12 AM. |
|

|

|
|
07-06-2007, 03:25 AM
|
#2 |
|
Q(','Q)
|
Continuing
Step 2a
As you open up the compartment you'll see one of your fuse boxes.It'll look like this 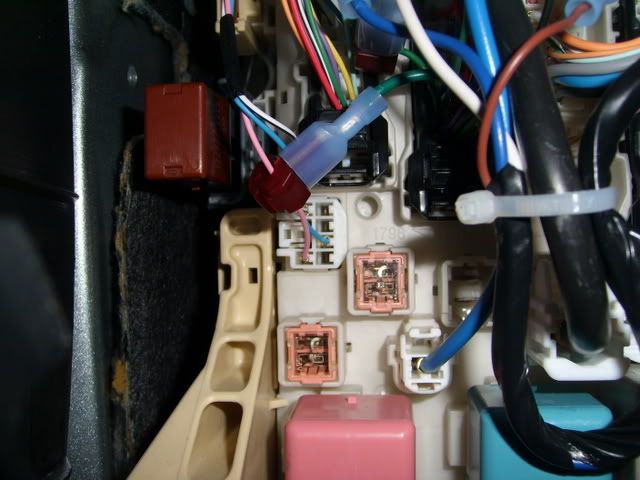 You will want to remove the white top left plug/connector. Circled for better understanding 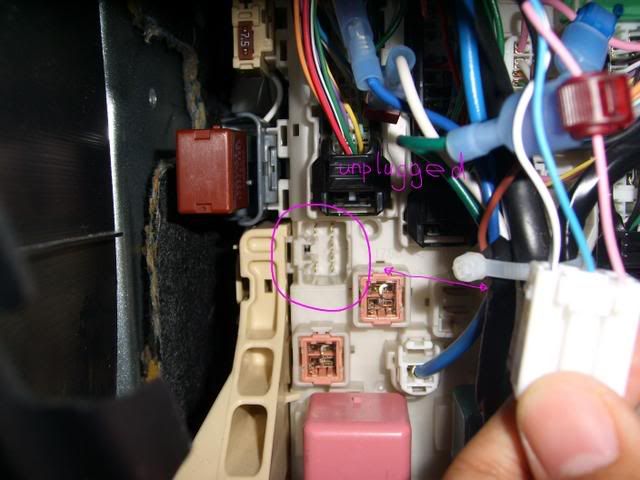 Step 2b So this part threw me off because I never seen this before and didn't know where it belonged looking at the old Thai DIY ignition set up They didn't have this clean plug and play version.The long black thing top left of ignition light is the relay 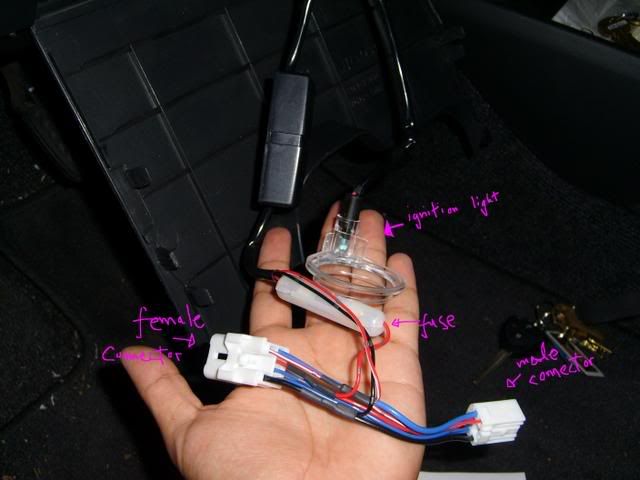 Stick the OEM male into the A.M. (after market *just call it that*) female connector. 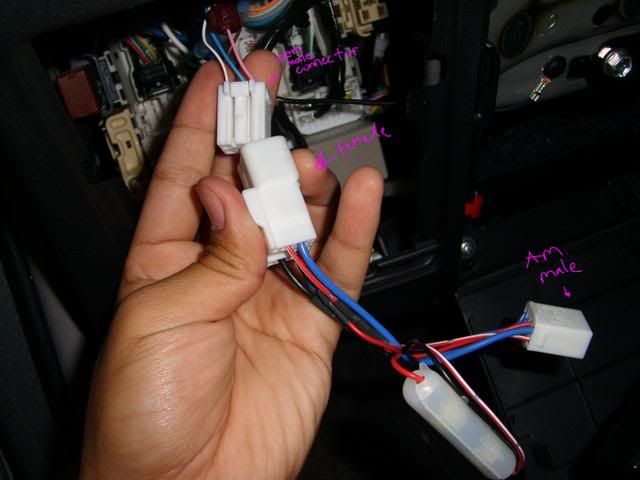 Insert AM male into fusebox and it will set power to the ignition light. *recommend insert AM male after setting up the ignition light*  I wrapped my ignition light behind the black-bar (Step 1b picture #2) and zip tied it along with the extra length of the cord since you don't need that much. Step 3a: *Optional* Stick the black sticker onto the ignition light. If not done, the finish looks doesn't look as clean because you see the clear plastic that not suppose to show, peek thru cracks. Line up the triangle. and fold the corner of the rectangle onto the ignition light.(yeah I can't line things up well apparently) 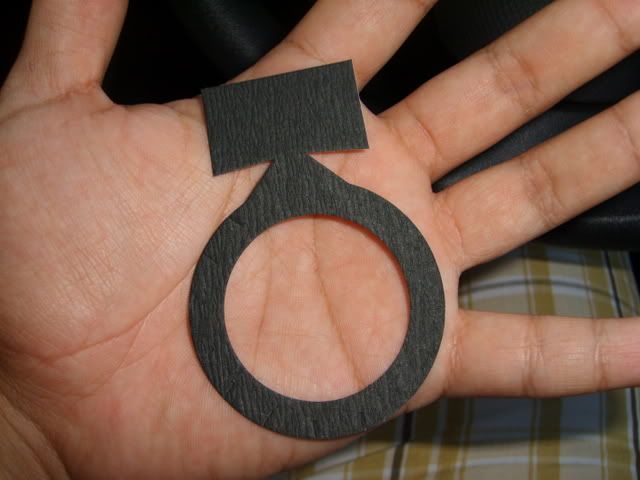 Step 3b Insert light. It fits around the key hole. 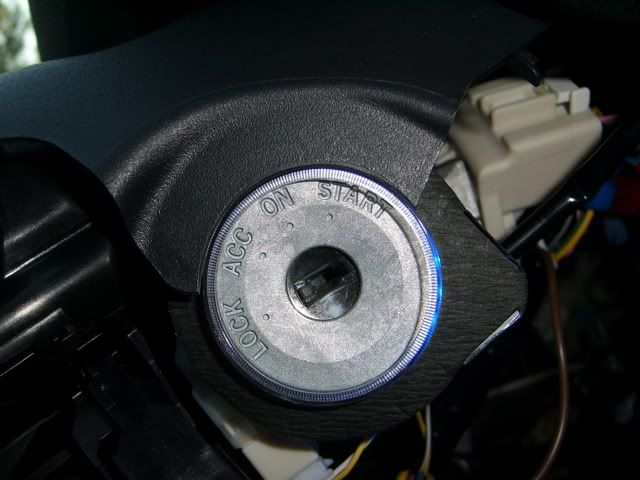 Complete Step 2b pic#3 and you're pretty much done dirty version. Clean version is putting all the parts back on: Secret compartment Under panel Steering will bottom cover FINISHED LOOK 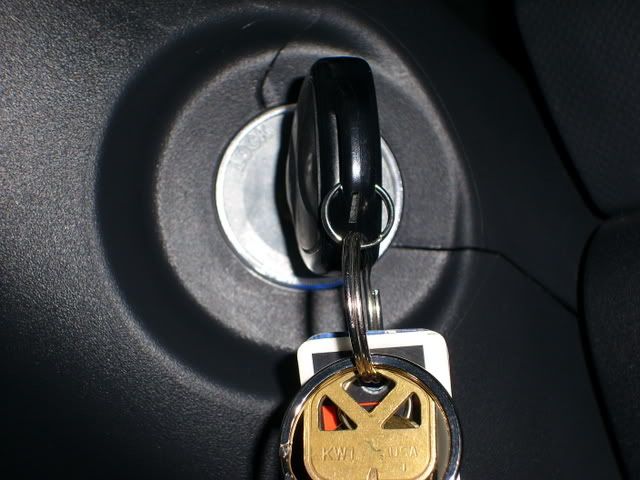 Day 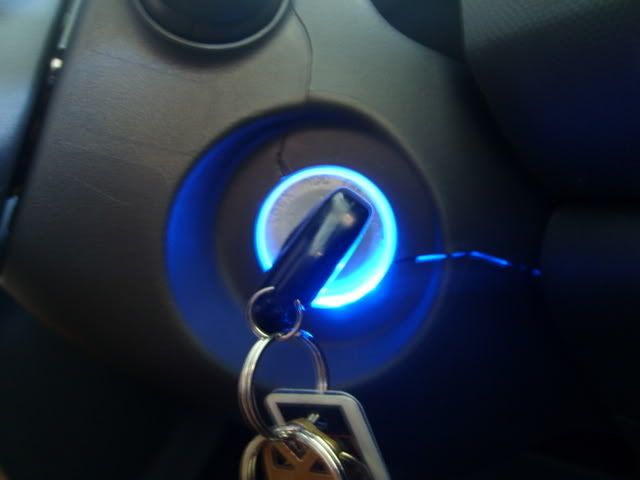 Night 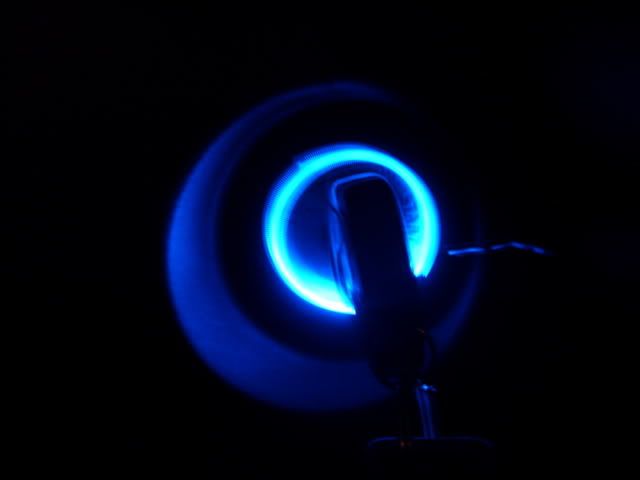 Passenger side View 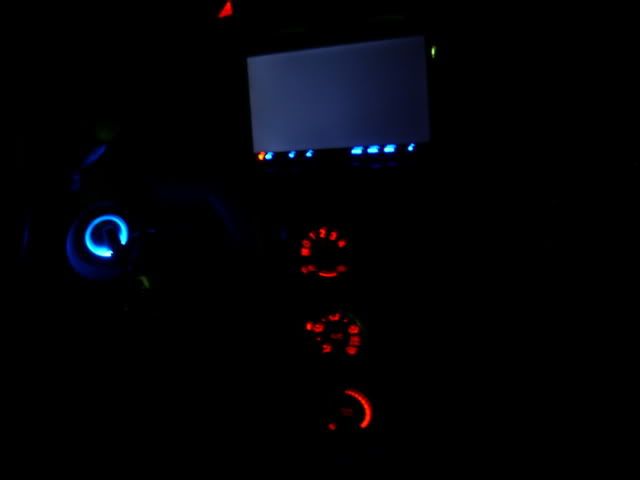
Last edited by eijikikimaru; 07-06-2007 at 04:17 AM. |
|
|
|
|
07-06-2007, 04:11 AM
|
#3 |
|
Q(','Q)
|
Hope this helps those who are interested in the Thailand Ignition light. I'm aware that Thomas will no longer be with us as often as he used to be, but if those of you who purchased in Thai GB #2 then hope this'll help out.
Those of you who still wish to purchase one and find a different mean to get a ignition light great! Here's a semi-guide for those that are a bit clueless like I was. Here's team Thailand guide |
|
|
|
|
07-06-2007, 06:00 AM
|
#4 |
|
YARIS NEWBIE

Drives: YARIS 07 LIFTBACK Join Date: Jun 2007
Location: NORTHERN NEW JERSEY
Posts: 159
  |
nice interior mod .. curious how much that cost ..
__________________
Hudson County, New Jersey  
|
|
|
|
|
07-06-2007, 08:02 AM
|
#5 |
|
Lurker supreme!

Drives: old and boosted! Join Date: Nov 2006
Location: Ottawa, ON, Canada
Posts: 792
|
Thanks eijikikimaru... I bought this from MC-BPT 6 months ago, but haven't gotten around to installing it... partially b/c of the *all japanese* instructions. Oh well... it's not that hard, is it? I'll do it this weekend!
__________________
2006 Red Blitzed RS 5-door |
|
|
|
|
07-06-2007, 09:14 AM
|
#6 |
  
Drives: 08 Yaris Liftback S (RIP 07) Join Date: Apr 2007
Location: Fair Lawn, NJ
Posts: 1,378
|
yeah i bought one of these form this gb so this will help me alot... one thing tho where is the fuse circled?
__________________
"It hurts more when its wet" 
|
|
|
|
|
07-06-2007, 10:15 AM
|
#7 |
|
vroom vroom

Drives: lil red 5-door Join Date: Sep 2006
Location: Bangkok, Thailand
Posts: 7,744
  |
sweetness!!! well done, dude!
__________________
The price of freedom of religion, or of speech, or of the press, is that we must put up with a good deal of rubbish. - Robert Jackson  Bye bye 1NZ... |
|
|
|
|
07-06-2007, 10:20 AM
|
#8 | |||
|
Q(','Q)
|
Quote:
Quote:
Quote:
The connector that needs to be pulled is about 3inchs up from the bottom left side of the fuse box. |
|||
|
|
|
|
07-06-2007, 11:43 AM
|
#9 |
|
Drives: 08 Yaris Liftback S (RIP 07) Join Date: Apr 2007
Location: Fair Lawn, NJ
Posts: 1,378
|
ahh the laptop i was on for somereason did not know the circle... now im at home an d i feel like an idiot
__________________
"It hurts more when its wet"
|
|
|
|
|
07-06-2007, 11:49 AM
|
#10 |

|
I wonder if the one sold by Japanparts.com is the same one as from Etimago's GB ?
__________________
|
|
|
|
|
07-06-2007, 11:51 AM
|
#11 |
|
vroom vroom
Drives: lil red 5-door Join Date: Sep 2006
Location: Bangkok, Thailand
Posts: 7,744
|
I'm pretty sure it is the same thing, but like Doc Zaius', with all-japanese instructions. Not that it really matters now with this great writeup
__________________
The price of freedom of religion, or of speech, or of the press, is that we must put up with a good deal of rubbish. - Robert Jackson Bye bye 1NZ... |
|
|
|
|
07-06-2007, 12:03 PM
|
#12 |
|
Shiny Chromey Coolness

Drives: 2007 Toyota Yaris Liftback Join Date: Feb 2007
Location: Orlando, FL
Posts: 982
|
Great DIY! Love the blue color. Nice to know it will go with the blue AC panel LEDs I have. Gotta add this to my list. Please post the link to order the one outside the group buy.
__________________
Bringin the Bling to Yarisworld |
|
|
|
|
07-06-2007, 12:44 PM
|
#13 |
|
Drives: 07' Yaris Liftback - silver Join Date: May 2006
Location: Springfield, Mass
Posts: 475
|
looks nice, but $100 for THAT? mm.. I dont know how they can justify charging that much for some wire, plastic and leds...
|
|
|
|
|
07-06-2007, 01:54 PM
|
#14 |
|
rice rocket

Drives: 05 Echo Join Date: Feb 2007
Location: Toronto
Posts: 163
|
and timing circuit to turn off the light once triggered :)
|
|
|
|
 |
|
|
 Similar Threads
|
||||
| Thread | Thread Starter | Forum | Replies | Last Post |
| Bulb Replacement Guide (led Sizes) | theFEVA | Cosmetic Modifications (Exterior/Interior) | 113 | 02-28-2017 12:02 PM |
| Check engine light flashes during high reving | AlphaFox | DIY / Maintenance / Service | 40 | 08-21-2007 01:43 PM |
| Reverse light vs Rear Fog light | cooldavidko | General Yaris / Vitz Discussion | 3 | 01-03-2007 03:09 AM |
| "Airbag" center console light on 07 Sedan with side airbags | atebit | In Car Entertainment + Electronics (audio / video / alarm) | 5 | 11-10-2006 06:10 PM |
| rear fog light and tuned rear lights | lefti696 | Cosmetic Modifications (Exterior/Interior) | 0 | 11-09-2006 03:06 PM |


 Linear Mode

